11.1 Introduction to Master Pages
Master Pages are used when user needs a consistent look and behavior over all web pages in an application. When a user needs to attach header and footer for all the web pages in an application, the master pages are used. Master pages provide a template for all other pages in an application.
The master pages define placeholders for the content, which are overridden for the content. The result is combination of master and content page. Every master page has one or more content pages in an application.
The advantages of the master page are as mentioned below:
- They provide an object model allowing users to customize the master page from the individual content pages.
- They allows user design the rendering of the controls in the placeholder
- It is centralized with common functionality of all pages to makes updates in one place
- Code can be applied on one set of controls and the results to the set of pages in the application
The @Master directive is defines in the master page. The master page contains one or more <asp:ContentPlaceHolder> for an individual content. The id attribute identifies the placeholder from all present in a web page. The master page has .master extension. The syntax of the master directive is as shown below:
<%@ Master Language=”C#” CodeFile=”MasterPage.master.cs” Inherits=”MasterPage” %
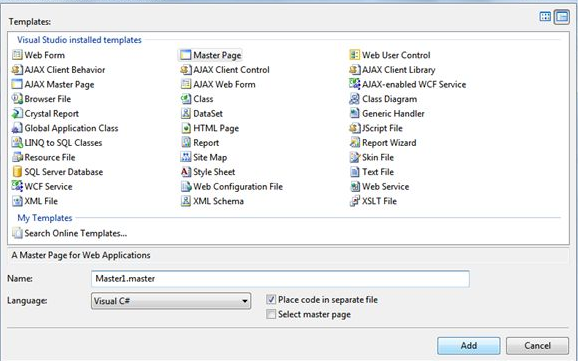
To create a master page, create an ASP.NET website by clicking ‘File’ > ‘New’ > ‘Website’. Right click on the Project in the solution explorer and click ‘Add New Item’. In the dialog box, choose the ‘Master Page’ and click ‘Add’. The ‘MasterPage.master’ appears in the solution explorer.
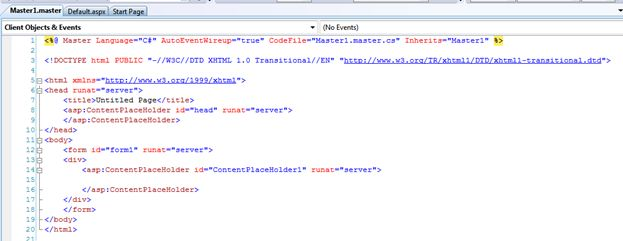
The master page will be displayed as shown below:
11.2 ContentPlaceHolder and content tags
The steps to add a content page to the application is as shown below:
- Select the ‘Add New Item’ from the list.

2) Add the web form page to the application.
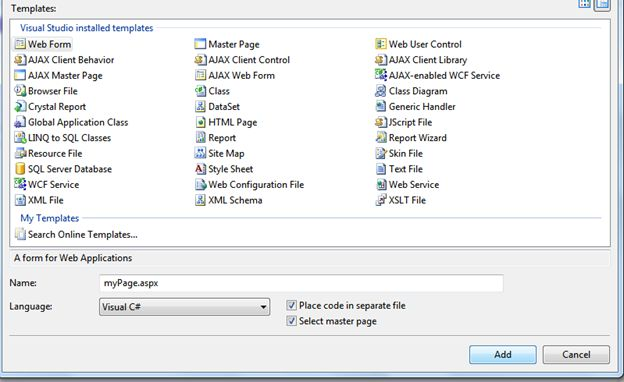
3) Select a master page for the content page from all the available master pages in an application.

4) The content page in an application is as shown below:
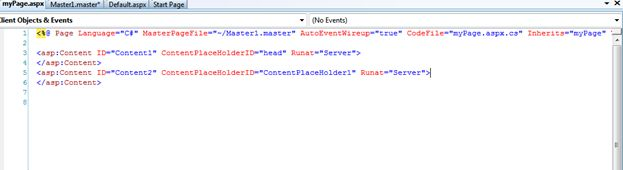
The content are used for holding values of the master page placeholder control. The syntax for the content page is as shown below:
<%Page Language=”C#” MasterPageFile=”~/MasterPages/Master1.master” Title=”Content Page %>
The @Page directive defines as a standard page. The content pages are saved with page1.aspx extension. The MasterPageFile is the master file which is applied to the content page. The content page binds with the respective master page. The content page looks as shown below:
<%Page Language=”C#” MasterPageFile=”~/MasterPages/Master1.master” Title=”Content Page1 %>
<asp:Content ID=”Content1” ContentPlaceHolderID=”Main” runat=”server”>
Main Content
</asp:Content>
The @Page directive page binds the content page to a specific master page. It defines a title for the page to be merged with the master page. User can create content by adding content controls and mapping them to the contentplaceholder controls on the master page.
11.3 Accessing contents of the master page in the content page
User can write code in the content pages referring properties, methods and controls in master pages. This includes public properties and methods. User can add reference when they are declared as public members of the master page. The syntax to add @MasterType directive is as shown below:
<%@ MasterType virtualpath=”~/Masters/Master1.master” %>
Next, user must create a code that uses the master page public member of the Master property. The code mentioned below is used to assign the value of the public property named as Countryname from the master page to a textbox on the content page.
CountryName Text = Master.CountryName;
To reference a control on the master page and accessing it on the content page, FindControl method is used. Consider that the master page has a textbox control in it. The code snippet for accessing the textbox control is shown below:
TextBox txt1 = ( TextBox)Master.FindControl (“masterPageTextBox”);
if(txt1!=null)
{
txt1.Text=”TextBox found in the master page”;
}
Consider another example of a label control. The label control is placed inside the ContentPlaceHolder of the master page. The code to access values of the label control is as shown below:
Label lbl1;
nContentPlaceHolder = (ContentPlaceHolder)Master.FindControl(“ContentPlaceHolder1”);
if( nContentPlaceHolder!=null)
{
  lbl1=(Label)Master.FindControl(“ContentPlaceHolder1”);
  if( lbl1!=null)
  {
    lbl1.Text=”Master page label=”+lbl1.Text;
  }
}
11.4 Example of Master Content Page
A sample code for demonstrating the concept of master content page is:
<html xmlns=”http://www.w3.org/1999/xhtml”>
 <head runat=”server”>
   <title>ASP.NET master page file</title>
   <asp:ContentPlaceHolder id=”head” runat=”server”>
   </asp:ContentPlaceHolder>
 </head>
 <body>
   <form id=”form1” runat=”server”>
     <div>
    <h1 style=”color:Red”>New Site</h1>
    <hr/>
    <table>
      <tr valign=”top”>
      <td>
         <asp:ContentPlaceHolder id=”ContentPlaceHolder1” runat=”server”>
         </asp:ContentPlaceHolder>
      </td>
      </tr>
    </table>
     <hr/>
     <div style=”color:Gray”>Page Footer</div>
     </div>
   </form>
 </body>
</html>
<%@Page Title=”” Language=”C#” MasterPageFile=”~/MasterPage.master” AutoEventWireup=”true” CodeFile=”Default2.aspx.cs” Inherits=”Default2” %>

<asp:Content ID=”Content1” ContentPlaceHolderID=”head” runat=”server”>
</asp:Content>
<asp:Content ID=”Content2” ContentPlaceHolderID=”ContentPlaceHolder1” runat=”server”>
  <asp:Calendar ID=”Calendar1” runat=”server” BackColor=”Aqua” BorderColor=”Blue” >
  </asp:Calendar>
</asp:Content>
<asp:Content ID=”Content3” ContentPlaceHolderID=”ContentPlaceHolder2” runat=”server”>
  <asp:Image ID=”Image1” runat=”server” ImageUrl=”`/Penguins.jpg” Width=”50px” Height=”50px” />
</asp:Content>
Output is:

11.5Nested Master pages with Example
Master pages can be nested with one master page referencing to another as the master of itself. It helps user to create customized master page. All site contents can define their own child master pages and they define the look of the content pages in an application.
The benefits of nested master page are as mentioned below:
- User can add the administration specific information and links to every content page in the ~/Admin folder
- User can update the Site.master master page to include the Administration section for the links used in the application
- Copy the markup from the Site.master, add the Administration section and content pages in the ~/Admin folder
- The nested master page can easily bind to the Site.master and ~/Admin folder
The steps to create the nested master page in an application are as follows:
1) Create a master page in the project by selecting it from the templates.
2) Select Site.master template as the master page for the application
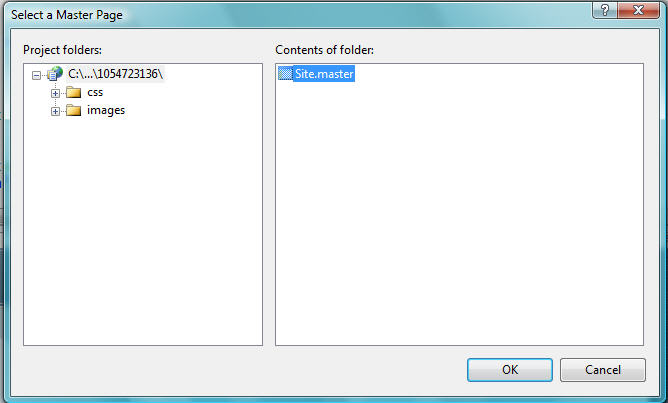
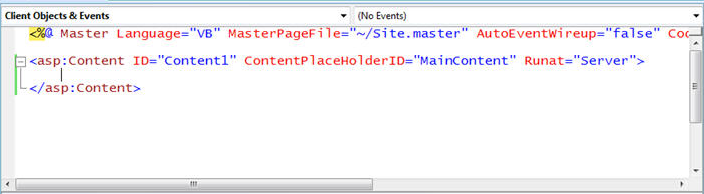
3) The master page source code window will appear as shown below:
4) Create another nested master page by repeating the steps mentioned above.
5) Create the content page by selecting the web form and clicking the ‘select as master page’ option from the list.

6) Select the master page or nested page to be selected as the base for creating the content page. Now user can add the designing values in the content page.
Example for creating nested master page is as shown below:
A sample code for creating nested master page is as shown below:
The code for a first master page in the application is:
<html xmlns=”http://www.w3.org/1999/xhtml”>
 <head runat=”server” >
  <style type=”text/css”>
   body
   {
    Background-color:Aqua;
   }
  </style>
    <title></title>
    <asp:ContentPlaceHolder id=”head” runat=server”>
    </asp:ContentPlaceHolder>
 </head>
 <body>
   <form id=”form1” runat=”server”>
     <div>
       <asp:Label id=”label1” runat=”server” Text=”Name”></asp:Label>
       <asp:TextBox ID=”txt1” runat=”server”></asp:TextBox>
       <br/>
      <asp:Label ID=”Label2” runat=”server” Text=”Gender”></asp:Label>
      <asp:RadioButton ID=”RadioButton1” runat=”server” />Male
      <asp:RadioButtonID=”RadioButton2” runat=”server” />Female
     </div>
   </form>
 </body>
</html>
The code for the second master page is:
<%@ Master Language=”C#” MasterPageFile=”~/MasterPage.master” AutoEventWireup=”true” CodeFile=”MasterPage2.master.cs” Inherits=”MasterPage2” %>
<asp:Content ID=”Content1” ContentPlaceHolderID=”head” runat=”server”>
   <asp:ContentPlaceHolder ID=”ContentPlaceHolder1” runat=”server”>
   </asp:ContentPlaceHolder>
</asp:Content>
The code for content page in the nested master page is:
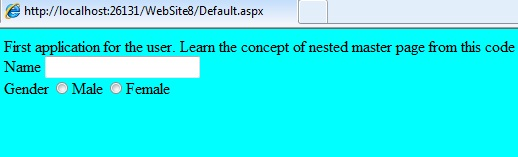
<%@ Page Title=”” Language=”C#” MasterPageFile=”~/MasterPage.master” AutoEventWireup=”true” CodeFile=”Default.aspx.cs” Inherits=”_Default” %>
<asp:Content ID=”Content1” ContentPlaceHolderID=”head” runat=”server”>
  Firsr application for the user. Learn the concept of nested master page from this code
</asp:Content>
The output for the nested master page is as shown below: