4.1 ASP.NET Introduction
ASP.NET is a technology used for creating Web applications and Web services that are executed in the IIS server. The ASP.NET pages are compiled making the application faster that classic ASP. It provides good level of consistency over the web applications. It has a large set of user controls, XML based components and user authentication.
Framework of ASP.NET

Fig (a)
The ASP.NET framework is as shown in Fig (a). There various components of the ASP .NET framework and their features are mentioned below:
1. Common Language Runtime:
The Common Language Runtime (CLR) is used as execution engine for .NET framework. All the ASP.NET code is executed in the CLR. It performs functions like security, memory management, exception handling, thread execution, code verification, code security. The Just In time compiler is used for compilation of the ASP.NET code.
The source is compiled into the intermediate language code. The JIT compiler coverts the IL code into native code that is specific to the system.
2. Base Class Library:
The Base Class Library is the functionality available to all the .NET framework languages. It provides various features like database connectivity, XML document manipulation, classes and interfaces that are reusable with the CLR.
3. ADO.NET and XML:
ADO.NET is used for the database operations in .NET. It works efficiently with SQL Server, OLEDB, XML. The operations like accessing data from the data source, updating and manipulating data are performed through ADO.NET. Extensible Markup Language (XML) is useful for designing the web pages in .NET
4. Windows Forms:
The windows Forms application is used for creating window application in .NET. There are wide controls and designing features available for Windows Forms.
5. ASP.NET Web Forms and Services:
The Web Forms user to create Web based applications. They include web pages and several GUI components for designing. It helps simultaneous addition of controls at runtime and design time.
Web Services are used when the user needs specific task to be executed. They are used for creating single application or distributed on the web.
6. Common Language Specification:
The Common Language Specification (CLS) is a set of language features used for developing web application and web services. It ensures interoperability among applications without the language dependency. It defines a subset of Common Type System (CTS) providing objects of different languages to interact with each other.
7. Visual Studio .NET:
The Visual Studio .NET is used for developing all the web and windows applications. The GUI interface and extensive built in class libraries are provided in the component. Web Services can be developed and deployed using Visual Studio.
Advantages of ASP.NET
- The code is reduced for building application through ASP.NET
- It is server side technology, the code is executed at the server before sending it to the browser.
- It is easy to deploy applications as the components are not registered in the system
- The applications developed are safe and secure due to Windows authentication
- The performance is better due to early binding, just in time compilation, and code optimization
- It is language independent providing user the flexibility to develop the application
- The ADO.NET used for data binding makes the application run faster with large volume of data
4.2 First ASP.NET Application
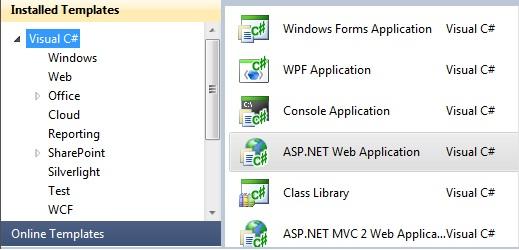
To create an application in Visual Studio, open the Visual Studio application installed in the system. In the application, click ‘File’, select ‘New Project’ from the option list. The new project dialog box will open. Click on the ‘Visual C#’ icon on the left pane of the window. Select the ASP.NET web application option from the option list in the right pane of visual studio.
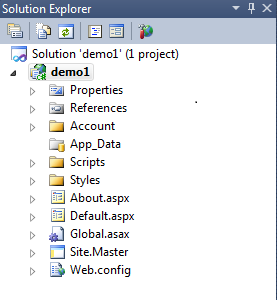
Select the path where the application needs to be saved and click ‘ok’. Visual Studio will create a new web project in the solution in the Solution Explorer window of the application. By default, .aspx page is created in the solution explorer window.
The code behind page with ‘.cs’ extension will also be created in the application. The Web. Config file contains all the information about the configuration of the files in the application.
The design window of the ASP.NET application is where the controls are added in the web page. Various styles can be applied to the added controls through the properties of the controls.
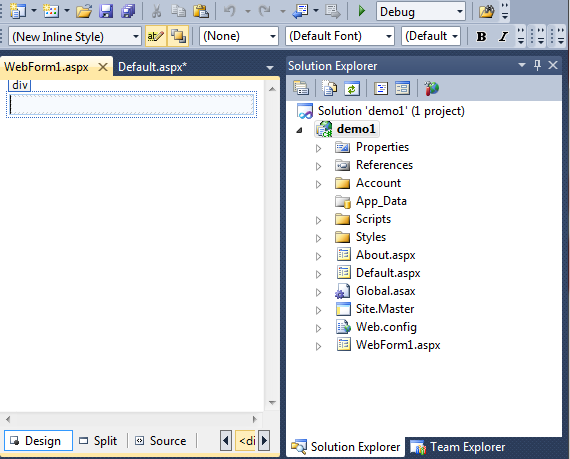
The Source window contains the code of the controls added in the design window of the application. The code can be changed by adding the appropriate to the controls. The source window for ASP.NET application is shown below:
<%@ Page Title=”Home Page” Language=”C#” MasterPageFile=”~/Site.master” AutoEventWireup=”true” CodeBehind=”Default.aspx.cs” Inherits=”demo1._Default” %> <asp:Content ID=”HeaderContent” runat=”server” ContentPlaceHolderID=”HeadContent” > <asp:Content> <asp:Content ID=”BodyContent” runat=”server” ContentPlaceHolderID=”MainContent” > <h2> Welcome to ASP.NET ! </h2> <p> You can also find <a href=”http://go.micorosoft.com/fwlink/?LinkID=153268&clcid=0x409” title=”MSDN ASP.NET Docs” >documentation on ASP.NET at MSDN</a> </p> </asp:Content>
The code behind file of the web page is has extension as ‘.cs’ or ‘.vb’ depending on the programming language selected by the user. The execution of the controls is handled through the code behind file. The events execution is coded in the code behind file. The code behind window of ASP.NET application is as shown below:
using System;
using System.Data;
using System.Configuration;
using System.Web;
using System.Web.Security;
using System.Web.UI;
using System.Web.UI.WebControls;
using System.Web.UI.WebControls.WebParts;
using System.Web.UO.HtmlControls;

namespace MyWebProject
{
   public partial class_Default : System.Web.UI.Page
   {
    protected void Page_Load( object sender, EventArgs e)
     {
     }
   }
}
The properties window is used for adding events and properties to the web application. The WYSIWYG designer allows user to add the functionality through properties window. To add an event for the control, click on the ‘events’ tab of the properties window of the application. There are event handlers for every control in ASP.NET. Select the appropriate event handler from the list.
The properties window for the application is as shown below:
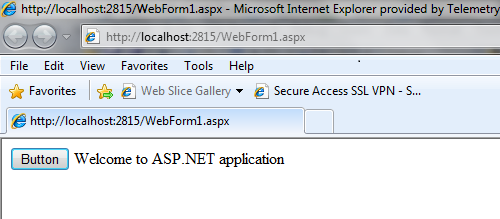
To execute the application, user can hit the ‘F5’ key, the control will be deployed on the web page. The code executed on the server will be shown as below:
4.3 AutoPostBack Property
The AutoPostBack Property is used for sending the value through automatic post back by pressing the enter tab. Every ASP.NET control has the AutoPostBack property. By default, the property is set to False. To set the property for the specific control, add the AutoPostBack value as ‘True’.
The example of AutoPostBack property is mentioned below:
Consider a Drop down list control. Add the AutoPostBack property in the control tag. Set the AutoPostBack property to True. The code snippet for this property is as mentioned below:
<body>
   <form id=”form1” runat=”server” >
     <div>
    Course<asp:DropDownList ID=”DropDownList1” runat=”server” AutoPostBack=”True” onselectedindexchanged=”DropDownList1_SelectedIndexChanged” >
    <asp:ListItem>MBA</asp:ListItem>
    <asp:ListItem>MCA</asp:ListItem>
    <asp:ListItem>BBA</asp:ListItem>
    <asp:ListItem>BCA</asp:ListItem>
    <br/>
    <asp:Label ID=”lbl1” runat=”server” ></asp:Label><br/>
     </div>
   </form>
</body>
In the code behind page, add the code for the event handler of the drop down list.
protected void drop1_SelectedIndexChanged( object sender, EventArgs e)
{
  lbl1.Text = drop1.SelectedItem.Text;
}
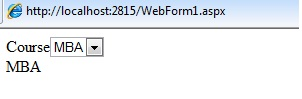
The output of the AutoPostBack property for Drop down list is shown below:
4.4 Event Handler Properties
The Event Handler are used for handling the action performed by the control in the application. Every control is associated with an event. The functionality to be performed is added in the event handler in the code behind file.
User can create event handler through Properties window and code editor of the ASP.NET application.
1) Create an event handler through the Properties window.
Navigate to the design view of the application. Select the control for which you want to create an event handler. In the ‘Properties’ window, select the events symbol which is visible as shown.

Navigate to the event name property of the respective control. The control will be named as controlID_event. Insert the name of the handler for the control. In the drop down list, select the name of the event handler, the list of methods with their signature for the event will be displayed. When the process is completed, user can switch to the editor and insert code in the event handler.
2) Create an event handler through code editor.
If the code editor is a single file web page, user can switch to the Source View to add the event handler.
If there is a code behind page, navigate to the Solution Explorer. Right click for the specific page and click ‘View Code’. Select the control from the drop down list and click on the event associated with the control. The event handler will be added for the control.
Consider an example to create a handler for page events. In the code editor create Page_event method. The page will automatically bind page events to the methods present in the code. The AutoEventWireup attribute in the @Page directive is set to true. As a result the page binding is automatic. The example of the page_event handler is shown below:
<%@ Page Language=”C#” AutoEventWireup=”true” CodeBehind=”WebForm1.aspx.cs:”Inherits=”demo1.WebForm1” %>
<!DOCTYPE html PUBLIC =”-//W3C//DTD XHTML 1.0 Transitional//EN” “http://www.w3.org/TR/xhtml1/DTD/xhtml1-transitional.dtd” >
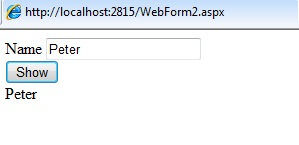
Consider an example for adding the handler to the control. The method name can be selected by the user. In the markup of the control, the event handler name is written as On<event name>. Consider a Button Control which has OnClick event bounded for it.
The source code of the Button Control is shown below:
<html xmlns=”http://www.w3.org/1999/xhtml”>
 <head runat=”server” >
    <title></title>
 </head>
 <body>
    <form id=”form1” runat=”server” >
      <div>
    <asp:Label ID=”lblname” runat=”server” > Name</asp:Label>
    <asp:TextBox ID=”TextBox1” runat=”server”></asp:TextBox><br/>
    <asp:Label ID=”lbloutput” runat=”server”></asp:Label>
      </div>
    </form>
 </body>
</html>
The code behind file containing the event handler is shown as follows:
protected void btn1_Click1( object sender, EventArgs e)
{
    lbloutput.Text = TextBox1.Text;
}
The output when the code is executed on the server will display the text present in the Textbox.