
22.1 Definition of Globalization and Localization
Globalization is the process of designing and developing web applications that are culture neutral and language neutral. The executable code is separate from the data specific to the locale. The global resource can be used with any page in an application.
Localization is the process of customizing the globalized web application to a specific locale and culture. Various resources such as images and text for the specific locale are created. The resource file in localization is scoped to a particular page in an application.
The steps to create the Global resource file in an ASP.NET web application are as follows:
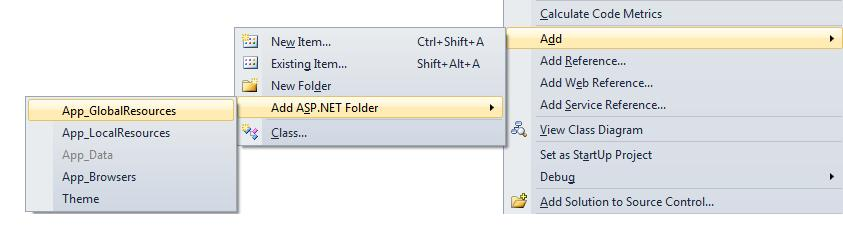
1) To create a resource file that can be used across the entire application. Right click on the solution explorer of Visual Studio, click on the ‘Add ASP.NET folder’ option. Select ‘App_Global Resources’ option from the list.
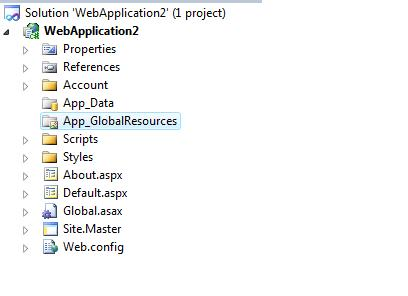
2) A new ‘App_GlobalResources’ folder is created in the project is as shown below.
3) User can create global resource files by adding a special folder as App_GlobalResources. Click on the ‘Add New Item’ from the list of options.
4) Visual Studio application provides a new file as ‘MyResource.resx’ in the application.
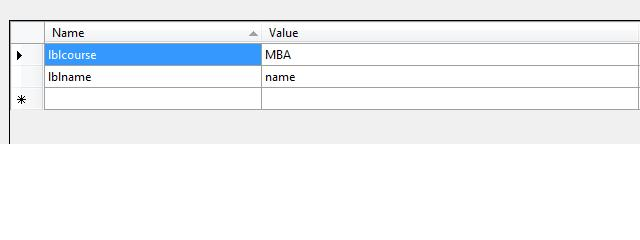
5) Add the name and values for each resource that are needed in an application and save it.
The steps for creating a local resource file in an ASP.NET application are as shown below:
1) To create a resource file, Open the page for which the resource file is to be created.
2) Add a drop down list control and switch to the design view of the web page
3) At the top of the ASP.NET web application in the Tools menu, click ‘Generate Local Resources’ option.
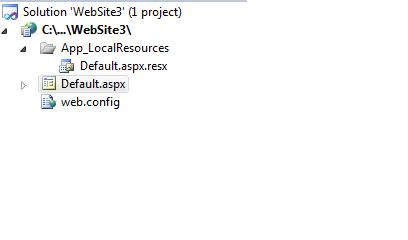
4) Visual Studio will automatically create the App_LocalResources folder in the root folder of the application
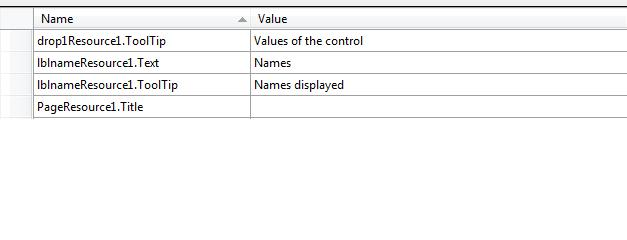
5) A neutral base resource file is created for the current page in the application. It contains a key/value pair for each control property or page property that requires localization.
6) In the Visual Studio web page, a meta attribute is added for the web server control for controlling the implicit localization. The UICulture and Culture properties are added to the <%@Page %> directive.
<%@ Page Language=”C#” AutoEventWireup=”true” CodeFile=”Default.aspx.cs” Inherits=”_Defualt” culture=”auto” %>
<html xmlns=”http://www.w3.org/1999/xhtml”>
<head runat=”server”>
    <title></title>
</head>
<body>
  <form is=”form1” runat=”server”>
    <div>
     <asp:Label ID=”lblname” runat=”server” meta:resourcekey=”lblnameResource1”>Names</asp:Label>
     <asp:DropDownList ID=”drop1” runat=”server” meta:resourcekey=”drop1Resource1”>
     </asp:DropDownList>
    </div>
  </form>
</body>
</html>
7) Add the values for each resource that is added in the application and save the resource file.
22.2 Creating resource file for different cultures
The .Net Framework represents different cultures across the world by using the culture code. The culture code consists of two parts, a two letter language code and an optional two letter country/region code.
The general code format of the culture code is as shown below:
<Language code>-<Country/Region code>
The table lists some cultures codes and their description as mentioned.
Culture Code | Description |
En | It specifies English language, no region |
en-CA | It specifies English language, Canada region |
fr-FR | It specifies French language, France region |
De | It specifies German language, no region |
Zh-CN | It specifies Chinese region, China region |
de-DE | It specifies German language, Germany region |
To implement globalization in an application, include System.Globalization namespace in the application. The namespace provides classes that define culture related information such as language, country, calendars and formats.
CutureInfo Class: The class provides information about a specific culture. It includes details as name of the culture, the formatting styles and calendar used.
The list of properties of CultureInfo class are as mentioned below:
Property | Description |
CurrentCulture | It returns the instance of the CultureInfo class representing the culture of the current thread |
CurrentUICulture | It returns the instance of the CultureInfo class representing the culture used by the resource manager for the culture specific resource at runtime |
Name | It returns the name of the culture in <Language code>-<Country/Region code> format |
IsNeutralCulture | It returns a Boolean value indicating the culture represented by the CultureInfo object is a neutral culture |
NumberFormat | It gets or sets the NumberFormatInfo object that defines the correct format for displaying numbers, currency, and percentage |
The list of methods of CultureInfo class are as mentioned below:
Methods | Description |
CreateSpecificCulture | It creates a CultureInfo object that represents the specific culture associated with the specific name |
GetCultureInfo | It returns the read-only instance of the culture |
GetCultures | It gets a list of the supported cultures filtered by the specified type |
GetFormat | It returns the object that represents the format of the specified type |
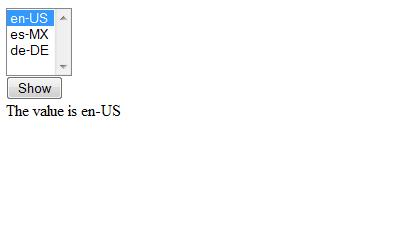
The sample code to demonstrate different cultures using the listbox control is as shown below:
<html xmlns=”http://www.w3.org/1999/xhtml”>
<head runat=”server”>
    <title></title>
</head>
<body>
  <form is=”form1” runat=”server”>
    <div>
      <asp:ListBox ID=”ListBox1” runat=”server”>
        <asp:ListItem Value=”en-US” Selected=”True” >
      </asp:ListItem>
      <asp:ListItem Value=”es-MX” Selected=”True” >
      </asp:ListItem>
      <asp:ListItem Value=”de-DE” Selected=”True” >
      </asp:ListItem>
      <br/>
      <asp:Button ID=”btn1” runat=”server” Text=”Show” /><br/>
      <asp:Label ID=”lbl1” runat=”server”></asp:Label>
    </div>
  </form>
</body>
</html>
The code behind file is as shown below:
public partial class _Default:System.Web.UI.Page
{
   protected void Page_Load(object sender, EventArgs e)
   {
    CultureInfo USCulture = new CultureInfo(“en-US”);
    CultureInfo FrenchCulture = new FRenchCulture(“fr-FR”);
    if ( CultureInfo.CurrentCulture.Equals(FrenchCulture))
           lbl1.Text = “The value is \t”+FrenchCulture;
    else
       lbl1.Text=”The value is \t”+UsCulture;
    }
    protected override void InitializeCulture()
    {
    if (Request.Form[“ListBox1”]!=null )
    {
       string selectedLanguage=”Request.Form[“ListBox1”];
       UICulture = selectedLanguage;
       Culture=selectedLanguage;
       Thread.CurrentThread.CurrentCulture = CultureInfo.CreateSpecificCulture(selectedLanguage);
       Thread.CurrentThread.CurrentUICulture = new CultureInfo(selectedLanguage);
    }
    }
   base.InitializeCulture();
   }
}
The output is as shown below:
22.3 Designing the web form and linking the controls to keys in the resource files
In ASP.NET application, user must create the resource file based on the steps mentioned above. Use the Resources to set the property values in the web server control. The steps to perform the functionality are as mentioned below:
1) In the Design view, select the control for which user needs to add the resource expressions
2) In the Data category of the Properties window, click expressions and click on the ellipse button
3) In the Expressions dialog box, navigate to Bindable properties and select the properties to be set using the resource
4) In the Expressions type list, click Resources
5) In the Resource key box, type the name of the resources that user wants to use
6) Repeat the steps 3 to 5 for all the controls and click ok
The code sample for linking the controls to the key in the resource files is mentioned below:
<body>
 <form id=”form1” runat=”server”>
   <div>
     <asp:Button ID=”btn1” runat=”server” OnClick=”btn1_Click” Text=”GetResources” />
     <asp:Image ID=”Image1” runat=”server” Visible=”false” />
   </div>
 </form>
</body>
The code behind file is as shown below:
protected void btn1_Click( object sender, EventArgs e)
{
  btn1.Text=GetLocalResourceObject(“btn1.Text”).ToString();
  Image.ImageUrl = ( String)GetGlobalResourceObject(“WebResourceGlobal”,”LogUrl”);
  Image1.Visible=true;
}
In the above code, the GetLocalResourceObject method is used to read specific resources from the global or local resource files. The GetGlobalResourceObject takes the name of the resource class and the resourceID. The class name is based on the .resx file name.