
3.10.6 Android Broadcast Example
For better understanding let us create a broadcast receiver and check the things practically. Open your eclipse and create a new project. I am naming it as BroadcastReceiverEx. This application will demonstrate the broadcast receiver’s functioning in coolest way. Now open your activity_main.xml file and type the code as shown below:
<RelativeLayout xmlns:android="http://schemas.android.com/apk/res/android"
     xmlns:tools="http://schemas.android.com/tools"
     android:layout_width="match_parent"
     android:layout_height="match_parent"
     android:paddingBottom="@dimen/activity_vertical_margin"
     android:paddingLeft="@dimen/activity_horizontal_margin"
     android:paddingRight="@dimen/activity_horizontal_margin"
     android:paddingTop="@dimen/activity_vertical_margin"
     tools:context=".MainActivity" >
     <EditText
        android:id="@+id/broadcastedit"
        android:layout_width="wrap_content"
        android:layout_height="wrap_content"
        android:layout_alignParentTop="true"
        android:layout_marginTop="81dp"
        android:ems="10"
        android:text="Broadcast message" >

         <requestFocus />
     </EditText>
     <Button
        android:id="@+id/sendBroad"
        android:layout_width="wrap_content"
        android:layout_height="wrap_content"
        android:layout_alignLeft="@+id/broadcastedit"
        android:layout_below="@+id/broadcastedit"
        android:layout_marginTop="16dp"
        android:onClick="broadcastCustomIntent"
        android:text="Broadcast" />
</RelativeLayout>
activity_main.xml file
Now the corresponding graphical layout should be similar to the following snapshot:
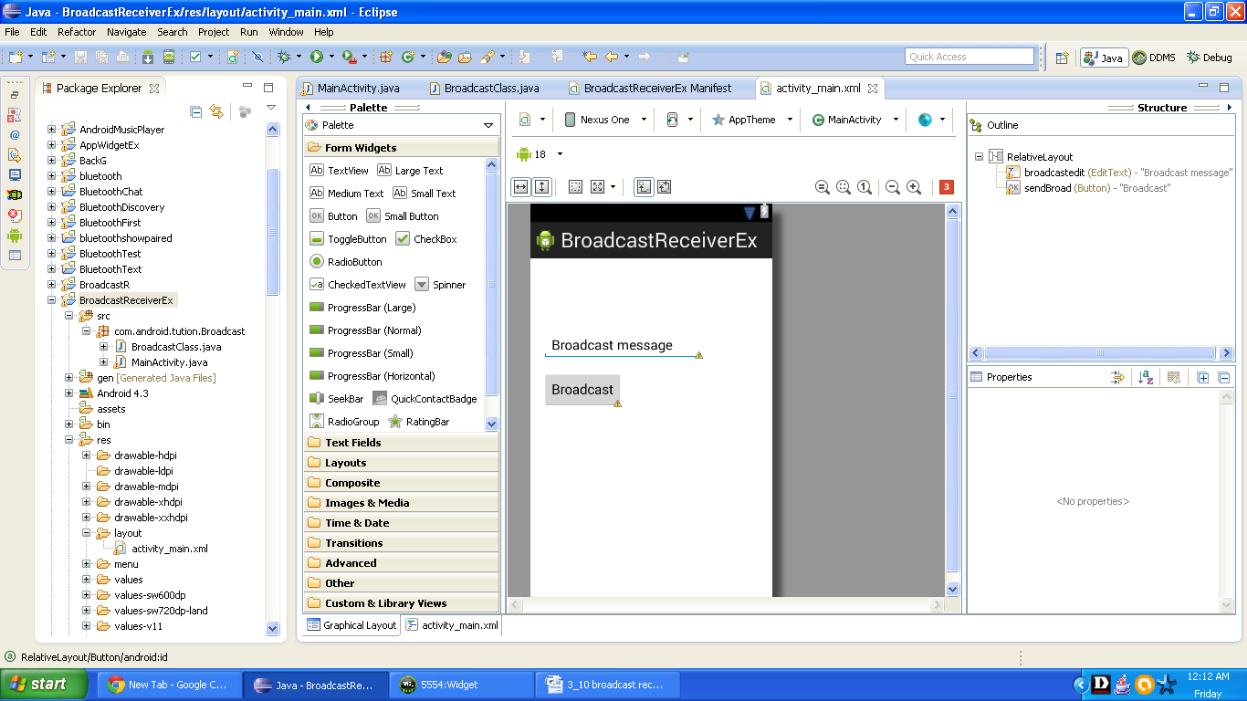
Figure - Graphical layout of BroadcastReceiverEx App
It’s the time for our MainActivity.java file. Open it and type the code as shown below:
package com.android.tution.Broadcast;
import android.app.Activity;
import android.content.Intent;
import android.os.Bundle;
import android.view.View;
import android.view.View.OnClickListener;
import android.widget.Button;
import android.widget.EditText;

public class MainActivity extends Activity {

       @Override
       protected void onCreate(Bundle savedInstanceState) {
             super.onCreate(savedInstanceState);
             setContentView(R.layout.activity_main);
             // Button broadcast = (Button) findViewById(R.id.sendBroad);
       }

       public void broadcastCustomIntent(View v) {
             Intent intent = new Intent("MyCustomIntent");
             EditText edit = (EditText) findViewById(R.id.broadcastedit);
             intent.putExtra("broadcast", (CharSequence) edit.getText().toString());
             intent.setAction("com.android.tution.Broadcast.CUSTOM_INTENT");
             sendBroadcast(intent);
       }
}
MainActivity.java file
For a broadcast receiver there has to be a receiver to receive the broadcast. In this case, we have to create a new class. Create a new class by right clicking over the package name and add a class. Name it as you like. I am naming it BroadcastClass. As soon as eclipse creates this for you, open the class and type the code as shown below:
package com.android.tution.Broadcast;

import android.content.BroadcastReceiver;
import android.content.Context;
import android.content.Intent;
import android.widget.Toast;
public class BroadcastClass extends BroadcastReceiver {

       @Override
       public void onReceive(Context arg0, Intent arg1) {
            // TODO Auto-generated method stub
            CharSequence inData = arg1.getCharSequenceExtra("broadcast");
               Toast.makeText(arg0, "Hello Readers!! Enjoying broadcasts :)" + inData,
                Toast.LENGTH_SHORT).show();
       }

}
Code for Android Receiver
The last work you have to do is open your manifest file and add the code as shown below:
<?xml version="1.0" encoding="utf-8"?>
<manifest xmlns:android="http://schemas.android.com/apk/res/android"
      package="com.android.tution.Broadcast"
      android:versionCode="1"
      android:versionName="1.0" >

      <uses-sdk
        android:minSdkVersion="8"
        android:targetSdkVersion="18" />

      <uses-permission android:name="android.permission.READ_PHONE_STATE" />

      <application
          android:allowBackup="true"
          android:icon="@drawable/ic_launcher"
          android:label="@string/app_name"
          android:theme="@style/AppTheme" >
          <activity
              android:name="com.android.tution.Broadcast.MainActivity"
              android:label="@string/app_name" >
              <intent-filter>
                 <action android:name="android.intent.action.MAIN" />

                  <category android:name="android.intent.category.LAUNCHER" />
             </intent-filter>
          </activity>

          <receiver android:name="BroadcastClass" >
            <intent-filter>
                <action android:name="com.android.tution.Broadcast.CUSTOM_INTENT" />
            </intent-filter>
        </receiver>
     </application>
Figure manifest file of BroadcastReceiverEx app
Save everything and run your emulator. Now run your application. The output should be similar to the snapshot listed below:
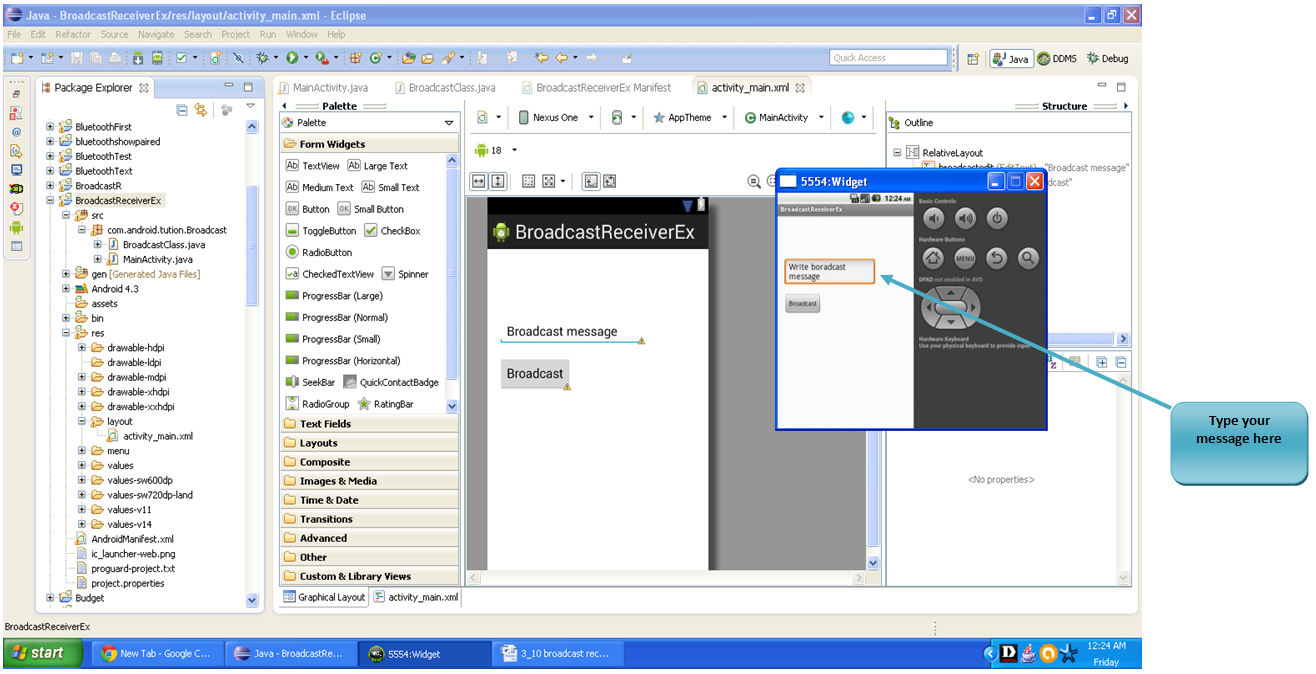
Figure - Initial Output of Android App on Emulator
Now enter the message you want to broadcast and press the button and see the magic what you wanted to broadcast is actually broadcasted.
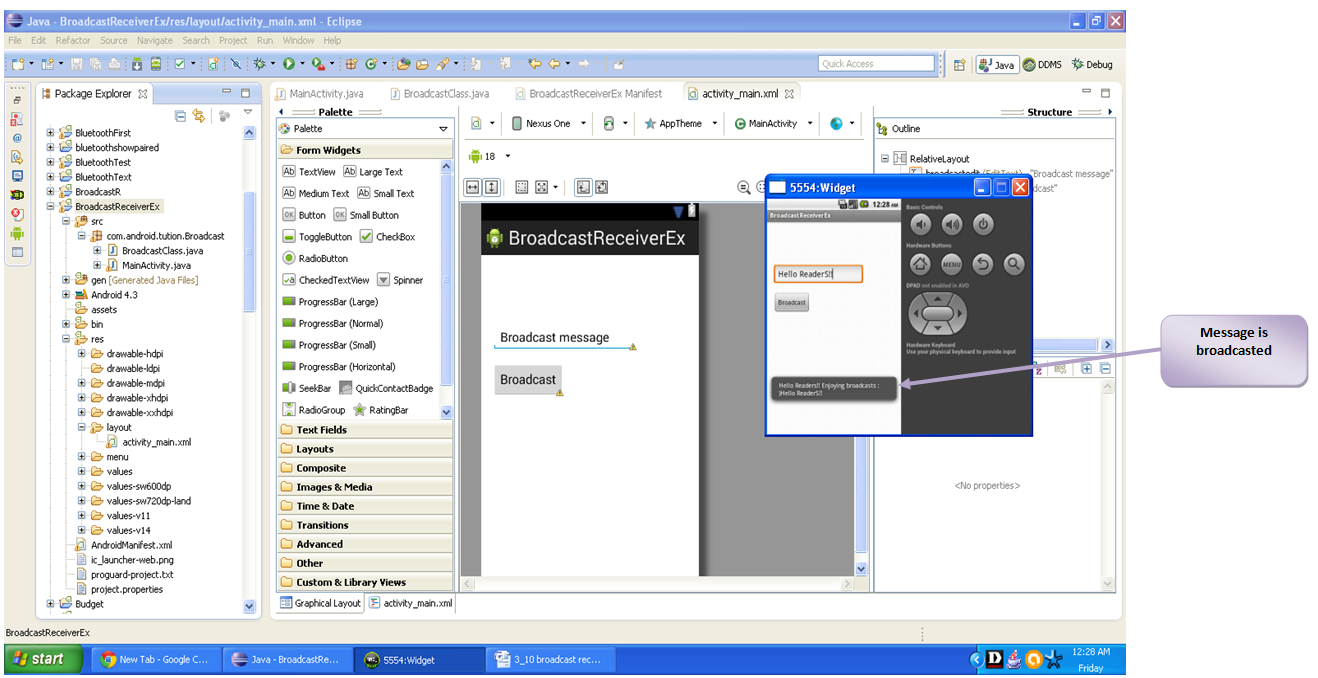
Figure - Message is broadcasted
So that’s it, we are done with broadcast receivers. Congratulations!! You have created your own broadcast receiver and received a dynamic broadcast by yourself. Hope you enjoyed this tutorial. See you in the next section. Till then keep practicing and Happy App Developing!!!