We have everything we want for setting up the Android execution environment. So let’s start developing our first application. I shall recommend you to create a shortcut of eclipse on your desktop so that you can avoid the mess with files and folders to find out the eclipse folder then launch eclipse. Now launch eclipse by clicking its launcher icon. Follow these simple steps to create your own android application. Don’t worry if you don’t have a android device. All applications or apps shall be tested on emulator. Everybody can afford learning android. So cheer up and gear up. Let’s start doing things.
2.2.1 Create a New Android Project
Follow the steps and create your own first android application project.
Open in sequence File->New -> Project

Figure Opening the Project Wizard
Now select the Android Application Project from New Project wizard.

Figure Selecting Android Application Wizard
Now fill in the details of your project and go on clicking Nexr.

Now finally you will come to a page saying Finish. Hit that and you are done.
Your new application is created for you. A page like the one shown below will be prompted to you. It will have two files saying MainActivity.java and activity_main.xml.

Figure New Android Application Wizard.
HelloWorld application is created for you. You might be thinking that we have filled the form for one app then why android is giving me offer of one plus one free file. Well it is not an offer. Both of them are related to each other. Activity_main.xml is the layout file i.e., here you will design your application’s look. Graphical layout of application is set here. We will have another xml file which you will find in all the applications. It is called manifest.xml. As the name indicates it is the manifestation of your application. It acts like a directory. All your activities will be glued together n the manifest file. It will keep information about all the permissions of your app.
The xml file for designing has two parts, first part is drag and drop or graphical layout and another is for hard coding the design elements like button’s size, it’s id everything are to be coded here.

Figure Graphical layout of HelloWorld App
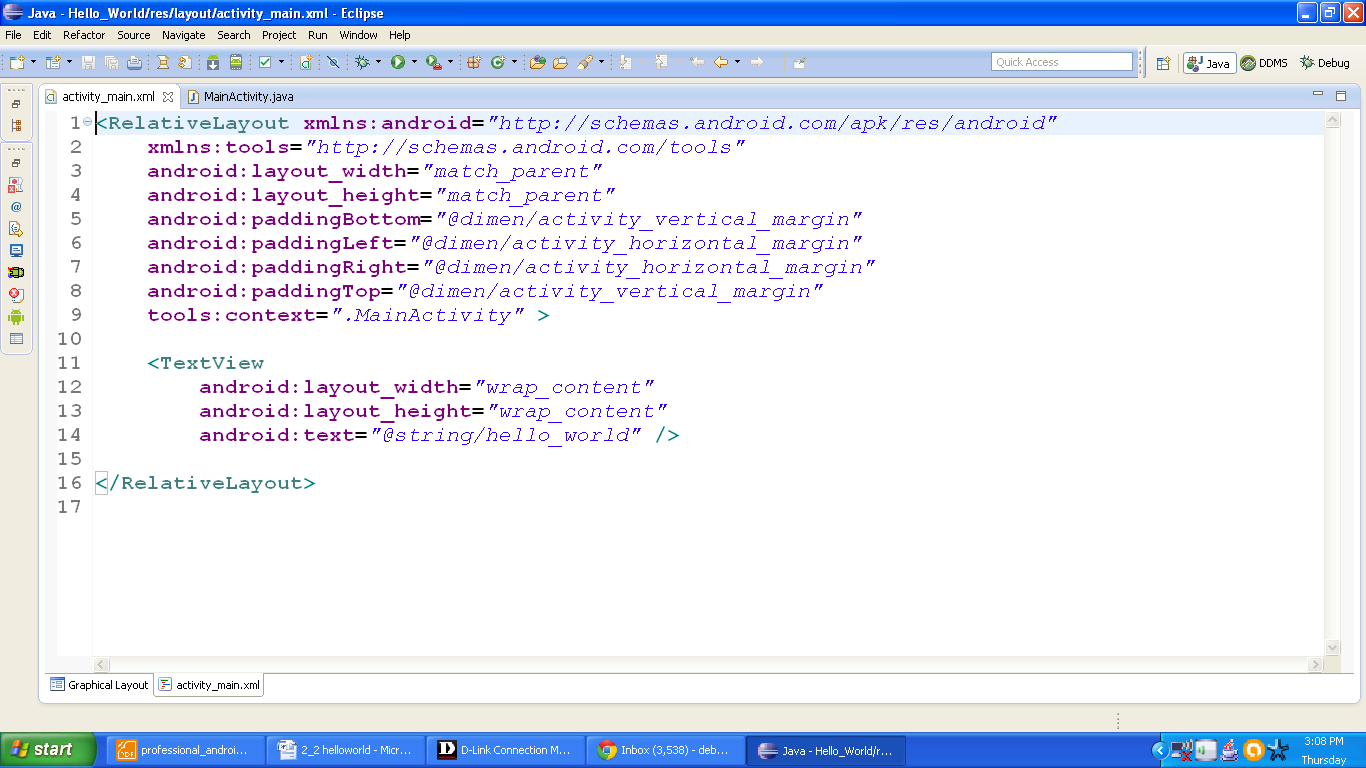
Figure xml file of HelloWorld app
Your application is now ready to be deployed. Find the procedure in next section.
2.2.2 Running Android HelloWorld Application
For running an Android app we need to have an AVD (Android Virtual Device.). AVD simulates the hardware and software configurations of a device. Every app is tested on AVD before testing on a real device. You have to create an AVD as android is not shipped with one already available. Let us create our AVD.
- Double click the AVD Manager icon and select New button
- Create new AVD dialog will allow to fill in details o your AVD.
- Create a new AVD called “First_AVD” that targets Android 4.0.3, include a 16MB SD Card.
- Select Create AVD and it will be created for you.
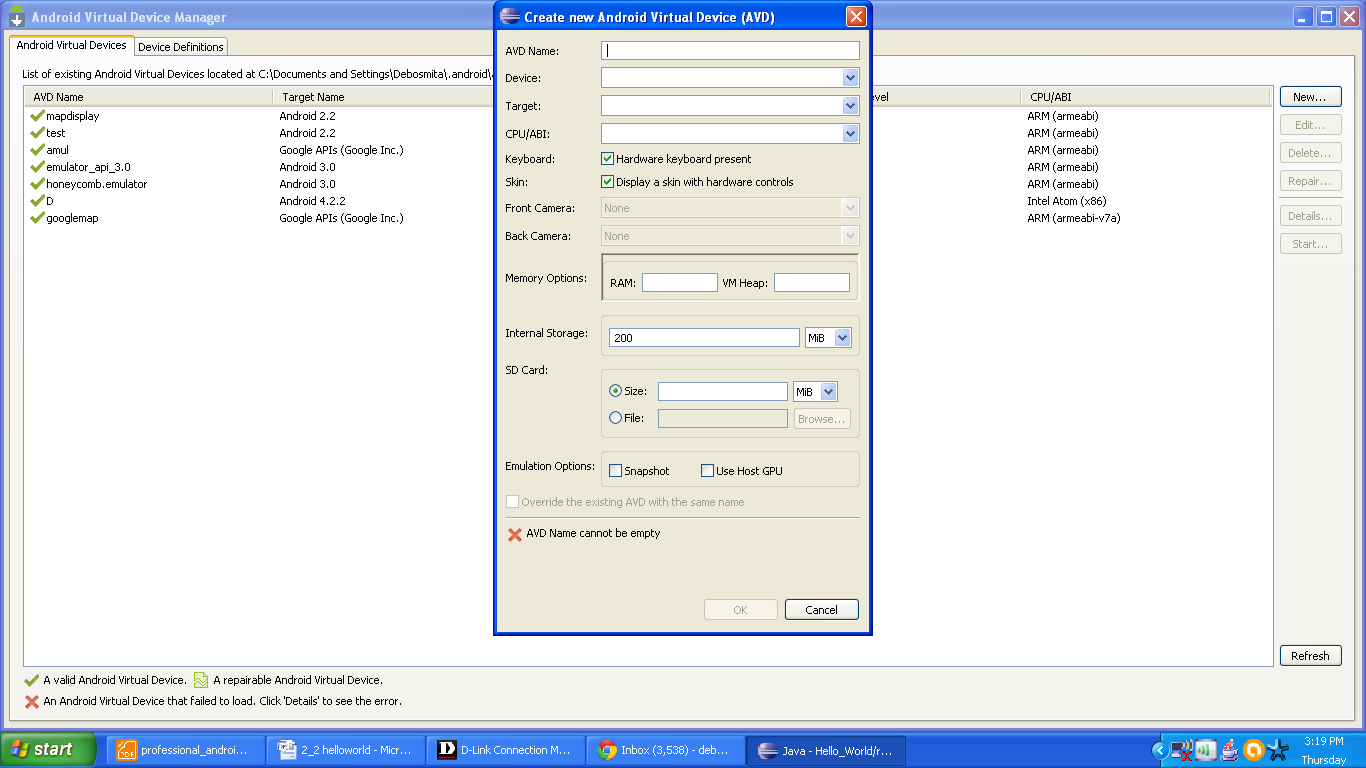
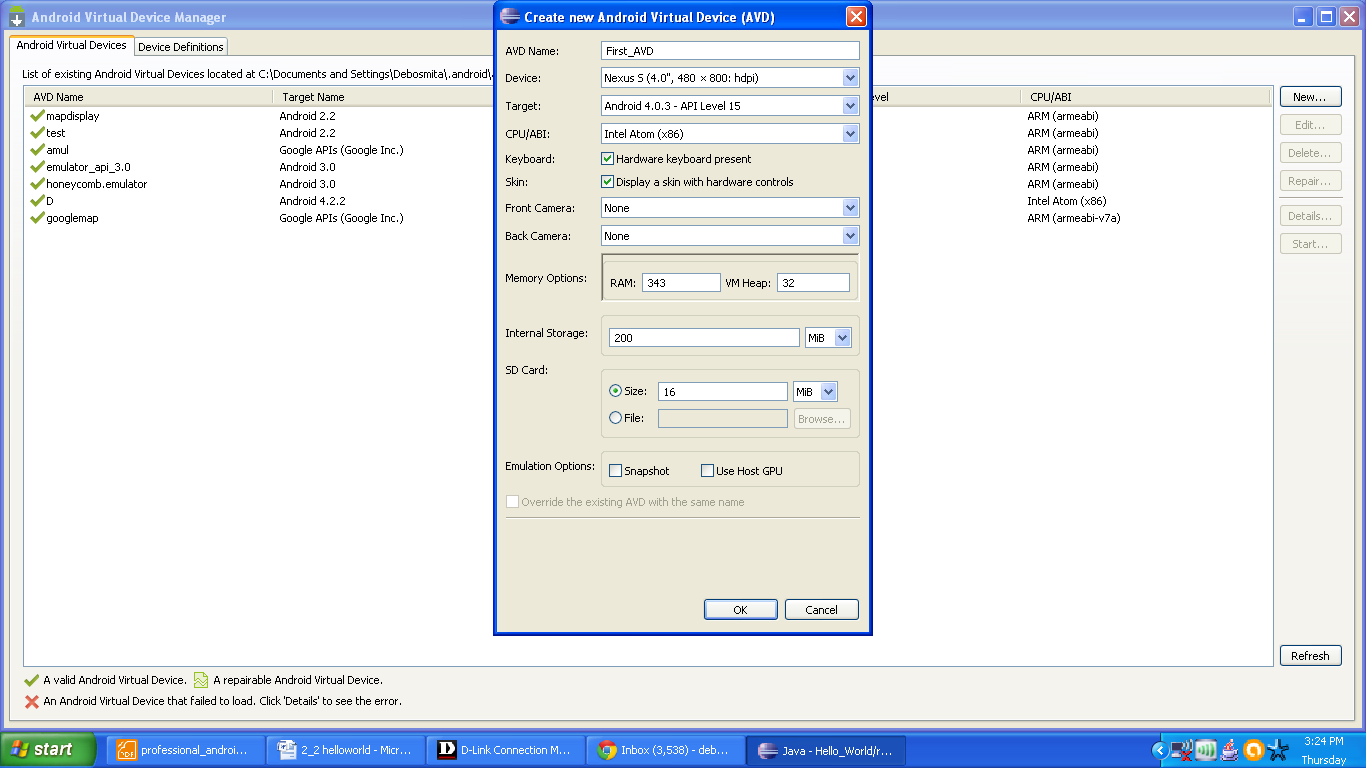
Figure creating new AVD
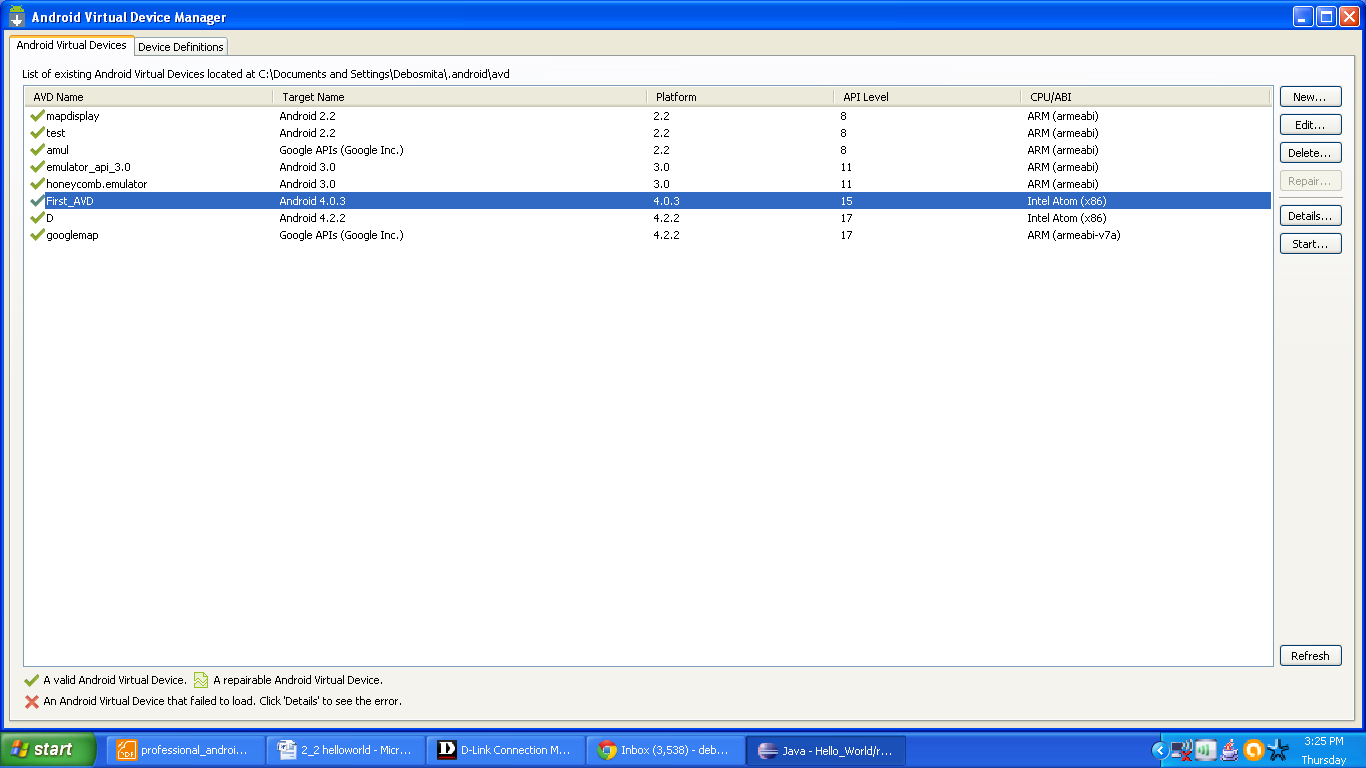
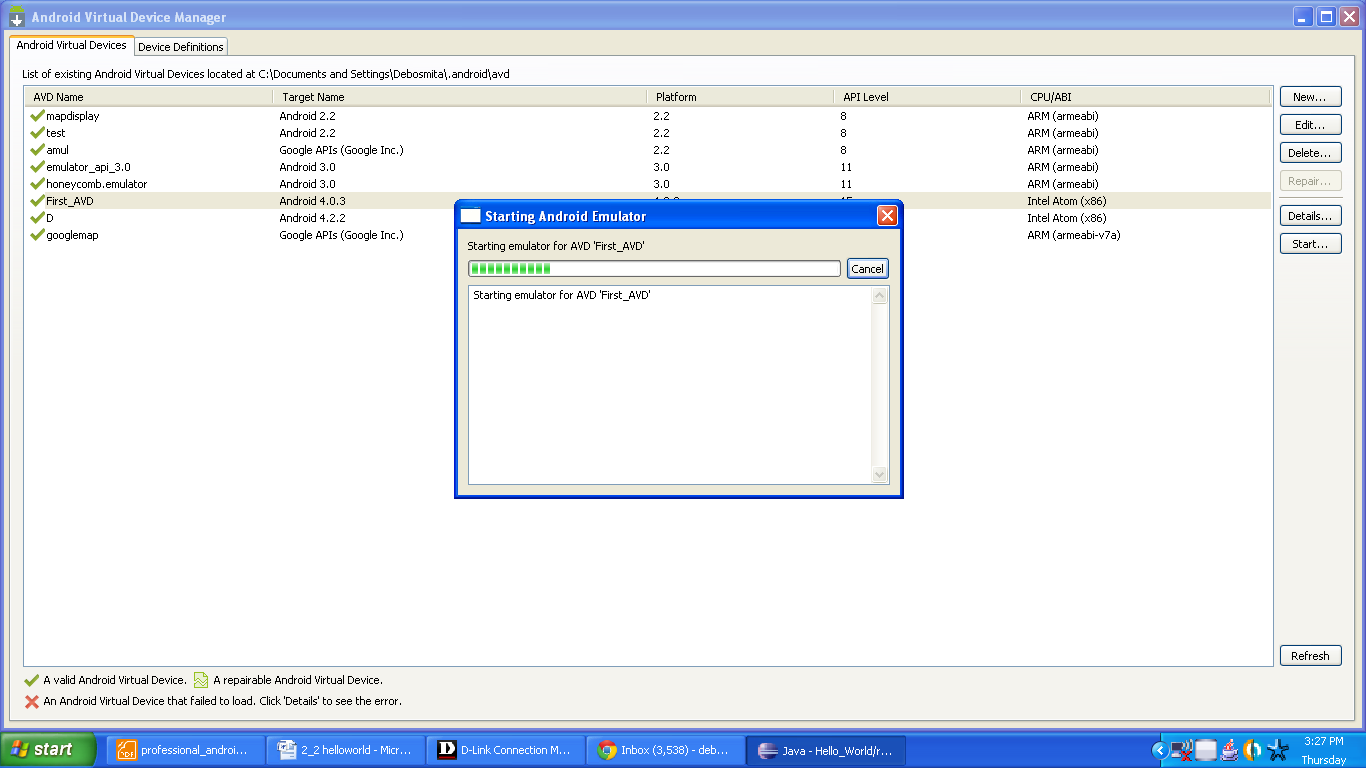
Figure launching new emulator

Now let us run our application and see how it looks like. For that do the following steps:
- Go to package explorer and find your project named HelloWorld.
- Select it and right click on the project.
- Select Run As -> Android Application.
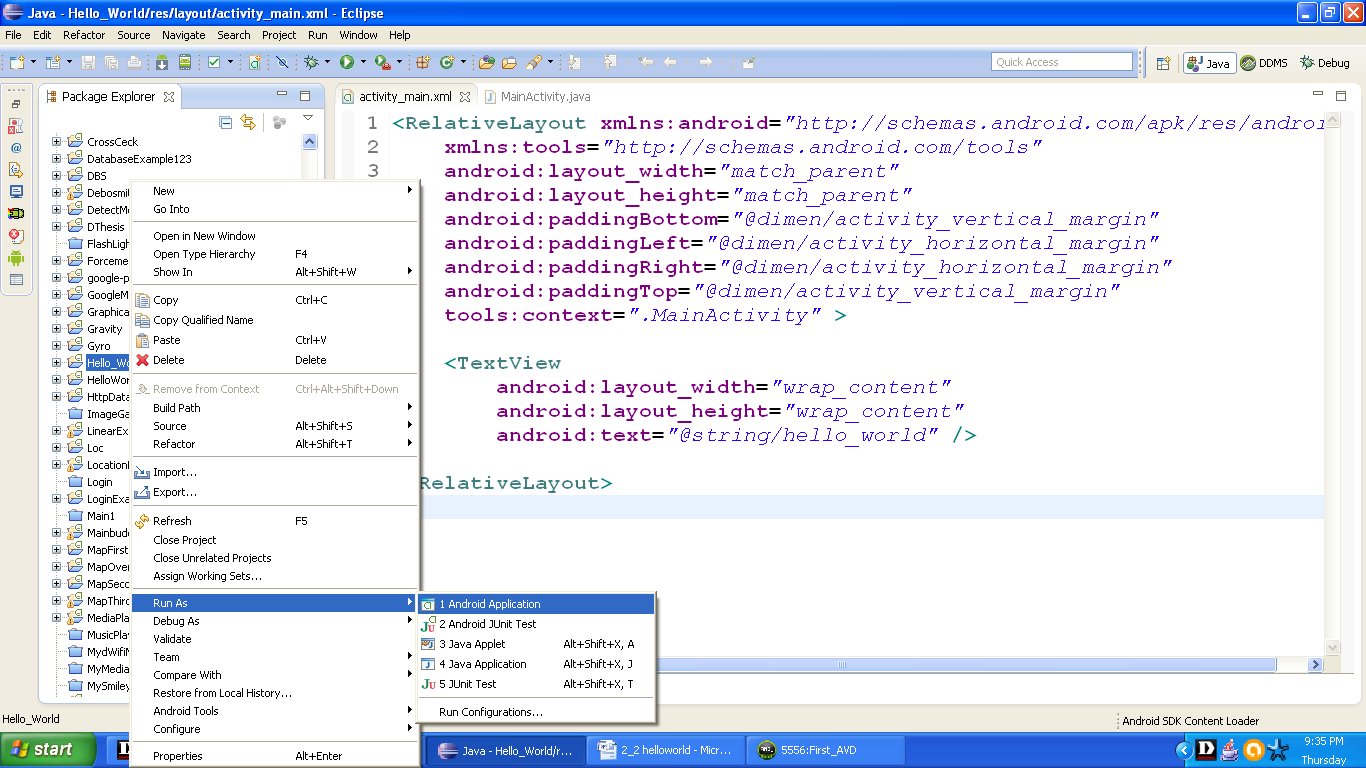
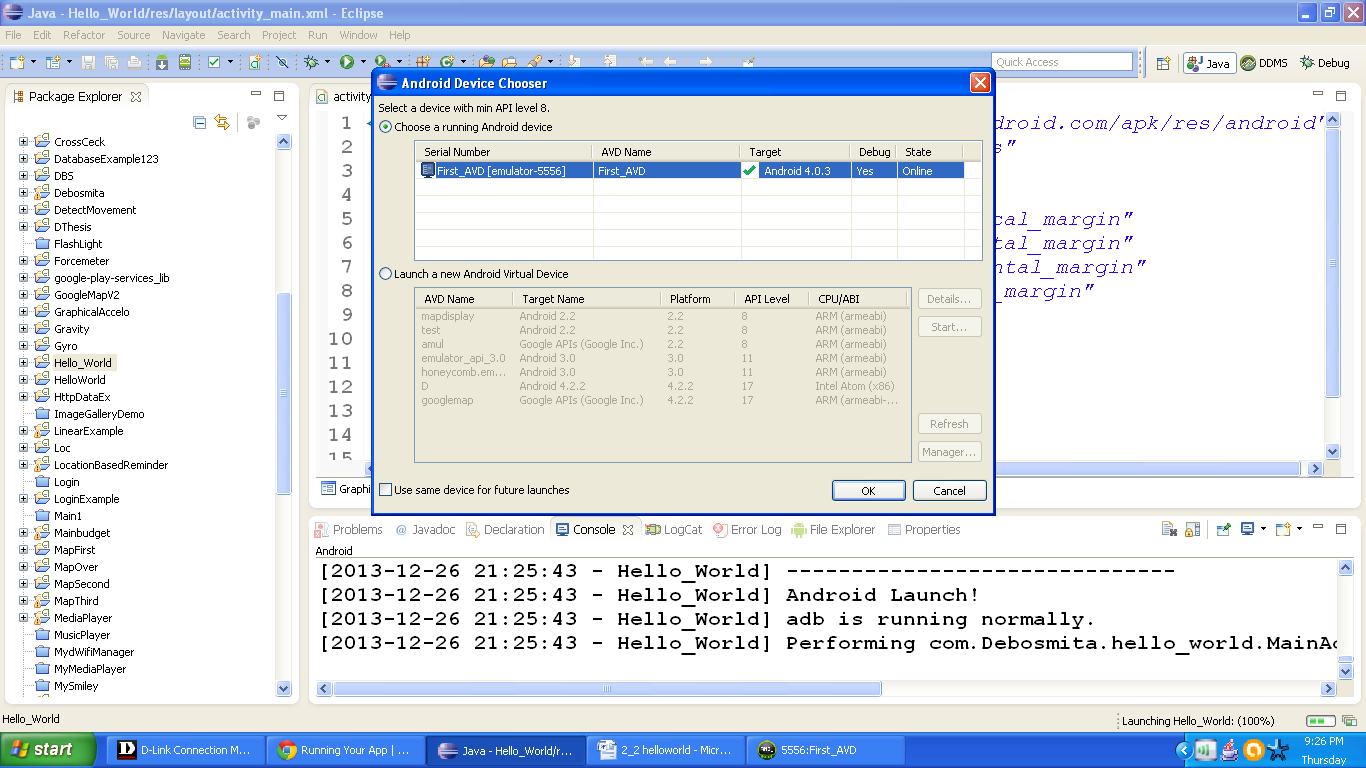
Figure Android Device Chooser
This is the android device chooser; it is used mostly when more than one emulator is present or when they are in active state. This shows our First_AVD as online. It is ready to run the app.
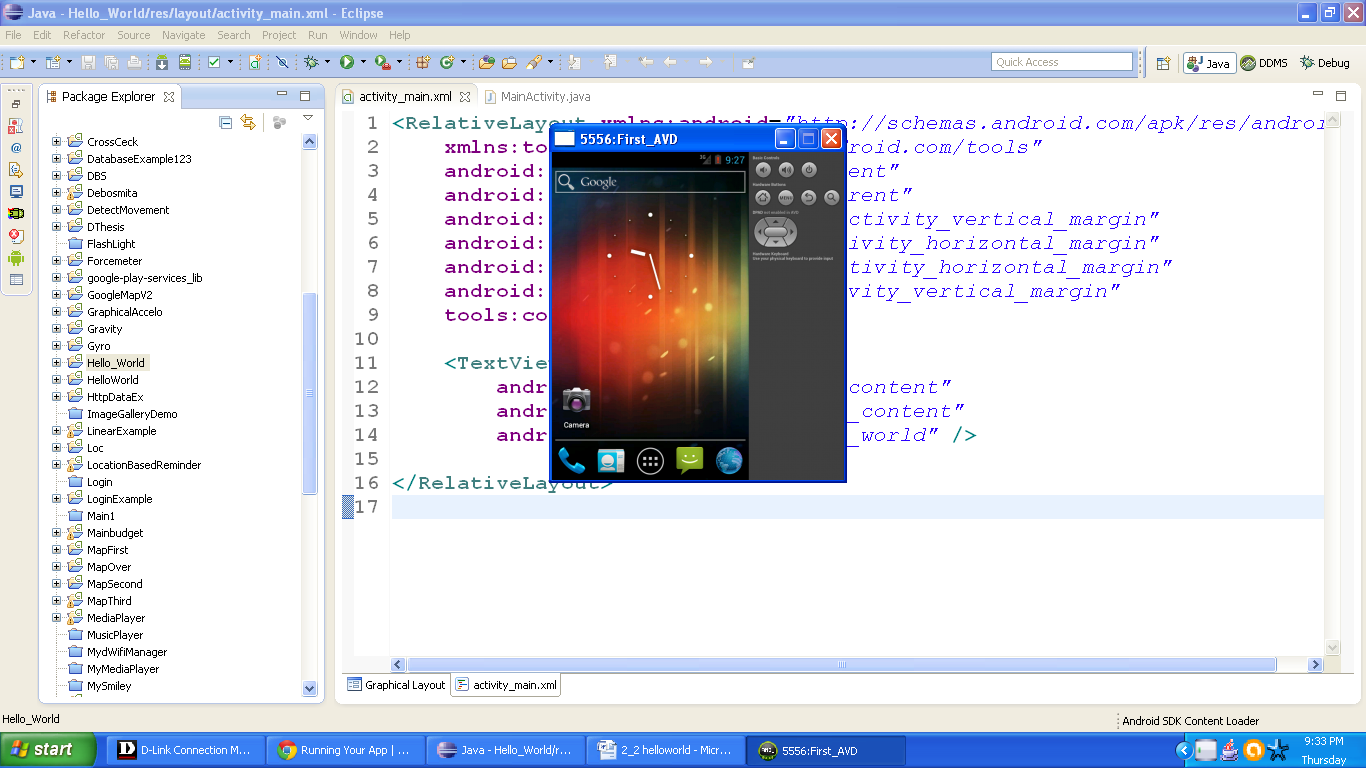
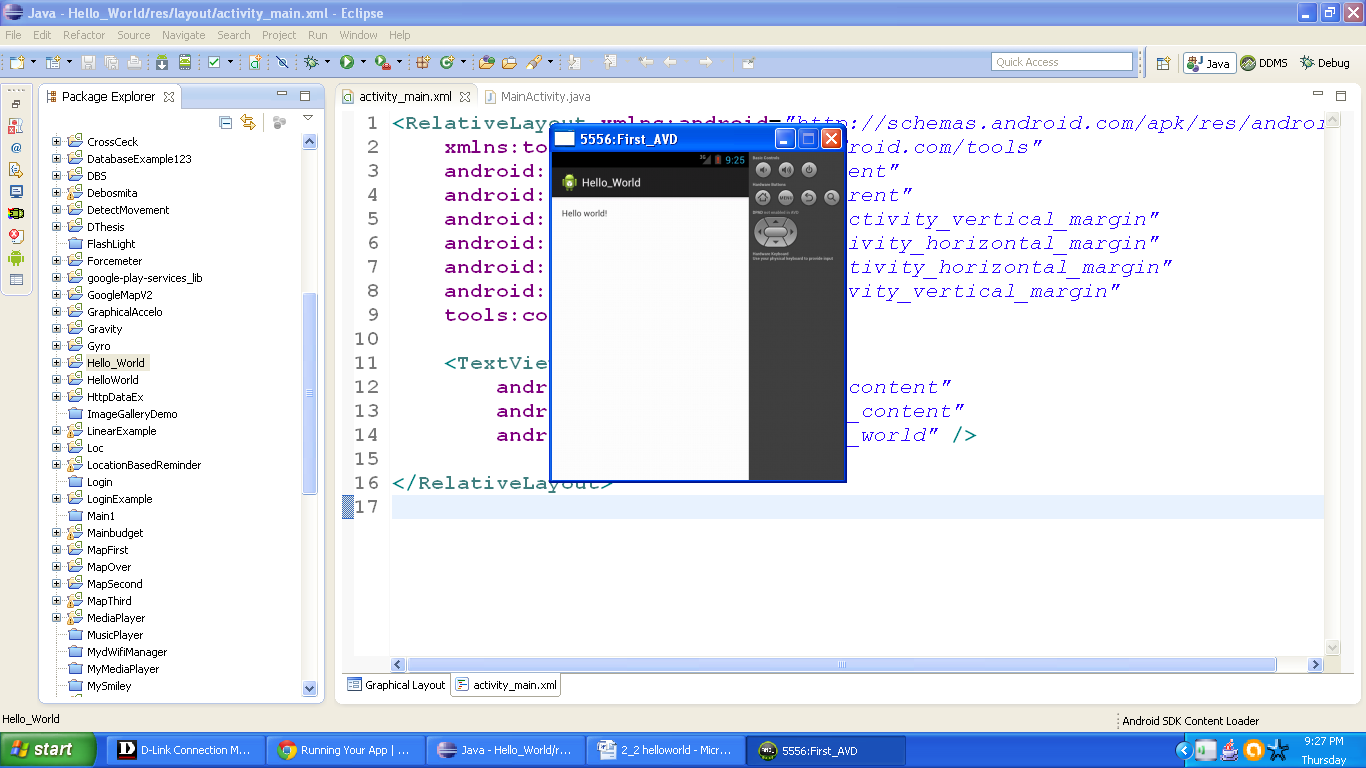
- This is how our HelloWorld app looks like after running it on emulator
- We are done with our HelloWorld app. Just now you created your first mobile app by yourself. Congratulations!!!
