
Introduction
You can make any HTML element draggable (movable) using a simple jQuery UI method: draggable. A draggable element can be moved anywhere within the screen using your mouse. You can also control the behavior of the element during dragging if you want using a number of options and methods. You need to specify the options as key/value pairs. You can directly call methods inside the draggable method.
Syntax
The syntax of draggable method is
$(selector).draggable();
OR
$(selector).draggable({option1:value1, option2:value2,……..});
OR
$(selector).draggable("method_name", [parameters]);
The options will set the behaviour of the element while moving. The option and its corresponding value are set as key value pairs. While specifying actions using method names, we need to pass the method name along with its parameters (if any) to the draggable method. We will see all the popular options and methods one by one with the help of code samples. While trying the code samples, make sure that you add reference to the jQuery UI related files (one .css file and two .js files) correctly.
The draggable() Method
Open a new file and add the following lines of code:
<!DOCTYPE html>
<html>
<head>
<title>Sample Code</title>
<link rel="stylesheet" href="jquery-ui.min.css">
<script src="jquery.js"></script>
<script src="jquery-ui.min.js"></script>
<style>
#parent
{
width: 200px;
height: 200px;
border:2px solid black;
background-color:fuchsia;
font-size: 30pt;
}
</style>
<script>
$(document).ready(function(){
$("#parent").draggable();
});
</script>
</head>
<body>
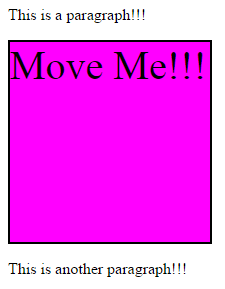
<p>This is a paragraph!!!</p>
<div id="parent"class="ui-widget-content">
Move Me!!!
</div>
<p>This is another paragraph!!!</p>
</body>
</html>
Save the file as index.html. Open it using your browser and you will get a screen like this:
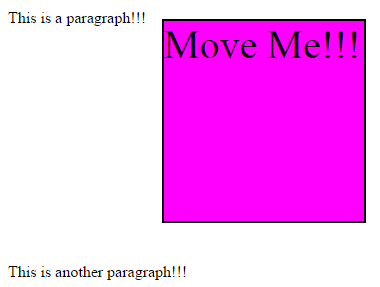
Once you move the box to some other location, your screen will look like this:
Setting Values to axis, containment, cursor and delay Options
You can control the direction of the move by setting value of axis parameter. The possible values are x and y. If you set the value of axis to x, then the element will move only horizontally and if the value is y, then the element will move only vertically. You can set boundary for the moving area using containment option. You can change the style of the cursor while moving using cursor option. Any of the CSS cursor styles can be set as the value of cursor option. Some of the examples are crosshair, pointer, help and so on. You can add a delay before the element starts moving using the delay option. The time needs to be set in milliseconds.
Open a new file and add the following lines of code:
<!DOCTYPE html>
<html>
   <head>
      <title>Sample Code</title>
      <link rel="stylesheet" href="jquery-ui.min.css">
      <script src="jquery.js"></script>
      <script src="jquery-ui.min.js"></script>
      <style>
         #parent
         {
       width: 850px;
       height: 550px;
       border:2px solid black;
         }
         .child
        {
       width:180px;
       height:80px;
       border:1px solid black;
       margin:5px;
       font-size: 15pt;
        }
      </style>
      <script>
         $(document).ready(function(){
         $("#child1").draggable({axis:"x"});
         $("#child2").draggable({axis:"y"});
         $("#child3").draggable({containment:"#parent", cursor:"pointer"});
         $("#child4").draggable({delay:1000});
         });
      </script>
   </head>

   <body>
     <div id="parent"class="ui-widget-content">
        <p class="child" id="child1" style="background-color:fuchsia">I will move only HORIZONTALLY!!!</p>
        <p class="child" id="child2" style="background-color:gray">I will move only VERTICALLY!!!</p>
        <p class="child" id="child3" style="background-color:pink">I will move only INSIDE the big box!!!</p>
       <p class="child" id="child4" style="background-color:aqua">I will start moving only AFTER one minute!!!</p>
     </div>
   </body>
</html>
Save the file as options1.html. Open it using your browser and you will get a screen like this:
Try moving the boxes. You could find that the first box moves only horizontally and the second box moves only vertically. The third box can be moved only inside the big box. If you notice the cursor when you move the third box, you could find that its style is changed. The fourth box will start moving only after one minute you try moving it.
Setting Values to distance, disable, helper, opacity, revert and revertDuration Options
Once you set the distance in pixels, the element will start moving only if you try to move it more than the specified distance. You can disable the ability of elements to move if you set the value of disable to true. You can allow a helper element to be used for dragging display by setting the value of helper to clone. You can set the transparency of the element while moving using opacity option. You can make an element revert to its original position by setting the value of revert to true. Its default value is false. You can set the duration by which the element reaches its original position by setting the value of revertDuration. The value needs to be set in milliseconds.
Open a new file and add the following lines of code:
<!DOCTYPE html>
<html>
<head>
<title>Sample Code</title>
<link rel="stylesheet" href="jquery-ui.min.css">
<script src="jquery.js"></script>
<script src="jquery-ui.min.js"></script>
<style>
#parent
{
width: 850px;
height: 550px;
border:2px solid black;
}
.child
{
width:180px;
height:80px;
border:1px solid black;
margin:5px;
font-size: 15pt;
}
</style>
<script>
$(document).ready(function(){
$("#child1").draggable({distance:100});
$("#child2").draggable();
$("#btnDisable").click(function(){
$("#child2").draggable({disabled:true});
alert("Move is disabled!!!");
});
$("#btnEnable").click(function(){
$("#child2").draggable({disabled:false});
alert("Move is enabled!!!");
});
$("#child3").draggable({helper:"clone"});
$("#child4").draggable({opacity:0.3});
$("#child5").draggable({revert:true, revertDuration:8000 });
});
</script>
</head>
<body>
<div id="parent"class="ui-widget-content">
<p class="child" id="child1" style="background-color:fuchsia">I will move only if you move me for 100px!!!</p>
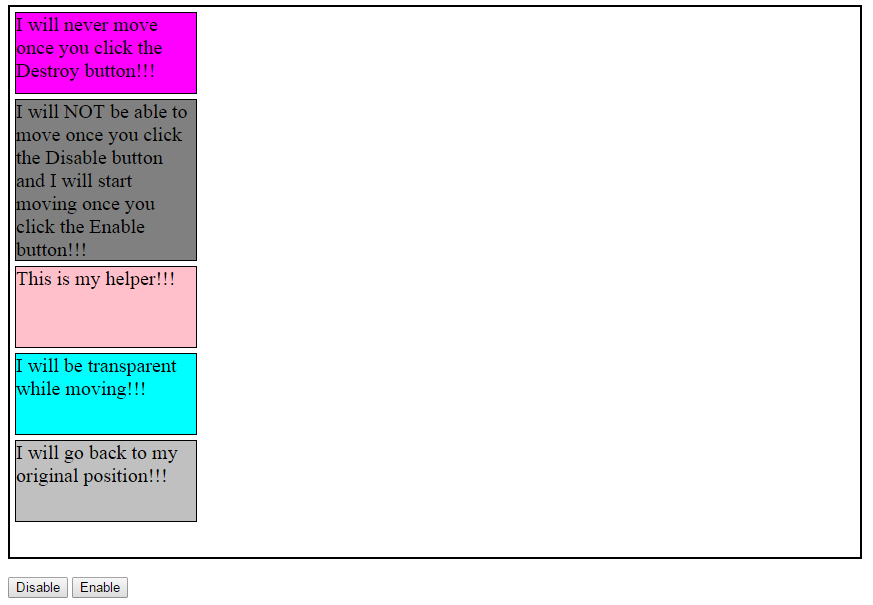
<p class="child" id="child2" style="background-color:gray;height:160px;">I will NOT be able to move once you click the Disable button and I will start moving once you click the Enable button!!!</p>
<p class="child" id="child3" style="background-color:pink">This is my helper!!!</p>
<p class="child" id="child4" style="background-color:aqua">I will be transparent while moving!!!</p>
<p class="child" id="child5" style="background-color:silver">I will go back to my original position!!!</p>
</div> <br />
<button id="btnDisable">Disable</button>
<button id="btnEnable">Enable</button>
</body>
</html>
Save the file as options2.html. Open it using your browser and you will get a screen like this:

If you move the first box only for a short distance (less than 100px), it will not move. Try moving the second box. You could move it. Now again try moving it after clicking the Disable button. You will not be able to move it. If you try moving it after clicking the Enable button, it will again start moving. If you start moving the third box, you could find that the third box remains there itself and a duplicate box starts moving. When you move the fourth box, it will be transparent. The fifth box will go back to its original position once you release the mouse. As you set the time of revertDuration to 8 seconds (8000), the element will move very slowly when moving back to its original position.
Calling Methods
We can perform an action on the movable elements by passing the method that performs the action as the parameter of the draggable method. You can remove the drag functionality completely by calling the destroy method. You can temporarily remove the drag functionality using the disable method and then again make the element movable by calling the enable method. You can get the values of all options as an object by calling the option method without passing any parameter. You can get the value of a specific option by calling the method named option with the name of the option as parameter. You can set the value of options by calling the option method and passing the option name and its corresponding value as parameters.
Open a new file and add the following lines of code:
<!DOCTYPE html>
<html>
  <head>
    <title>Sample Code</title>
    <link rel="stylesheet" href="jquery-ui.min.css">
    <script src="jquery.js"></script>
    <script src="jquery-ui.min.js"></script>
    <style>
      #parent
      {
    width: 850px;
    height: 550px;
    border:2px solid black;
      }
      .child
      {
    width:180px;
    height:80px;
    border:1px solid black;
    margin:5px;
    font-size: 15pt;
    float:left;
      }
    </style>
    <script>
      $(document).ready(function(){
      $("#child1").draggable();
      $("#btnDisable").click(function(){
      $("#child1").draggable('disable');
      alert("Move is disabled!!!");
      });
      $("#btnEnable").click(function(){
      $("#child1").draggable('enable');
      alert("Move is enabled!!!");
      });

      $("#child2").draggable();
      $("#child2").click(function(){
      $("#child2").draggable('destroy');
      alert("Movability is Destroyed!!!");
      });

      $("#child3").draggable({cursor:"pointer"});
      $("#child3").click(function(){
      var cursorType = $("#child3").draggable('option', 'cursor');
      alert("The cursor type is " + cursorType);
      });

      $("#child4").draggable();
      $("#btnOpacity").click(function(){
      $("#child4").draggable("option","opacity","0.3");
      });

      $("#child5").draggable();
      $("#child5").click(function(){
      $("#child5").draggable("option",{cursor:"crosshair",axis:"y"});
      });

      });
    </script>
  </head>
  <body>
  <div id="parent"class="ui-widget-content">
    <p class="child" id="child1" style="background-color:fuchsia;height:140px;">I am now movable. I will stop moving if you click Disable button and again start moving if you click     Enable button!!!</p>
    <p class="child" id="child2" style="background-color:aqua;height:110px;">I am now movable. I will NEVER move again if you click ME!!!</p>
    <p class="child" id="child3" style="background-color:gray">Click me to know my cursor type!!!</p>
    <p class="child" id="child4" style="background-color:silver;height:110px;">Click the Set Opacity button to make me transparent while moving!!!</p>
    <p class="child" id="child5" style="background-color:lime;height:110px;">Click Me to Change my Cursor and Moving Direction while moving!!!</p>
  </div> <br />
  <button id="btnDisable">Disable</button>
  <button id="btnEnable">Enable</button>
  <button id="btnOpacity">Set Opacity</button>
  </body>
</html>
Save the file as callingmethods.html. Open it using your browser and you will get a screen like this:
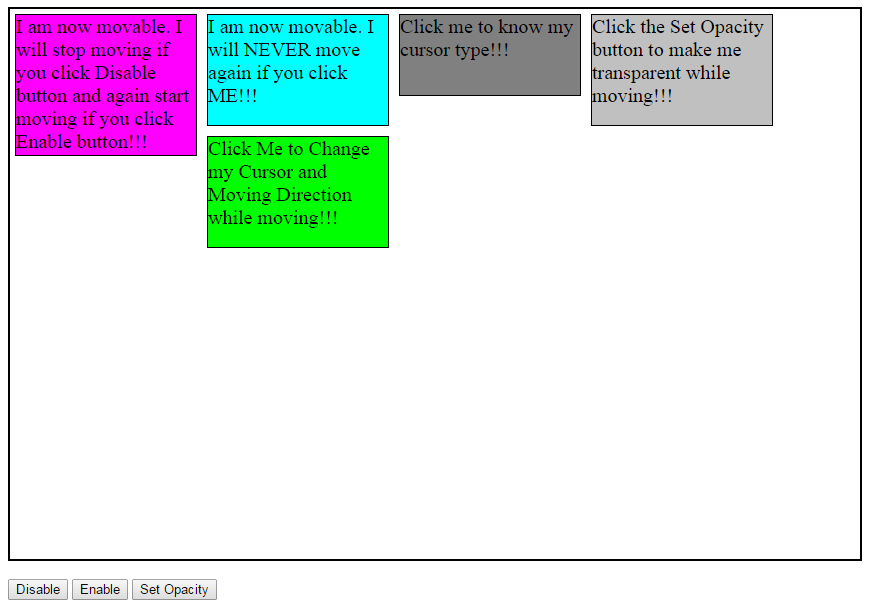
Now try moving the boxes following the instructions specified inside. The first box is movable initially, stops moving once the Disable button is clicked and again starts moving once the Enable button is clicked. The second box is movable initially and it will stop moving once the box is clicked. If you click the third box (dark gray colored), its cursor type will be returned. The value of the opacity option will be set calling the option method if you click the dark gray box. The cursor and axis options will be set calling the option method if you click the green button.
Managing Events on Moving Elements
Different events get triggered in different stages of a draggable element. The create event will be triggered when a draggable element is created or when the element is made draggable. The start event is triggered when the drag starts and the stop event is triggered when the drag stops. The drag event is triggered when the element is moving.
Open a new file and add the following lines of code:
<!DOCTYPE html>
<html>
 <head>
   <title>Sample Code</title>
   <link rel="stylesheet" href="jquery-ui.min.css">
   <script src="jquery.js"></script>
   <script src="jquery-ui.min.js"></script>
   <style>
     #parent
     {
    width: 500px;
    height: 500px;
    border:2px solid black;
     }
     .child
     {
    width:180px;
    height:180px;
    border:1px solid black;
    margin:5px;
    font-size: 15pt;
    background-color:aqua;
     }
   </style>
   <script>
     $(document).ready(function(){
     $("#btnMakeMovable").click(function(){
     $("#child1").draggable({
     create:function(event,ui){
     alert("The element becomes movable.");
     },
     start:function(event,ui){
     $("#child1").css("background-color", "pink");
     },
     drag:function(event,ui){
     $("#info").text("The box is moving.");
     },
     stop:function(event,ui){
     alert("The element stopped moving.");
     $("#info").text("");

     }
     });
     });
     });
   </script>
  </head>
  <body>
   <div id="parent"class="ui-widget-content">
     <p class="child" id="child1">Click the button Make Movable to make me movable. My color will be changed once I start moving.</p>
     <div id="info" style="font-size:15pt"></div>
   </div>
   <button id="btnMakeMovable">Make Movable</button>
  </body>
</html>
Save the file as eventmanagement.html. Open it using your browser and you will get a box that is not movable. Once you click the button the element will become movable and you will get apt messages based on the events triggered.
Summary
In this tutorial, we have seen how to make an HTML element movable using jQuery UI by writing only a couple of lines of code. We have also seen a number of options, methods and events that can be used to change the behaviour of the element while moving.