GORM – Mapping relationships
As any application entities are related between each other, so we will create in our application two more entities (domain classes) that will allow us to create different profiles for our subscribers and to register a subscriber to a specific service.
One to Many relations
Let’s create a new domain-class called Profile.

One subscriber can have multiple profiles associated, one for each member of his family for instance, so we have to create a one-to-many relationship between Subscriber and Profile classes.
So, let’s open our Subscriber class and add the following line:
static hasMany = [profiles:Profile]
package tutorialdemo

class Subscriber {

      String name
      String lastName
      String status
   static constraints = {
    }
    static hasMany = [profiles:Profile]
}
In this way our Subscriber entity will know every profile it has, if we want to allow the profile to know to which subscriber it belongs, we need to add a new line to the Profile class:
static belongsTo = [subscriber:Subscriber]
package tutorialdemo

class Profile {

    String description

    static constraints = {
    }
    static belongsTo = [subscriber:Subscriber]
}
In this way we are allowing to perform cascading updates and deletes, since both entities know about each other.
We need to create a new Controller for our Profiles:

We are going to use one of the magic that comes with Grails: Scaffolding.
So let’s edit our SubscriberController class, and the newly created ProfileController class to leave them like this:
package tutorialdemo

class SubscriberController {

   ef scaffold = true
}
package tutorialdemo

class ProfileController {
      def scaffold=true
}
If we run our application now, and click on the Subscriber controller, we will see a completely different page than before; we now have a complete set of CRUD operations defined for our Subscribers!

The index page for our subscribers, display a list of all available subscribers in our application (since we are using an in-memory database, when the application is restarted, any record created are removed).
If you click on New Subscriber a complete form to set the Subscriber properties will be shown:

Based on the relationship definition we set on the Subscriber and Profile entities Grails now knows how to manage those relationships and defines automatically how they should behave, when you try to create a Profile it will ask to define which subscriber it is associated to.

Since we don’t have any Subscriber, the first time we try to create a profile, it won’t show any Subscriber in the list to select, but let’s try to create a new Subscriber.

Once created, Grails will display your new subscriber information:

If you click on “Subscriber List”, then a list of your Subscriber will be displayed.
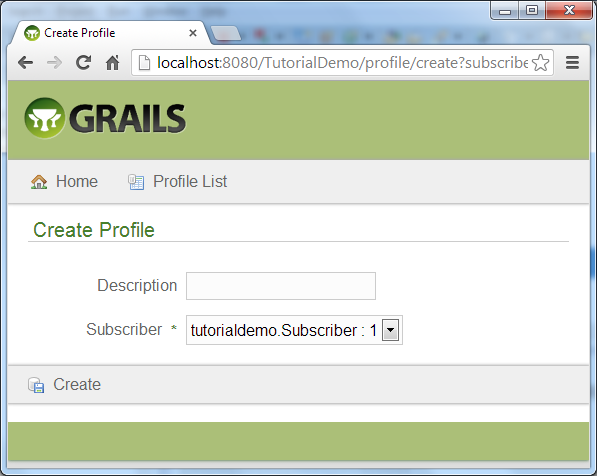
Let’s edit our John Doe subscriber, on the list, click on the Last Name, it will take you again to the page that displays your subscriber information. Once in there, click on the Edit button, and try to Add a Profile:

We can see now that we have some value available in our Subscriber field, this should be a listing of all subscribers in the application, but if you check closely, there is an ID like statement instead of a meaningful value for the subscriber, we can change that with a very simple change in our Subscriber domain-class:
Let’s add the following method:
String toString(){
return "${lastName}, ${name}"
}
package tutorialdemo

class Subscriber {
     String name
     String lastName
     String status

     static constraints = {
     }

     static hasMany = [profiles:Profile]

     String toString(){
        return "${lastName}, ${name}"
    }
}
This change here will affect how the Subscriber information is rendered in the application. Before we restart our application, let’s make the same change to our Profile domain-class, so we display the description instead of the internal ID.
package tutorialdemo

class Profile {

    String description
    static constraints = {
    }

    static belongsTo = [subscriber:Subscriber]
    String toString(){
        return "${description}"
    }
}
So now, let’s restart the application and try to create a new Profile.
(Remember that when restarting all data is erased, so first create a new Subscriber, and then create a new Profile )

So now you can finally see that the Subscriber combo-box has the values as we defined, “LastName, Name”
If you create the new Profile and go back to edit the Subscriber you will see that the John Doe subscriber has now a “Main Screen” profile, with a link that will allow you to change it.
