
A plug-in can be delivered as a jar file. A plug-in is self-contained bundle in a sense that it contains the code and resources that it needs to run for ex: code, image files, resource bundles etc. A plug-in is self describing - when I say it is self describing it means that it describes who it is and what it contributes to the world. It also declares what it requires from the world.
A Mechanism For Extensibility
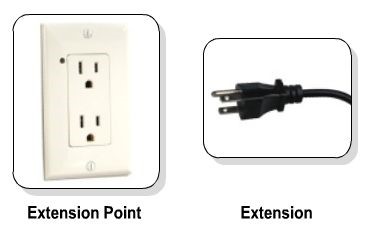
Figure 1-5
We all know that eclipse is extensible. In order to achieve this extensibility eclipse uses the concept of extension points and extension. Think of extension point as Electric socket and think of extension as a plug. Plug-in A exposes a extension point (electric socket) which Plug-in B extends by providing an extension (an electric plug). Plug-in A knows nothing about plug-in B. If we think about it this is very similar to concept of Inheritance – we extend functionality of base class to provide more specific implementation. Think of Plug-in A as a text editor and Plug-in B as xml editor. Text editor declares extension point thereby declaring to the world that it is open for extension and xml editor extends text editor by using its extension point to customize it in its own way. It is important to understand that each extension point essentially declares
a contract. An extension point provider only accepts those extensions which abide by the contract.
These extension points and extensions are declared in plugin.xml (discussed earlier). The runtime is able to wire extensions and extension points and form a registry using markup alone.
Plug-in Example
Now that we have covered good amount of architecture basics, its time to get our hands dirty with some actual plug-in coding. The process for creating a plug-in is best demonstrated by implementing a plug-in on which discussion and examples can be based. Here we will take a step-by-step approach to create a simple but fully operational plug-in. This example will try to give you an feel of eclipse plug-in development. However, don’t try to grab all the details at this point. It is fine if you are not able to understand much of the details in this example. Rest of the tutorial will cover all the topics in great depth.
We will build a simple Resource Manager plug-in. Features of this plug-in are as follows:
- Ability to add/remove resources (essentially files in workspace) to resource manager.
- Display list of resources which were added to resource manager.
- Ability to open up associated editor whenever resource is clicked.
Note: All Examples in this tutorial have been implemented using Eclipse version 3.1.2
Creating a Plug-in
1. Launch Eclipse.
2. From File menu, select New Project. This will open up New Project wizard.
3. Now select Plug-in Project and click on the next button. (see Figure 1-8)
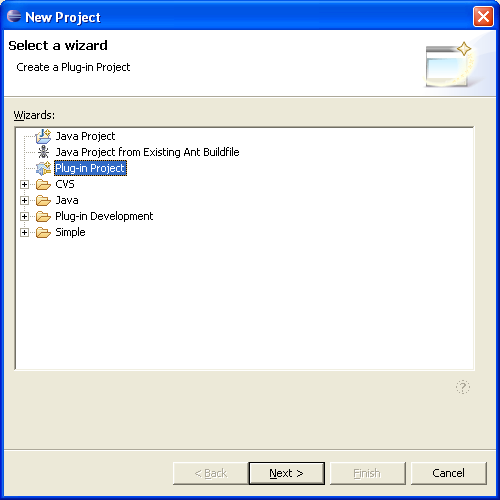
Figure 1-6
4. On next page of the wizard (see Figure 1-9), enter the name of the project "com.myplugin.rmp"
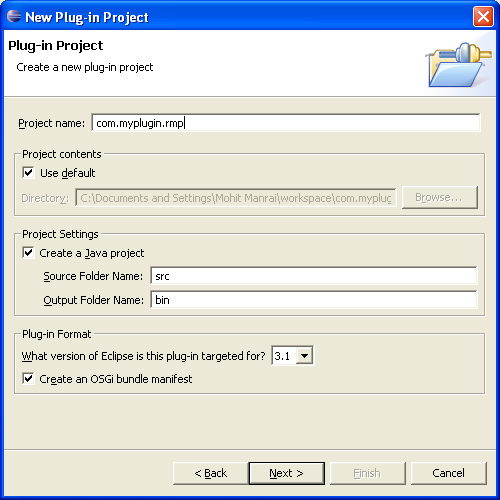
Figure 1-7
5. Fill in the other fields as shown and then click the Next button. The next wizard page displays options for generating plug-in Java class. Fill all the fields as shown below. Do not fill anything in classpath field - This has been removed in eclipse 3.4. Plug-in Activator is required if we want to do anything on plug-in start up or shut down. For example we want to acquire some resources at plug-in start up and perform clean up when plug-in is shutdown. It is important to note that Eclipse startup does not essentially means that your plug-in is starting up. Plug-ins are loaded/started only when they are demanded or required. So activator is used when plug-in startup/shutdown happens.
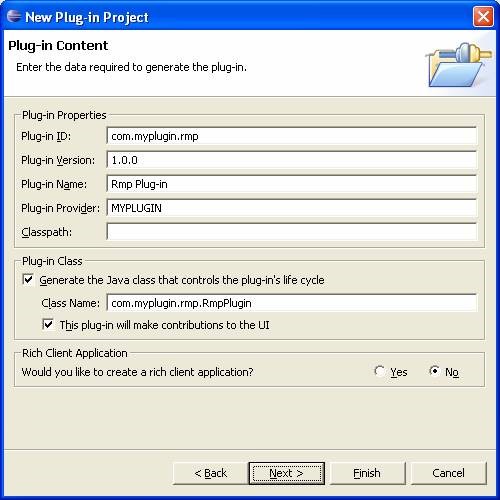
Figure 1-8
6. Click Next, select Plug-in with a view and then click the Next button.
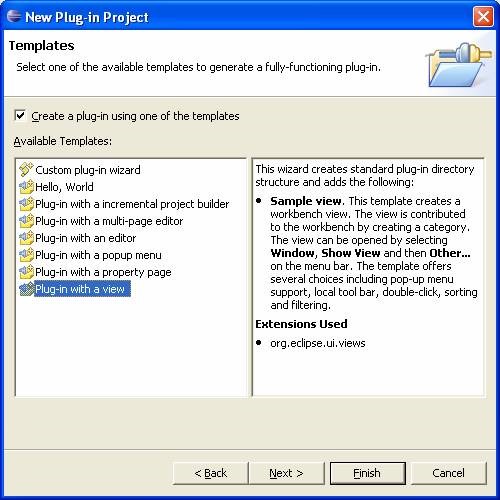
Figure 1-9
7. Next, Enter the values for this page (see Figure 1-12), and click the Next button.
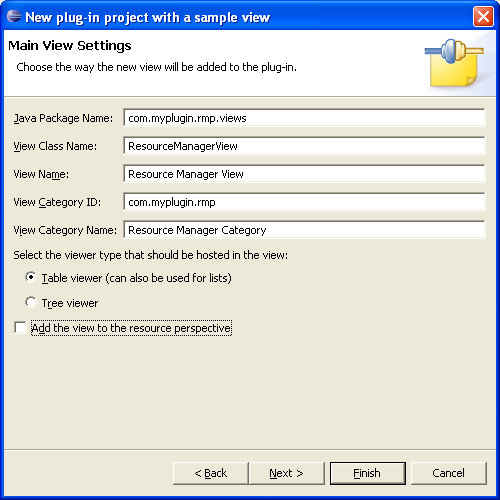
Figure 1-10
8. Finally, uncheck all the options (see Figure 1-13). and click Finish button.
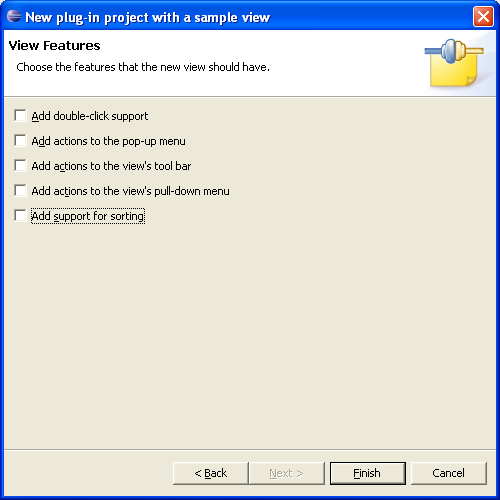
Figure 1-11