
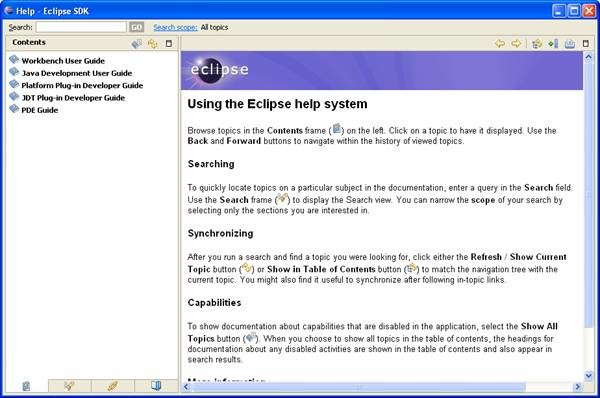
Eclipse Help System
Help in eclipse is accessed by using Help > Help Contents menu. Once you done with development of your plug-in and before you are ready to ship it as a product, one thing which you would like to do is create help contents. No matter how simple or complex your plugin is, users would like to see get started documents. Also help provide us with opportunity to describe functionalities available with the plugin.
Creating New Help
Eclipse has support for many formats like HTML, PDF, XHTML to name a few. We can create help within the main plugin or create altogether a new plugin project for help.
Creating new help project
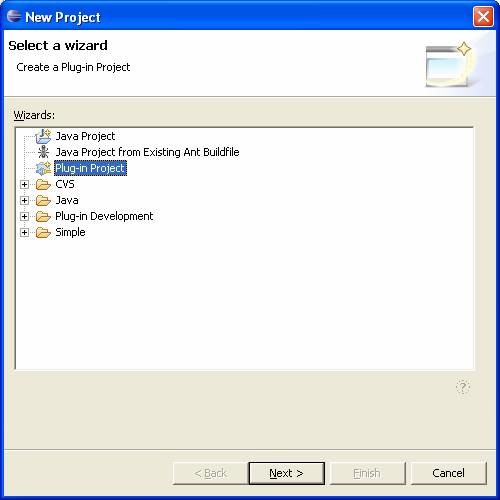
We will start by creating a new Plug in project. In order to create new project click on File > New Project > Select Plug in project (as shown below)
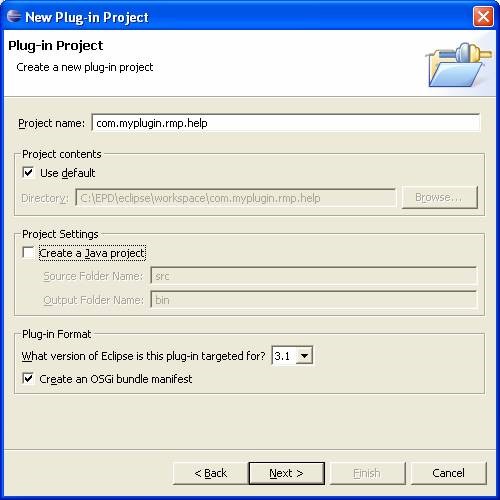
Click next button, Provide “com.myplugin.rmp.help” in Project Name field.
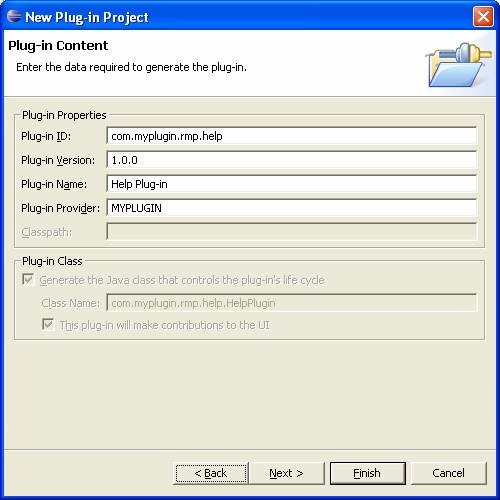
Click next button, Provide values as shown in figure below.
Click finish, this will create a new plug in project and will generate minimal code for the project. Till this point project is empty. Now we will use Existing extension templates to generate necessary files for creating help.
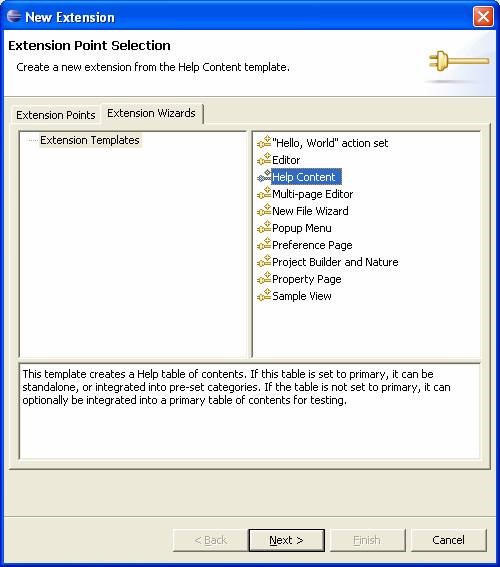
Navigate to Extensions page, click on "Add" button and select Extensions Wizard tab followed by selecting Help Content template. This template creates a Help table of contents. If this table is set to primary, it can be standalone, or integrated into pre-set categories. If this is not set as primary then it can be attached with the primary toc for testing purposes.
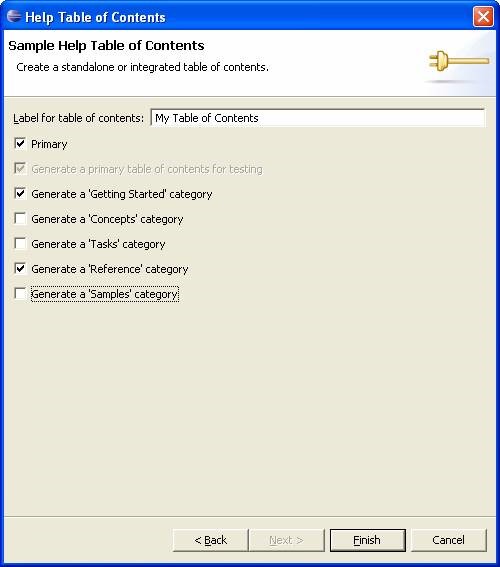
Click Next button and provide values as shown below: Check the Primary Option. This will create a primary table of content file. We will select only Getting Started and Reference categories for this example.
Click Finish and save the manifest file.
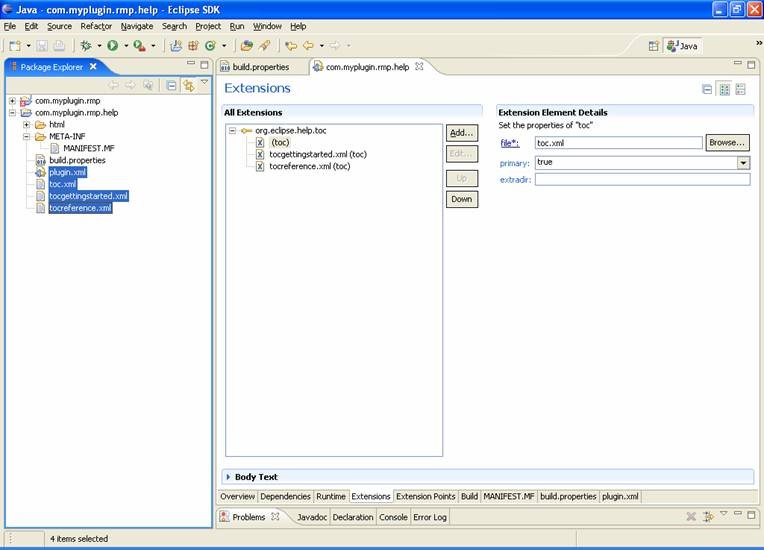
Let’s Review the generated code
Once you have finished creating the extension points you will notice that many files have been generated by the Help Template Wizard. It also creates html files in a new folder. In order to create eclipse help org.eclipse.help.toc extension point is used. Next, we have to create various toc’s and mark them primary/secondary depending on the type of help we are creating. Every toc is represented by XML file.
Now let’s have a look at toc.xml file. Remember this file represents primary table of contents file.
<toc label="My Table of Contents" topic="html/toc.html">
   <topic label="Getting Started">
      <anchor id="gettingstarted"/>
   </topic>
   <topic label="Reference">
      <anchor id="reference"/>
   </topic>
</toc>
In above xml file, two subtopics have been defined i.e. "Getting Started" and "Reference". In the above xml file, labels are used to display human readable text on the help. and the topic is used to navigate to the real help page.
Next, examine tocgettingstarted.xml :
<toc label="Getting Started" link_to="toc.xml#gettingstarted">
   <topic label="Main Topic"
      href="html/gettingstarted/maintopic.html">
      <topic label="Sub Topic"
          href="html/gettingstarted/subtopic.html" />
   </topic>
   <topic label="Main Topic 2">
      <topic label="Sub Topic 2"
          href="html/gettingstarted/subtopic2.html" />
   </topic>
</toc>
Above xml file has links to Help HTML files.
This is all it takes to create a help with eclipse. In order to test recently created help, launch new eclipse runtime and open help window, you will see newly created help in the Eclipse help System.