
8.1 Overview of JSP Directives
JSP Directives are used to provide the instructions and directions for translations of JPS page to Servlet code. Directives are placed between <%@ %>.
Specifications provides three types of directives and each directives provides several attributes so the general syntax of directive is <%@ directive-name attribute="value" %>.
Note: There is no space between <% and @ characters and same is the restriction with % and >. For example <% @ directive-name attribute=”value” %> is not valid because there is a space between <% and @.
The three types of directives are:
· page directive – We will discuss page directive and its attributes with examples in section 8.2.
· include directive- Refer section 8.3 for more details along with examples for include directive.
· taglib directive- We will discuss taglib directive and its attributes with examples in section 8.4
8.2 JSP page directives
JSP page directives provides attributes which are applied on entire JSP page.
· usually defined at top of the page (recommended).
· can define multiple attributes in single page directive or can have a separate page directive for each attribute.
Syntax of page directive is <%@ page attribute=”value” %>.
There are 14 attributes supported by page directives and they are –
1. import
2. contentType
3. extends
4. info
5. buffer
6. language
7. isELIgnored
8. isThreadSafe
9. autoFlush
10. session
11. pageEncoding
12. errorPage
13. isErrorPage
14. isScriptingEnabled
8.2.1 import
This attribute is equivalent to import statement in java and used to import classes, interfaces etc .JSP engine converts these import attributes in to import statement in generated Servlet code.
Note: If we are to use any java classes in scripting tag, we have to have it imported using import attribute of page directive. This is similar restriction as we have in java. Failing to do so will result in an error.
Example –
<%@page import=”java.util.List” %>
<%@page import=”java.util.Date” %>
  Alternatively multiple import statements can be combined like
<%@page import=”java.util.List”, java.util.Date %>
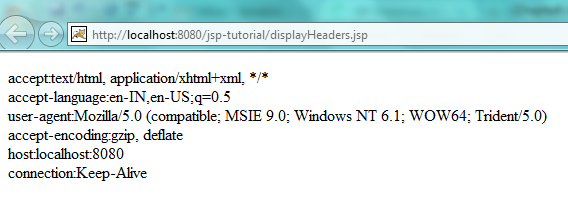
Example –Write a jsp that will display current all request headers.
Solution – HttpServlet Request provides a method which returns the enumeration. In this example we need to import enumeration in order to use. Lets create a displayHeaders.jsp in WebContent directory as below
<html>
  <head>
    <title>JSP Displaying Headers</title>
  </head>
  <body>
    <%@ page import="java.util.Enumeration"%>
    <%
     Enumeration<String> headerEnumeration= request.getHeaderNames();
     StringBuffer buffer = new StringBuffer();
     while(headerEnumeration.hasMoreElements())
     {
      String headerName= headerEnumeration.nextElement();
      String headerValue =request.getHeader(headerName);
      buffer.append(headerName + ":" + headerValue);
      buffer.append("<br/>");
     }
     response.setContentType("text/html");
     out.println(buffer.toString());
   %>
  </body>
</html>
Access displayHeaders.jsp with http://localhost:8080/jsp-tutorial/displayHeaders.jsp
8.2.2 contentType
This attribute is used to set the character set and content type of the response. Adding a contentType is similar to response.setContentType() API
Servlets has default MIME type as text/plain where as the default for JSP pages is
text/html (with a default character set of ISO-8859-1). Thus,JSP pages that output HTML need not use contentType.
contentType attribute takes one of the following two forms.
- <%@ page contentType="MIME-Type" %>
- <%@ page contentType="MIME-Type; charset=Character-Set" %>
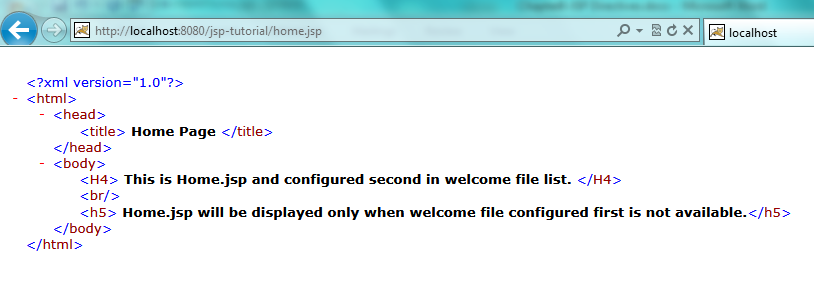
Remember we created home.jsp in earlier chapters? Now add “text/xml” contentType and access home.jsp again
<%@page contentType="text/xml" %>
<html>
  <head>
    <title> Home Page </title>
  </head>
  <body>
   <H4> This is Home.jsp and configured second in welcome file list. </H4>
   <br/>
   <h5> Home.jsp will be displayed only when welcome file configured first is not available.</h5>
  </body>
</html>
Access home.jsp with http://localhost:8080/jsp-tutorial/home.jsp . You will see all content as XML instead of html
8.2.3 extends
The extends attribute defines the super class of the servlet that will be generated for the corresponding JSP page.
Syntax of extends attribute is <%@ page extends="package.class" %> and is very rarely used and we can use it if we have extended HttpServlet and overridden some of it’s features.
8.2.4 info
The info attribute of page directive is used to provide an informational message about the JSP page. The JSP container ignores the info attribute. The info attribute is meant for JSP programmers to help them understand about the functionality of the page.
Syntax is <%@ page info="Home Page JSP" %>
Corresponding to info attribute , container will create a method getServletInfo() like below so we can retrieve it using Servlet interface getServletInfo() method
public String getServletInfo() {
  return "Home Page JSP";
}
8.2.5 buffer
The buffer attribute specifies the size of the buffer used by the out variable. We can use buffer attribute in following two ways –
- <%@ page buffer="sizekb" %>
- <%@ page buffer="none" %>
As you can see , we can define size in kb.
The default size of buffer size is server specific but generally (and must be ) it is 8KB. This means that the JSP container will send the HTTP response in chunks of 8 KB.
If we use <%@ page buffer="32kb" %> which means the content should be buffered and not sent to the client until at least 32 kilobytes are accumulated with the two exceptions
- the page is completed
- the output is explicitly flushed
Note: Servers can use a larger buffer than what we specify, but not a smaller than that.
8.2.6 language
The language attribute is used to specify the scripting language of JSP as containers may support languages other than Java.
Syntax of language attribute is <%@page language="java"%>
Default value is java and we need not to change it.
8.2.7 isELIgnored
The isELIgnored attribute is used to disable or enable Expression language. This attribute can take a boolean value (true or false ) like below
- <%@ page isELIgnored="false" %>
- <%@ page isELIgnored="true" %>
Default value is false which means evaluate Expression language.
Note: This attribute is added in JSP 2.0 so cannot use in a server that supports only JSP 1.2 or earlier
Let’s create one jsp (iselignored.jsp) in WebContent directory and add below content in it. We will discuss more about Expression language but think it as a replacement or alternative of scriplets. In below jsp we just added one request attribute which we are displaying using expression language(highlighted).
${requestScope.RequstAttribute} says display the value of RequestAttribute variable available in request scope.
<html>
  <head>
   <title> JSP using isELIgnored tag </title>
  </head>
  <body>
   <%
    request.setAttribute("RequstAttribute", "Hey I am request Attribute");
   %>
   ${requestScope.RequstAttribute}
  </body>
</html>
On accessing iselignored.jsp using http://localhost:8080/jsp-tutorial/iselignored.jsp we can see below page.

Now add <%@ page isELIgnored="true" %> to the above jsp to ignore expression language and see the results
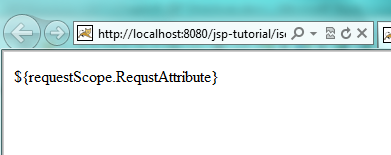
Since we have disabled expression language, instead of evaluating , it is getting printed.
8.2.8 isThreadSafe
The isThreadSafe attribute suggests the container how the JSP page should behave if multiple requests are received at the same time. It takes boolean values true or false. The default value of isThreadSafe attribute is true
Syntax of isThreadSafe attribute is <%@page isThreadSafe="true"%>
- If isThreadSafe attribute is set to true, then multiple request received for the JSP page are handled simultaneously
- If the isThreadSafe attribute is set to false, then requests to the JSP page are processed sequentially.
When we set isThreadSafe attribute to false then generated Servlet implements SingleThreadModel. Since SingleThreadModel is poorly designed, it is not recommended to use and instead should use synchronization.( which means we should not set it to false).
8.2.9 autoFlush
autoFlush attribute is used to control how container handles buffer output . Its default value is true and output is flushed automatically when the buffer is full. If we set it to false, the buffer will not be flushed automatically and we will get an exception for buffer overflow when buffer is full.
We can use this attribute to achieve a functionality that either complete JSP response is sent or none. Syntax of autoFlush attribute is
- <%@ page autoFlush="false" %>
- <%@ page autoFlush="true" %>
8.2.10 session
The session attribute defines if the corresponding JSP page will participate in HTTP session or not . session attribute takes one of the following two forms.
- <%@ page session="true" %>
- <%@ page session="false" %>
Default value is true which means by default all jsp will participate in session and using
session="false" can save server memory on high-traffic sites
Note : This attribute controls participation in session and does not mean session that session tracking will be disabled when using session=false and the session implicit variable will not be available to the JSP page.
8.2.11 pageEncoding
The pageEncoding attribute is used to specify or change the character set of the page . The default character set is ISO-8859-1. Syntax of pageEncoding attribute is directive.
<%@page pageEncoding="ISO-8859-1"%>
8.2.12 errorPage
The errorPage attribute is used to set the error page for the JSP.If the JSP throws exception, the request will be redirected to the page defined in this attribute.
Syntax of errorPage attribute is <%@ page errorPage="jsp page name" %>
To see it working,
a) Lets create a jsp named error.jsp in WebContent directory with below content
<html>
  <head>
   <title> Error JSP </title>
  </head>
  <body>
   <h4> Something has gone wrong </h4>
  </body>
</html>
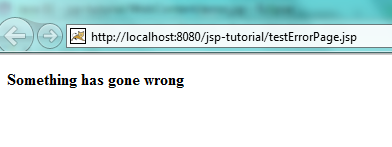
b) Create another jsp testErrorPage.jsp with below content. This page will generate null pointer exception as we are calling toString() method on null String.
<html>
  <head>
   <title> Test Error Page JSP </title>
  </head>
  <body>
   This page is generating error intentionally.
   <%
     String str = null;
     out.println(str.toString());
   %>
  </body>
</html>
c) Access testErrorPage.jsp using http://localhost:8080/jsp-tutorial/testErrorPage.jsp , you will see below screen

d) Now add errorPage attribute ( <%@ page errorPage="error.jsp" %> ) in testErrorPage.jsp and access it again. This time page will be redirected to error.jsp (see page content and Url in below figure)
8.2.13 isErrorPage
This attribute is used to inform container that declaring JSP page is an error page. Once declaring any jsp page as error page , container provides an implicit variable “exception” which can be used to get the exception details.
This attribute takes boolean value (true or false ) and the default value is false .
Syntax of isErrorPage attribute is
- <%@ page isErrorPage="true" %>
- <%@ page isErrorPage="false" %>
Note: As mentioned , container will provide exception implicit variable only if page is declared as error page which means all pages does not have exception implicit variable.
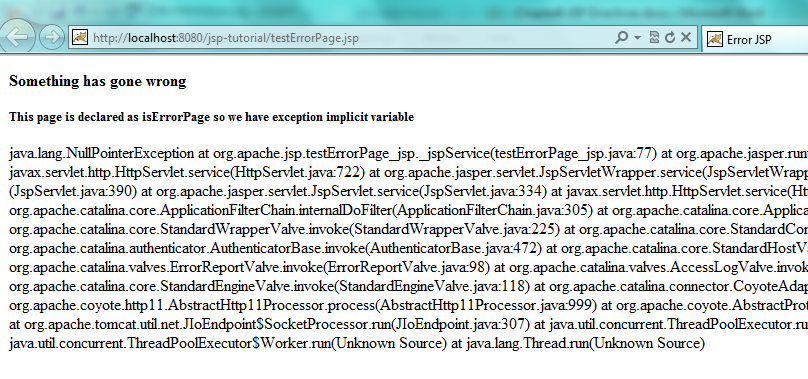
In example discussed in section 8.2.12, we created error.jsp. Change the error.jsp as shown below and access testErrorPage.jsp again
<%@ page isErrorPage="true" %>
<html>
  <head>
    <title> Error JSP </title>
  </head>
  <body>
    <h4> Something has gone wrong </h4>
    <h5>This page is declared as isErrorPage so we have exception implicit variable</h5>
    <%
     exception.printStackTrace(new java.io.PrintWriter(out));
    %>
  </body>
</html>
8.2.14
isScriptingEnabled– This attribute is used to determine is scripting elements (expressions , declaration or scriplets ) are allowed or not.Default value of this attribute is true which means by default scripting is enabled.
isScriptingEnabled attribute takes boolean value (true or false ) and looks like
- <%@ page isScriptingEnabled="true" %>
- <%@ page isScriptingEnabled="false" %>
If we set the value as false in a JSP Which has used scripting tags , then a translation time error will be raised.
8.3 JSP include directive
As its name suggests , include directive is used to include the contents of another file to the current JSP page. The included file can be HTML, JSP, text files etc.
This feature is very useful from code reusability and maintenance stand point of view and helps in creating templates.
We can define a header and footer in separate jsp file and can include then in all other pages.
Syntax of include directive is <%@ include file="resource file" %>
This directive works at translation time which means content of resource file is pasted ‘as is ‘ in the current jsp page at the place where include directive is used and then complete page is translated to servlets
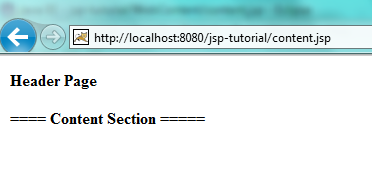
Lets define two jsp file (header.jsp and content.jsp) and include header.jsp in content
a) header.jsp
<html>
  <head>
   <title> Header</title>
  </head>
  <body>
   <h4> Header Page </h4>
  </body>
</html>
b) content.jsp
<html>
  <head>
    <title> Content Page </title>
  </head>
  <body>
    <%@ include file= "header.jsp" %>
    <h4> ==== Content Section ===== </h4>
  </body>
</html>
c) Access content.jsp using http://localhost:8080/jsp-tutorial/content.jsp
8.4 JSP taglib directive
JSP specification allows to create custom tag libraries having a custom behaviour.
JSP taglib directive is used to define and use a custom tags in a JSP. taglib directive takes uri and prefix attributes and looks like below example
<%@ taglib uri="uriOfTag" prefix="prefixOfTag" %>
If above taglib defines say function named “display” than it can be used as <prefixOfTag:display> </prefixOfTag:display>
We will discuss how to create and use custom tag libraries in coming chapters.