
6.5 How to create a new web application project in eclipse
In this section we will discuss how to create a web application using eclipse. We can create it manually as well.
To create a new project go to
File New Project Web Dynamic Web Project Next (see below).

Once you click Next, new window will open (see below).

· Project Name –Give it a name. This will be the name of your web application. In above figure, web application with name “jsp-tutorial” will be created.
· "Target Runtime", choose "Apache Tomcat v7.0"
· Leave rest all as default values .Click Finish
Once done, a new project with name “jsp-tutorial” will be created (see the below figure).
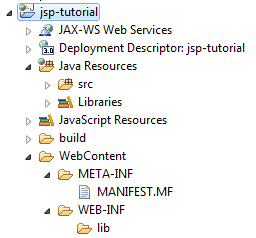
All static contents and jsp files will be created under WebContent directory.
6.6 How to create a war file and deploy
In this section we will discuss how to create a war file using Eclipse.
To do so
a) Right Click on Project Export War file

Clicking on War file, a new window will be opened (refer below). Choose a Destination as the webapps folder of your tomcat installation directory.
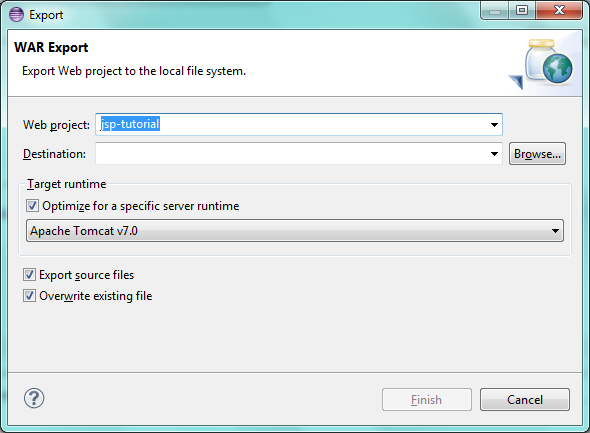
Note- You can select any destination folder and eclipse will create a jsp-tutorial.war file at the selected location. However, each server has its own directory from where it deploys the war file.
In case of tomcat “webapps” directory is the deployment directory and for any web application to be deployed on tomcat, it has to be placed in webapps.
In our next chapters we will use jsp-tutorial web application and it can be accessed using http://localhost:8080/jsp-tutorial.
6.7 Welcome File list Example
In section 6.3.2 we discussed about welcome file list tag to configure welcome files. Lets write an example in “ jsp-tutorial ” web application that we have just created.
To see how welcome file works, just deploy the “ jsp-tutorial ” web application and access the web application using http://localhost:8080/jsp-tutorial and see what is the result.
You will get a 404 error which means requested resource is not available (refer below figure).
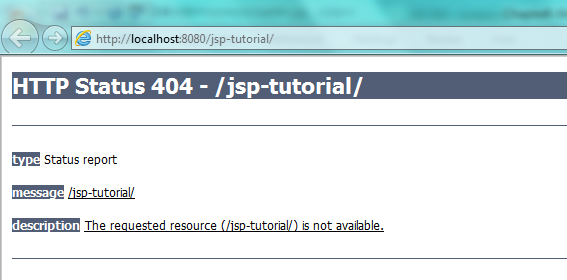
We got 404 error because there we have directly requested a web application. We did not requested any jsp file or a servlet.
If you think of any website you simply access it using like www.google.com and you can see the page. You do not hit it like www.google.com/home.jsp etc because end user does not know the name of jsp pages.
Welcome file list is the solution of this problem and by configuring a welcome files, container will verify if welcome file is configured. If configured, it verifies configured file in order in which they are configured and displays the first available.
Now add web.xml with below content in web.xml under WEB-INF directory.
<?xml version="1.0" encoding="UTF-8"?>
<web-app xmlns:xsi="http://www.w3.org/2001/XMLSchema-instance" xmlns="http://java.sun.com/xml/ns/javaee"    xsi:schemaLocation="http://java.sun.com/xml/ns/javaee http://java.sun.com/xml/ns/javaee/web-app_3_0.xsd" version="3.0">
 <display-name> JSP  Tutorials</display-name>
 <welcome-file-list>
   <welcome-file>index.jsp</welcome-file>
   <welcome-file>home.jsp</welcome-file>
 </welcome-file-list>
</web-app>
Here we configured two welcome files ( index.jsp and home.jsp ) .
Now add home.jsp under WebContent directory with some content and redeploy the web application and access it again using http://localhost:8080/jsp-tutorial.
Home.jsp
<html>
  <head>
    <title> Home Page </title>
  </head>
  <body>
    <H4> This is Home.jsp and configured second in welcome file list. </H4>
    <br/>
    <h5>
      Home.jsp will be displayed only when welcome file configured first is not available.
    </h5>
  </body>
</html>
Result
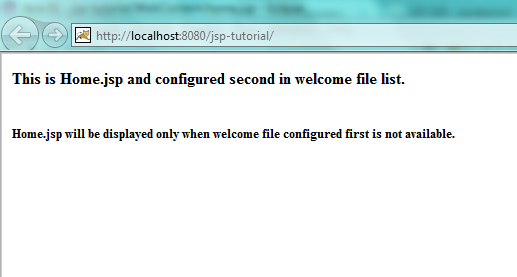
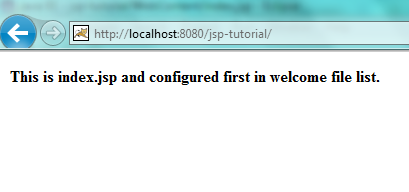
Since index.jsp is not available but home.jsp is available it is displayed. Now add index.jsp under WebContent directory and see the results.
Index.jsp
<html>
  <head>
    <title> Index Page </title>
  </head>
  <body>
    <H4> This is index.jsp and configured first in welcome file list. </H4>
    <br/>
  </body>
</html>
Result – This time it displays index.jsp
6.8 Context Parameters Example
To see context parameters in action, add context parameter in web.xml file reside under WEB-INF directory.
<context-param>
 <param-name>Context Param 1</param-name>
 <param-value>Context Param 1 Value </param-value>
</context-param>
Now add contextParam.jsp file under WebContent directory.
<html>
  <head>
    <title> Context Param JSP </title>
  </head>
  <body>
    <%
     out.println(application.getInitParameter("Context Param 1"));
    %>
  </body>
</html>
Now deploy the web application and access contextParam.jsp using http://localhost:8080/jsp-tutorial/contextParam.jsp.

Out and application are the implicit variables which we will discuss in coming chapters.