Introduction:
- The chapter will explain the interceptor “debugging” in Struts 2 with an example program.
debugging Interceptor:
- The debugging interceptor is used to visualize the values of variables and functions while debugging of web application.
- Just like in C and C++ (we normally use F7 key), we can put watch on variables value by debugging operation.
- The debugging interceptor is used to watch the applications data members for basic 3 modes:
- XML
- Console
- Command
- Console and command mode can be used to keep watch on OGNL expressions of application. XML is used viewing variables value for generalized purpose.
- In our web application, we debugging the values of variables through XML debugging interceptor. To make debugging enabled, we should use the “hidden” element of struts tag library inside our form tag.
- The syntax for the same is:
<s:hidden name = “debug” value = “browser”/>
- So the first.jsp can be coded as:
// first.jsp
<%--
Document : first
Created on : Nov 20, 2014, 12:34:17 PM
Author : Admin
--%>
<%@page contentType = "text/html" pageEncoding = "UTF-8"%>
<%@taglib prefix = "s" uri = "/struts-tags" %>
<!DOCTYPE html>
<html>
<head>
<meta http-equiv = "Content-Type" content = "text/html; charset = UTF-8">
<title> Library Application </title>
</head>
<body>
<s:form action = "click" method = "get">
<s:hidden name = "debug" value = "browser"> </s:hidden>
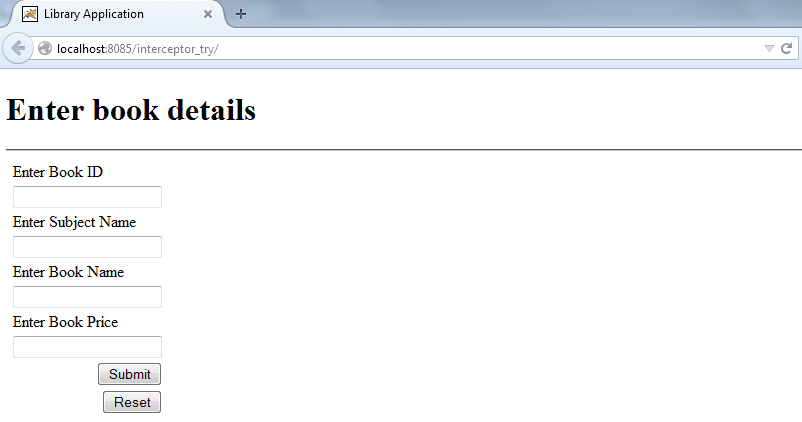
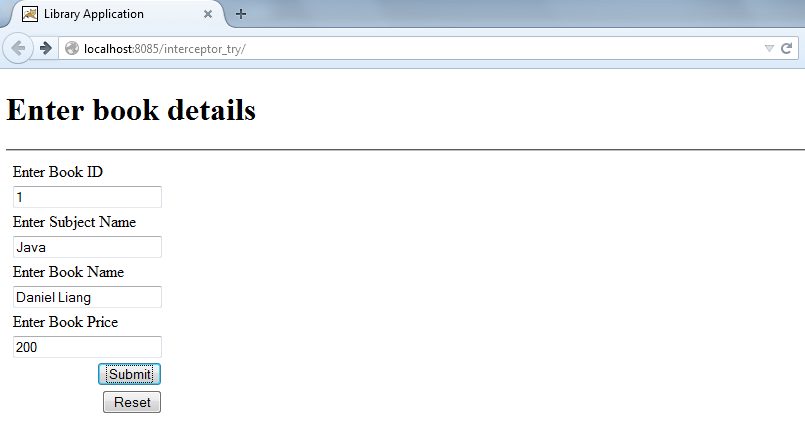
<h1> Enter book details </h1>
<hr/>
<s:label value = "Enter Book ID"/> <s:textfield name = "bid"/>
<s:label value = "Enter Subject Name"/> <s:textfield name = "sname"/>
<s:label value = "Enter Book Name"/> <s:textfield name = "bname"/>
<s:label value = "Enter Book Price"/> <s:textfield name = "bprice"/>
<s:submit name = "SUBMIT"/>
<s:reset name = "RESET"/>
</s:form>
</body>
</html>
- The next.jsp will display the values of fields from first.jsp. Also, now as we have enabled “debug” mode, we should be able to view the XML page of the entered details.
- So, next.jsp can be written as follows:
//next.jsp
<%--
    Document   : next
    Created on : Nov 20, 2014, 12:50:20 PM
    Author     : Admin
--%>

<%@page contentType = "text/html" pageEncoding = "UTF-8"%>
<%@taglib prefix = "s" uri = "/struts-tags" %>
<!DOCTYPE html>
<html>
    <head>
        <meta http-equiv = "Content-Type" content = "text/html; charset = UTF-8">
        <title> Book Details Page </title>
    </head>
    <body>

      <h1> Book Details are: </h1>
      <hr/>
      <h4>

       <s:label value = "Book ID : "/> <s:property value = "bid"/>
       <s:label value = "Subject Name : "/> <s:property value = "sname"/>
       <s:label value = "Book Name : "/> <s:property value = "bname"/>
       <s:label value = "Book Price : "/> <s:property value = "bprice"/>
     </h4>

   </body>
</html>
- The action class will only contain getter setter methods of all the variables used in our first.jsp. So Myaciton1.java will be coded as:
// Myaction_1.java

/*
 * To change this license header, choose License Headers in Project Properties.
 * To change this template file, choose Tools | Templates
 * and open the template in the editor.
 */

package action_class;

import com.opensymphony.xwork2.ActionSupport;
import java.util.Map;
import org.apache.struts2.interceptor.CookiesAware;

/**
 *
 * @author Admin
 */
public class Myaction_1 extends ActionSupport
{
    private int bid, bprice;
    private String bname, sname;
    public int getBid()
    {
        return bid;
    }
    public int getBprice()
    {
        return bprice;
    }
    public String getBname()
    {
        return bname;
    }
    public String getSname()
    {
        return sname;
    }
    public void setBid(int bid)
    {
        this.bid = bid;
    }
    public void setBprice(int bprice)
    {
        this.bprice = bprice;
    }
    public void setBname(String bname)
    {
        this.bname = bname;
    }
    public void setSname(String sname)
    {
       this.sname = sname;
    }
    public String execute()
    {
        return SUCCESS;
    }
}
- Now to combine our JSP’s with action class, we need to configure our struts.xml.
//struts.xml

<!DOCTYPE struts PUBLIC
"-//Apache Software Foundation//DTD Struts Configuration 2.0//EN"
"http://struts.apache.org/dtds/struts-2.0.dtd">
<struts>
 <constant name = "devMode" value = "true"/>
  <package name = "default" namespace = "/" extends = "struts-default">
     <action name = "click" class = "action_class.Myaction_1">
       <interceptor-ref name = "debugging"/>
       <result name = "success"> jsp/next.jsp </result>
     </action>
  </package>
</struts>
- The debugging interceptor given under action element with following syntax:
<action name = "Name of Action" class = "Name of action class">
<interceptor-ref name = "debugging"/>
</action>
- In addition to “debugging” interceptor, we also need to enable the development mode of our application. This can be done by,
<constant name = "devMode" value = "true"/>
- The default setting for devMode is always false because the end user is not allowed to see the development mode.
- And the web.xml can be given as:
//web.xml
<?xml version = "1.0" encoding = "UTF-8"?>
<web-app version = "3.1" xmlns = "http://xmlns.jcp.org/xml/ns/javaee" xmlns:xsi = "http://www.w3.org/2001/XMLSchema-instance" xsi:schemaLocation = "http://xmlns.jcp.org/xml/ns/javaee http://xmlns.jcp.org/xml/ns/javaee/web-app_3_1.xsd">
    <filter>
        <filter-name> struts2 </filter-name>
        <filter-class> org.apache.struts2.dispatcher.FilterDispatcher </filter-class>
    </filter>
    <filter-mapping>
        <filter-name> struts2 </filter-name>
        <url-pattern> /* </url-pattern>
    </filter-mapping>
    <session-config>
        <session-timeout>
            30
        </session-timeout>
    </session-config>
    <welcome-file-list>
        <welcome-file> jsp/first.jsp </welcome-file>
    </welcome-file-list>
</web-app>
- So the application will run as follows: