JUnit is used to automate unit and regression testing. Some advantages of using automated JUnit tests are:
- efficient verification of bug fixes
- reduces bad fixes
- consistent overview and analysis of test results
- increases productivity and system quality
- allocates more time to design better tests
9.1 Running JUnit with Ant and Maven
Install Apache Ant 1.9 version by downloading it from http://ant.apache.org/bindownload.cgi.
Set ANT_HOME classpath variable for Ant. Set the location for the ant folder, for example:
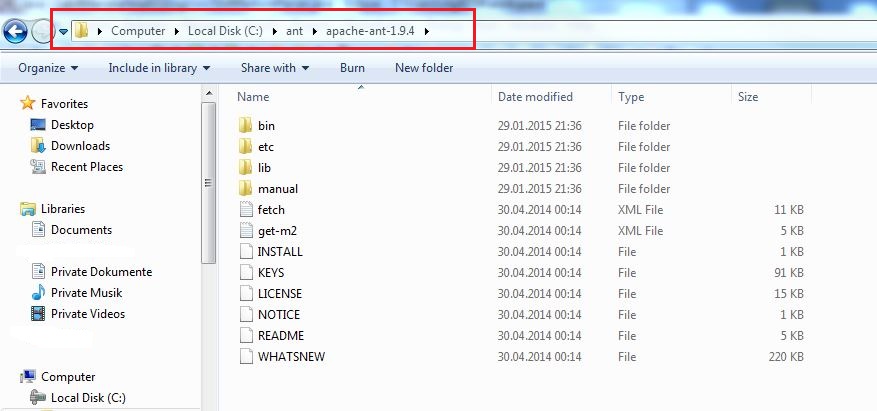
Set the environment variable:

Add to the path:
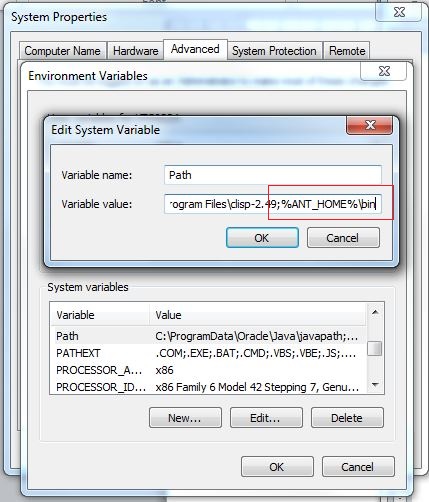
Check if the installation is successful with ant –version command in command line tool:

Create a new Dynamic Web Java project in Eclipse:

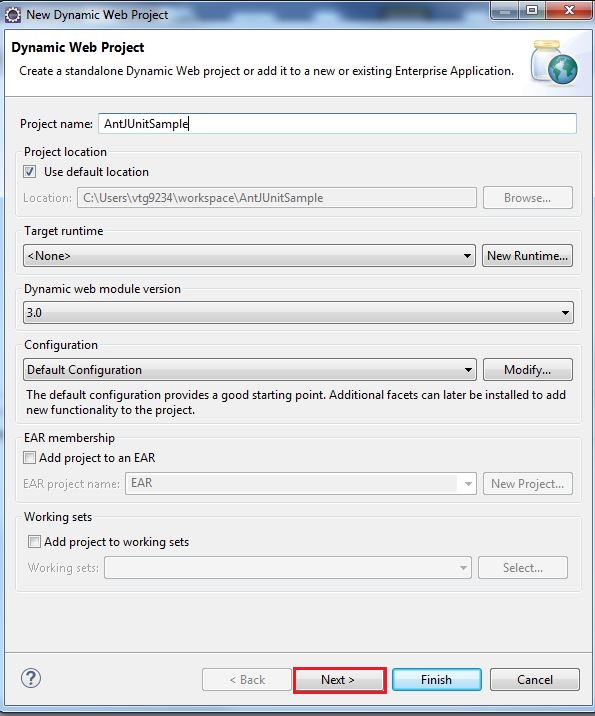
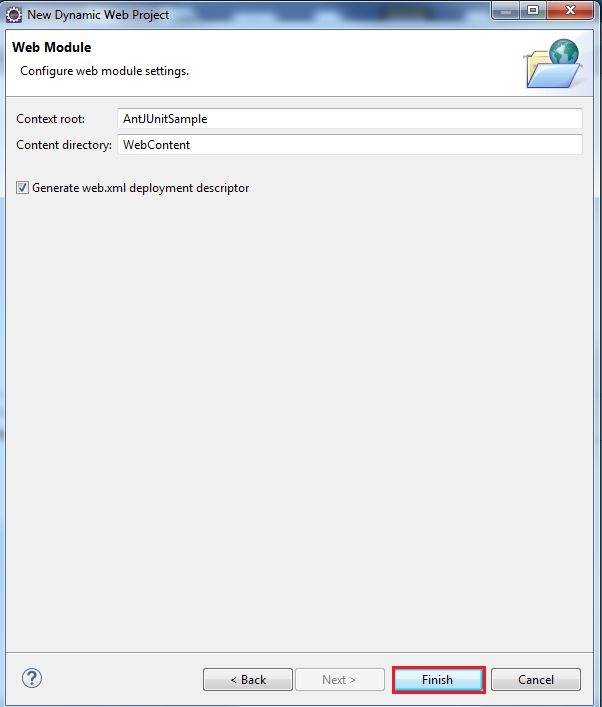
The JUnit library should be added to the project classpath. Right click on the project >Java BuildPath > Add libraries
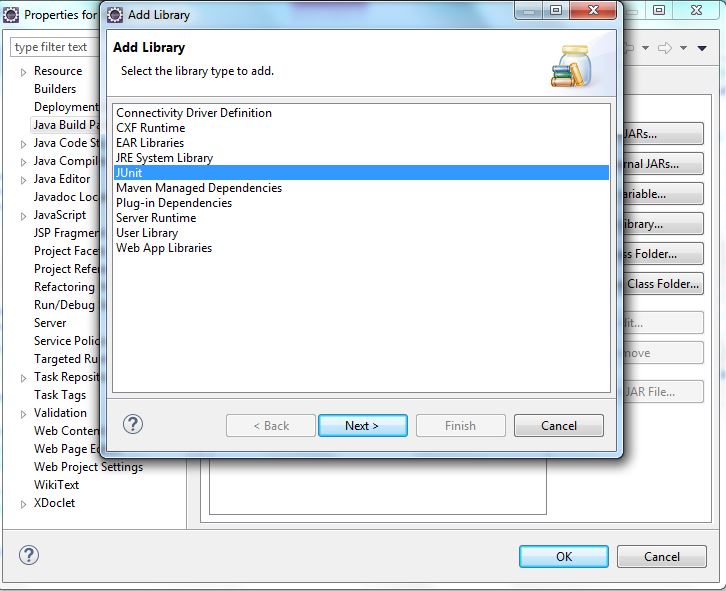
Ant 1.7 version no longer requires having junit.jar in Ant's startup classpath even if ant-junit.jar is present there.
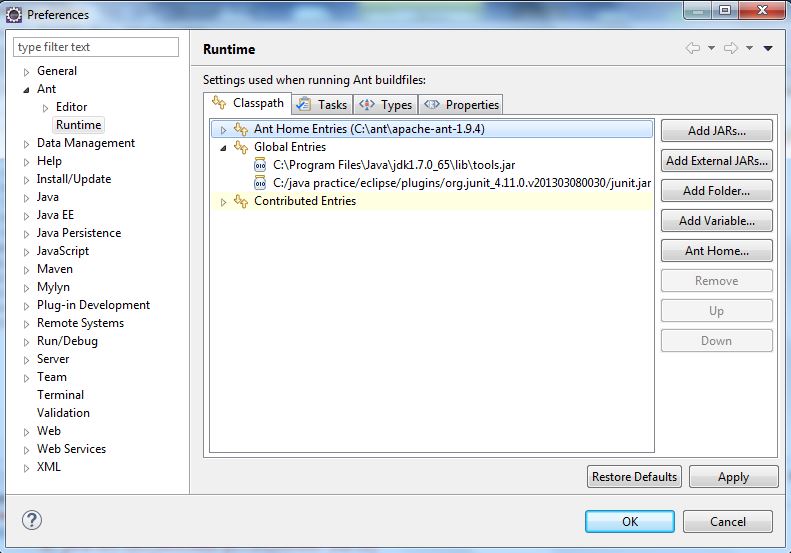
Add ANT_HOME directory and junit jar in Window > Preferences> Ant > Runtime > Ant Home Entries and Global entries:
Create a test class:
import static org.junit.Assert.*;

import org.junit.Test;

public class MyUnitTest {

    @Test
    public void mytest()
    {
        assertTrue("TestExample",true);
    }
}
In order to build the Java project by executing the Ant script we need to create the Ant build script manually. We have to follow the next steps:
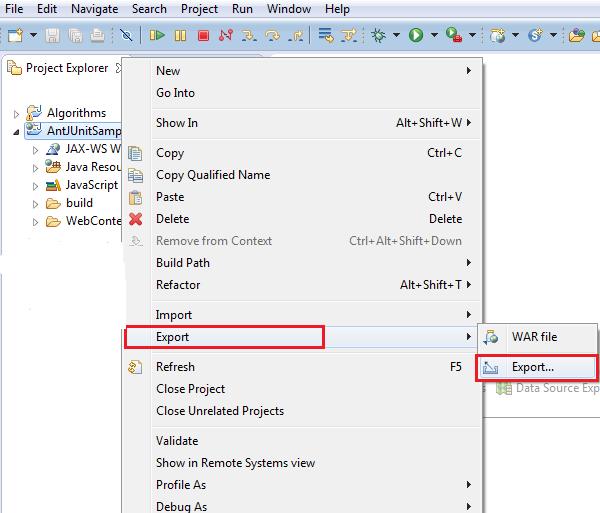
Select File > Export or right click on the project name and click Export > Export:
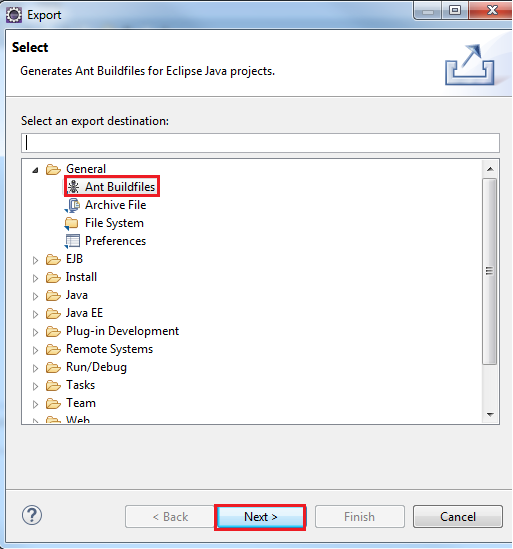
Select General > Ant Buildfiles:
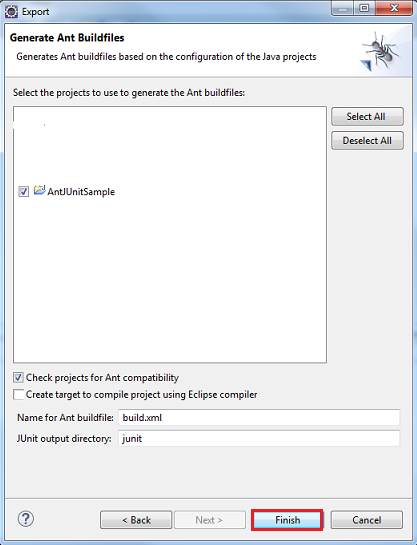
Select the project name in the next window Generate Ant Buildfiles. Leave the name of the build file as default. Uncheck the field Create target to compile project using Eclipse compiler.
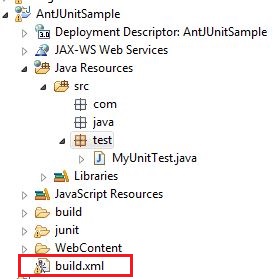
The build.xml file will be generated under the project directory as follows:
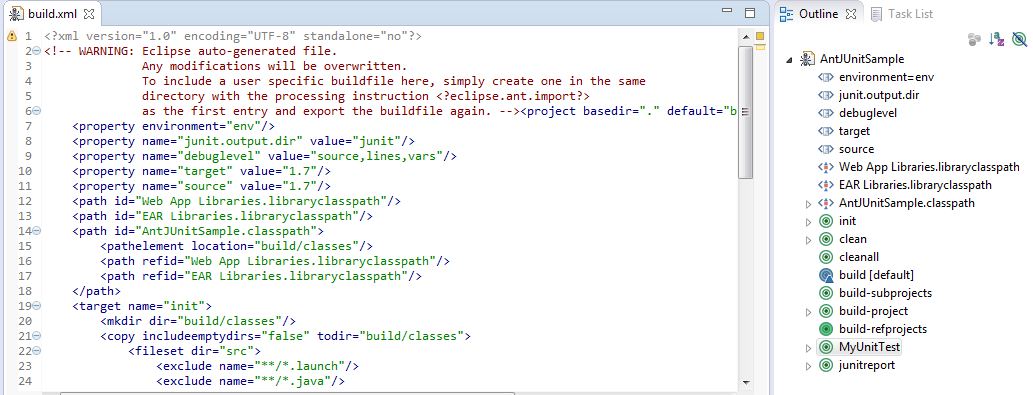
Double click on the buld.xml file to open its content in the Ant Editor of Eclipse:
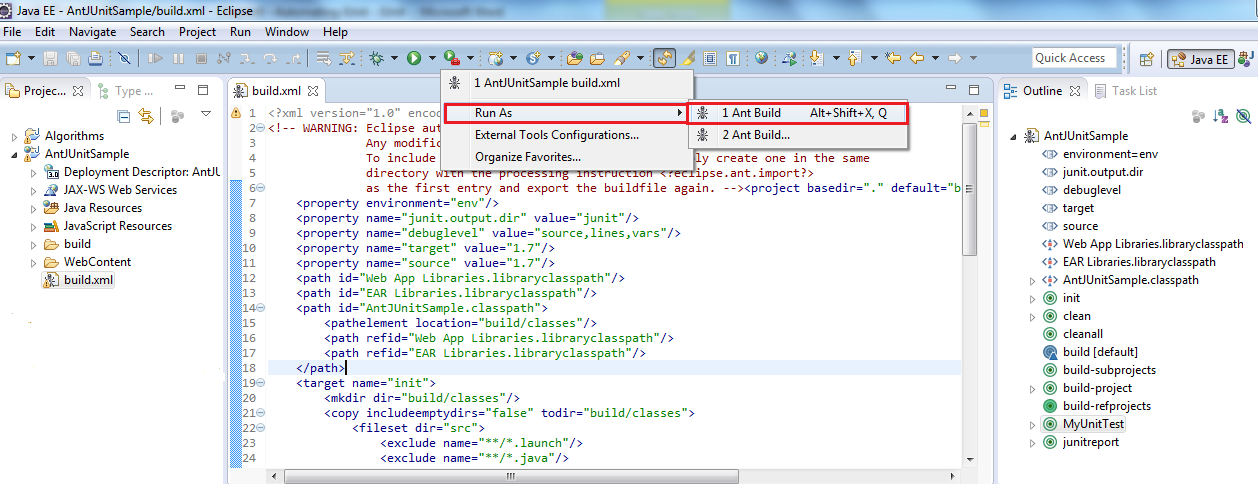
In External Tools Configuration (Targets) the tasks can be selected or ordered:
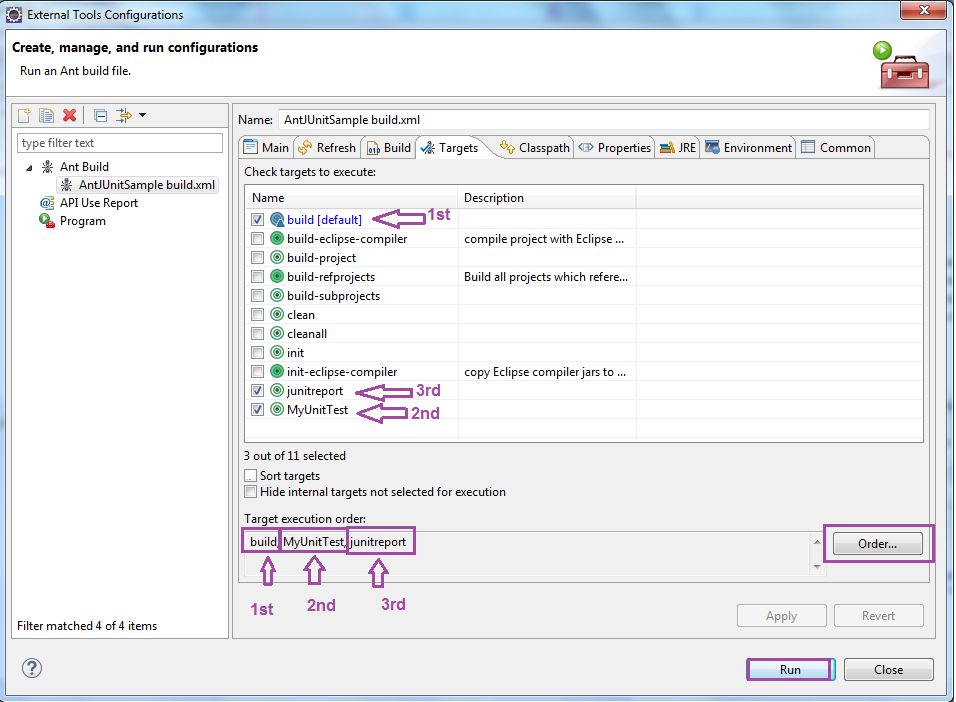
The result in the console is:
Buildfile: C:\Users\vtg9234\workspace\AntJUnitSample\build.xml |
Open a web report in browser – index.html generated in junit folder and look at the generated report:
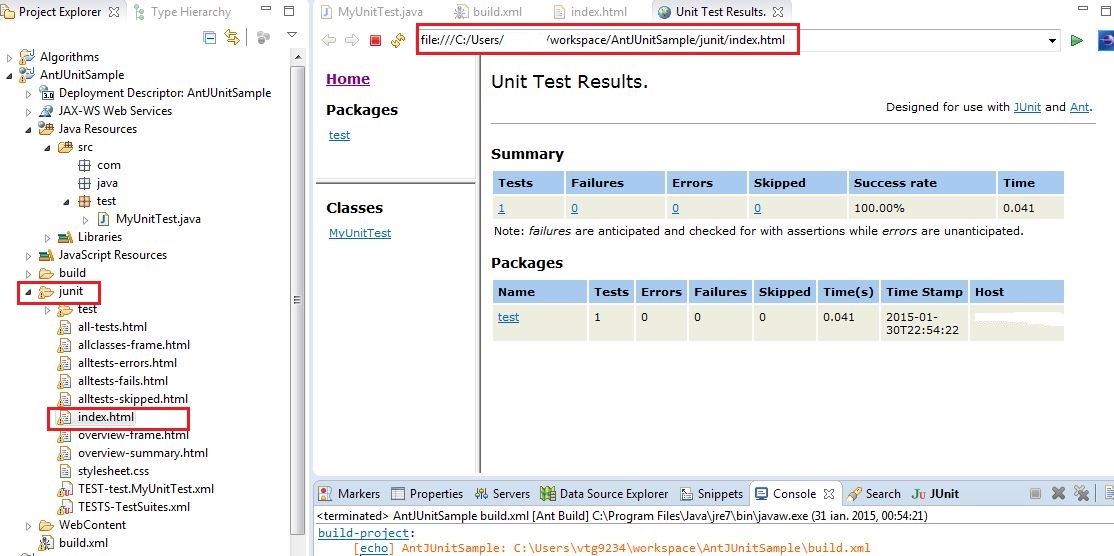
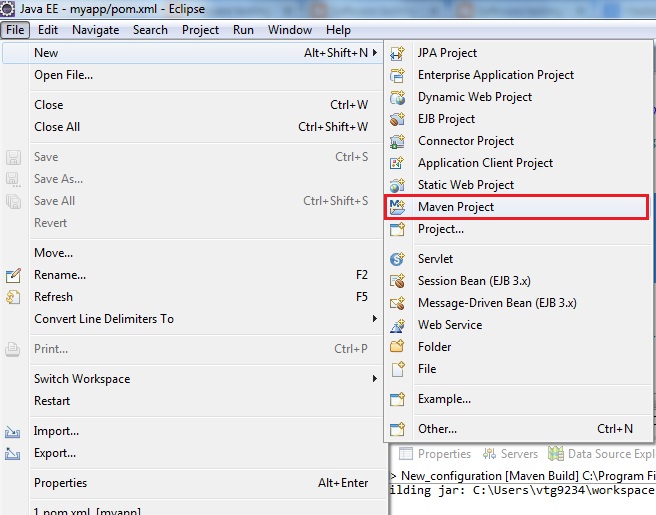
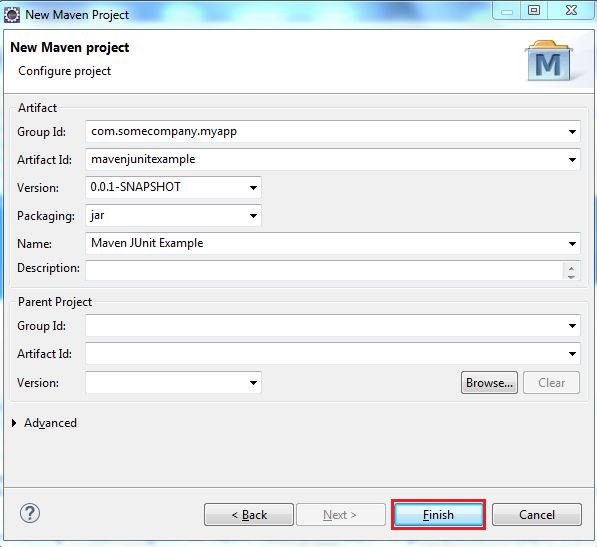
If we want to try to run in Eclipse JUnit tests with Maven we have to create a Maven Project:
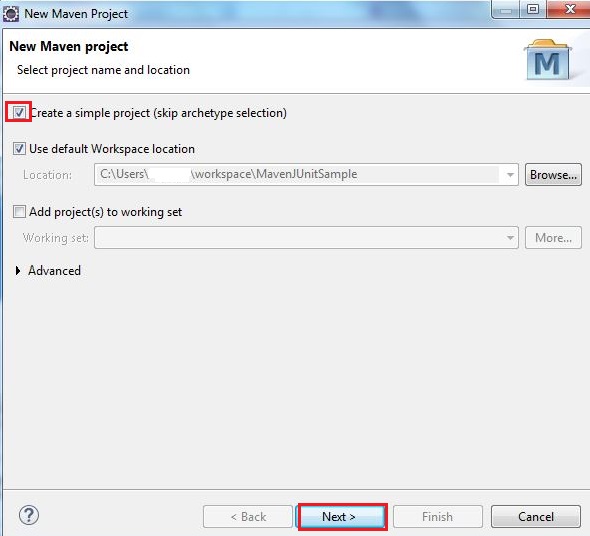
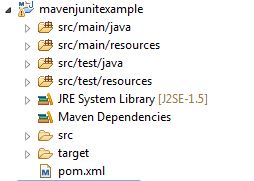
The project will have the following structure:
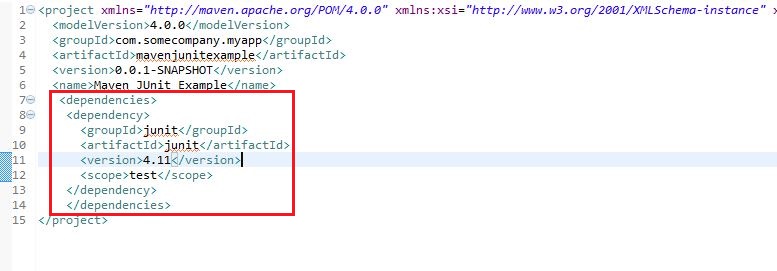
Add the same test class as in the example with Ant. Add Junit library in pom.xml
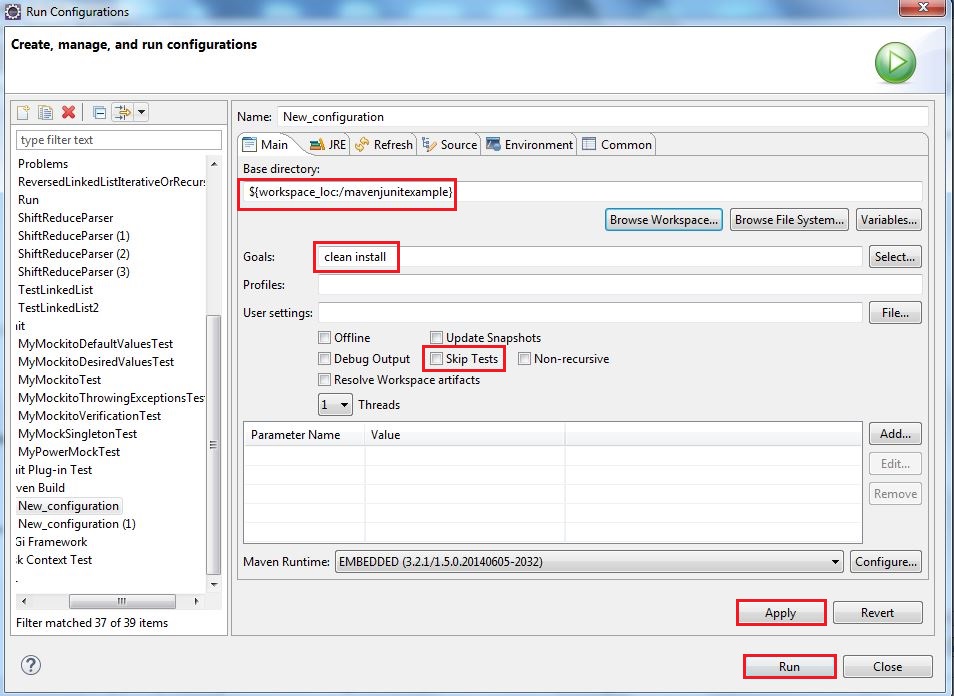
Then try to build the project without checking the option Skip tests.
The result from the console is:
[INFO] Scanning for projects...
[INFO] Compiling 1 source file to C:\Users\vtg9234\workspace\mavenjunitexample\target\test-classes ------------------------------------------------------- Results : Tests run: 1, Failures: 0, Errors: 0, Skipped: 0 [INFO] |
9.2 JUnit extensions
JUnit has been extended at the more frameworks. Some of these frameworks are:
Cactus
JWebUnit
XMLUNit
MockObject
Cactus
Cactus is a simple test framework for unit testing server-side applications – Servlets, Ejb, etc. The scope of Cactus is to simplify and decrease the cost of writing tests. Cactus is projected as a container and the tests are executed inside this container.
Cactus extends JUnit and provide three specific junit.framework.TestCase subclasses:
org.apache.cactus.ServletTestCase
org.apache.cactus.JspTestCase
org.apache.cactus.FilterTestCase
import org.apache.cactus.*;
Import junit. framework. *;

    public class TestSampleServlet extends ServletTestCase {
       @Test
       public void testServlet() {
          // Instantiate class to test
          ExampleServlet exampleservlet = new ExampleServlet();

          // Set a variable in session as the someMethod()
          // method that we are testing
          session.setAttribute("name", "value");

          // Call the method to test, passing an
          // HttpServletRequest object
          String result = servlet.someMethod(request);

          // Perform verification that test was successful
          assertEquals("some result", result);
          assertEquals("some Value", session.getAttribute("some Name"));
       }
}
Cactus was previously hosted by Jakarta but was retired due to the lack of development community.
JWebUnit
JWebUnit is a Java- based testing framework for web applications. It binds the testing frameworks HtmlUnit and Selenium.
JWebUnit operates on the top of JUnit. The test case class is JUnit4 Test Case.
import junit.framework.TestCase;
import net.sourceforge.jwebunit.WebTestCase;

public class SampleWebTestCase extends WebTestCase {


    public static void main(String[] args){
        junit.textui.TestRunner.run(new TestSuite(JWebUnitTest.class));
    }
     //set base url
    public void setUp() throws Exception {

        getTestContext().setBaseUrl("http://www.google.com");
        getTestContext().setProxyName("proxy.host.com");
        getTestContext().setProxyPort(80);
    }
   // test base info
   @Test
   public void testSearchWord() {
              beginAt("/");
       assertFormElementPresent("r");
       setFormElement("r", "searchValue");
       submit("buttonG");
       assertLinkPresentWithText(searchLink);
               clickLinkWithText(searchLink);
   }
}
