
HTML5 adds a number of new attributes and we have already seen many of them while discussing the new input types. We will see a few more attributes in this section. These attributes make the elements more useful.
autofocus
The autofocus attribute can be used to focus to an element when the page loads. It is a boolean attribute, that is you do not have to set any value to this attribute.
Sample Code:
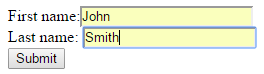
<!DOCTYPE html>
<html>
 <head>
  <title>Autofocus Example</title>
 </head>
 <body>
  <form action="#">
    First name:<input type="text" name="fname" autofocus><br>
    Last name: <input type="text" name="lname"><br>
    <input type="submit">
  </form>
 </body>
</html>
You could find that the first name field is focused in this example.
autocomplete
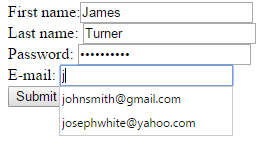
The autocomplete attribute can be used to on or off the autocomplete feature of form input elements and <form> element. If autocomplete is on, browser automatically completes values based on the previous entries. This attribute works with <form> as well as with input types text, email, url, tel, password, text, range, date and color. By making autocomplete on for the <form>, all the input fields will have autocomplete on. Even the autocomplete is on for <form>, you can make it off for any of the input fields if you want.
Sample Code:
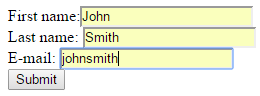
<!DOCTYPE html>
 <html>
  <head>
    <title>Autocomplete Example</title>
  </head>
  <body>
   <form action="#" autocomplete="on">
     First name:<input type="text" name="fname"><br>
     Last name: <input type="text" name="lname"><br>
     Password: <input type="password" name="password" autocomplete="off"><br>
     E-mail: <input type="email" name="email"><br>
     <input type="submit">
   </form>
  </body>
</html>
Try entering values once and then after refreshing the form, repeat the same. If you try to enter a value that starts with the same letter that you entered before, then you will see that value in a suggestion box as in Google suggest (given below).
novalidate
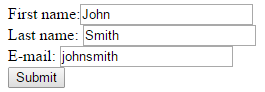
The novalidate attribute can be used with <form> element if you do not want the form data to be validated when submitted.
Sample Code:
<!DOCTYPE html>
<html>
 <head>
  <title>Novalidate Example</title>
 </head>
 <body>
   <form action="#" novalidate>
    First name:<input type="text" name="fname" autofocus><br>
    Last name: <input type="text" name="lname"><br>
    E-mail: <input type="email" name="email"><br>
    <input type="submit">
   </form>
 </body>
</html>
Here, even if you do not enter the email address in correct format, you will not find any validation message. This is because we have added novalidate attribute. You could see the form and also the URL after clicking the Submit button below.

form
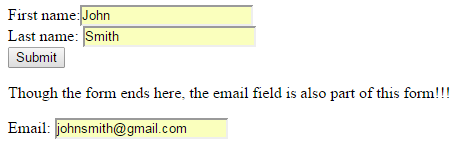
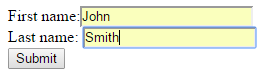
The form attribute can be used to associate any orphaned form control with any <form> on the page. You can specify one or more forms an input element belongs to. You just have to specify the form ids separated using whitespace.
Sample Code:
<!DOCTYPE html>
 <html>
  <head>
   <title>Form Example</title>
  </head>
  <body>
   <form action="#" id="myform">
     First name:<input type="text" name="fname" autofocus><br>
     Last name: <input type="text" name="lname"><br>
     <input type="submit">
    </form>
      <p>Though the form ends here, the email field is also part of this form!!!</p>
       Email: <input type="email" name="email" form="myform">
  </body>
 </html>
After clicking the Submit button, if you check the URL, you could find the email value also there.
formaction
The formaction attribute can be used to override the action attribute of the <form> element and to specify the URL of a file that will process the input control when the form is submitted. You can use formaction attribute with input types submit and image.
Sample Code:
<!DOCTYPE html>
 <html>
  <head>
    <title>FormAction Example</title>
  </head>
  <body>
    <form action="http://abctest.com/process.php" id="myform">
      First name:<input type="text" name="fname" autofocus><br>
      Last name: <input type="text" name="lname"><br>
      <input type="submit" formaction="http://xyz.com/admincheck.asp">
     </form>
  </body>
</html>
After clicking the Submit button, if you check the URL, you could find that the form is sent to xyz.com/admicheck.asp (though it does not actually exist) and not to abctest.com/process.php.

formmethod
The formmethod attribute can be used to override the method attribute of the <form> element and to specify the HTTP method for sending form data to the action URL when the form is submitted. You can use formmethod attribute with input types submit and image.
Sample Code:
<!DOCTYPE html>
 <html>
  <head>
   <title>FormMethod Example</title>
  </head>
  <body>
   <form action="http://abctest.com/process.php" method="get">
      First name:<input type="text" name="fname" autofocus><br>
      Last name: <input type="text" name="lname"><br>
      <input type="submit" formmethod="post">
   </form>
  </body>
</html>
After clicking the Submit button, if you check the URL, you could not find any query string with form data as we have added the formaction attribute with value post.

formenctype
The formenctype attribute can be used to override the enctype attribute of the <form> element and to specify how the form data should be encoded when submitting to the server using POST method. You can use this attribute with input types submit and image. The value you can set to this attribute is application/x-www-form-urlencoded (default), multipart/form-data (no encoding) or text/plain.
Sample Code:
<!DOCTYPE html>
 <html>
  <head>
   <title>FormEnctype Example</title>
  </head>
  <body>
   <form action="#" enctype="text/plain">
     First name:<input type="text" name="fname" autofocus><br>
     Last name: <input type="text" name="lname"><br>
     E-mail: <input type="email" name="email"><br>
     <input type="submit" formenctype="application/x-www-form-urlencoded">
   </form>
  </body>
</html>
You will get the encrypted data here.
formnovalidate
The formnovalidate attribute can be used to override the novalidate attribute of the <form> element. You can use formnovalidate attribute with input type submit.
Sample Code:
<!DOCTYPE html>
<html>
 <head>
  <title>FormNoValidate Example</title>
 </head>
 <body>
  <form action="#">
     First name:<input type="text" name="fname" autofocus><br>
     Last name: <input type="text" name="lname"><br>
     E-mail: <input type="email" name="email"><br>
     <input type="submit" formnovalidate>
  </form>
 </body>
</html>
Here, you will be allowed to click the Submit button even if you do not enter the email address in the correct format.
formtarget
The formtarget attribute can be used to override the target attribute of the <form> element and to specify where to display the form response. You can use formtarget attribute with input types submit and image. The value you can set to this attribute is _blank, _self, _parent or _top.
Sample Code:
<!DOCTYPE html>
 <html>
  <head>
   <title>FormTarget Example</title>
  </head>
  <body>
    <form action="#">
      First name:<input type="text" name="fname" autofocus><br>
      Last name: <input type="text" name="lname"><br>
      E-mail: <input type="email" name="email"><br>
      <input type="submit" formtarget="_blank">
    </form>
  </body>
</html>
Once you click the Submit button, a new page will be opened as the value of formtarget is _blank.
height and width
You can use the height and width attributes to specify the height and width of an <input> element and these attributes are only used with input type image.
Sample Code:
<!DOCTYPE html>
 <html>
  <head>
   <title>Height and Width</title>
  </head>
  <body>
    <form action="#" enctype="text/plain">
     <input type="image" src="baby.jpg" alt="baby" width="200" height="200"><br />
     <input type="submit">
    </form>
  </body>
</html>
Output:

multiple
You can use the multiple attribute if you want to allow the user to enter more than one value in the input field. It is a boolean attribute and can be used with email and file input types.
Sample Code:
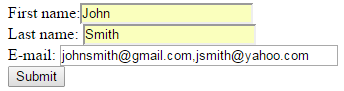
<!DOCTYPE html>
 <html>
  <head>
   <title>Multiple Attribute</title>
  </head>
  <body>
   <form action="#">
     First name:<input type="text" name="fname"><br>
     Last name: <input type="text" name="lname"><br>
     E-mail: <input type="email" name="email" size="35" multiple><br>
     <input type="submit">
   </form>
  </body>
</html>
Try entering more than one email address separated by a comma in the email field and click the Submit button. Check the URL to find all the email addresses you entered there.

placeholder
You can use the placeholder attribute if you want to add a hint that describes the expected value of an input field. You can use this attribute with text, search, email, url, password and tel input types.
Sample Code:
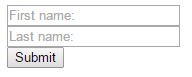
<!DOCTYPE html>
 <html>
  <head>
   <title>Placeholder Attribute</title>
  </head>
  <body>
    <form action="#">
      <input type="text" name="fname" placeholder="First name:"><br />
      <input type="text" name="lname" placeholder="Last name:"><br />
      <input type="submit">
    </form>
  </body>
</html>
Output:
Already Discussed Attributes
We have already seen a number of new HTML5 attributes while discussing new input types. They are:
list: to specify a <datalist> element that contains pre-defined options for an <input> element. We have used the list attribute with the email input type.
min and max: to specify the minimum and maximum allowed values for an <input> element. You can add the min and max attributes with the number, range, date, datetime, month, time and week input types. We have used the list attribute with the number input type.
pattern: to specify a regular expression that the data is checked against. You can add the pattern attribute with text, password, email, url, search and tel input types. We have used the pattern attribute with the tel input type.
step: to specify the allowed number intervals for an <input> element. You can use the step attribute with the number, date, datetime, week, month, time and range input types. We have used the step attribute with the range input type.
required: to specify that the <input> element must be filled before submitting the form. This is a boolean attribute and you can use this with text, search, url, tel, email, password, date pickers, number, checkbox, radio, and file input types. We have used the required attribute with the search input type.
Summary
In this section, we have seen a number of new attributes that can be used with different HTML5 elements. We discussed attributes such as autocomplete, autofocus, novalidate, form, formaction, formenctype, formmethod, formnovalidate, formtarget, multiple, placeholder, height and width to make form validation and coding lot easier. We also had a look at the attributes that were already discussed with the new input types.