
As most of you who are Eclipse users will know, you can easily organize your views around in each perspective to make yourself comfortable with development related tasks. As an Eclipse user the first thing you do when you launch eclipse application is to select a perspective which is most suitable for the job in hand. In this chapter we will create a new perspective which will open up Resource manager view when selected. Since our plug-in is very small with only one view, creating a perspective for the purpose of opening up single view might look overburden. However, in real world Plug-in applications Views can grow real big in terms of number, so creating a perspective and managing views become almost a necessity.
What is a Perspective?
A perspective is useful in organizing various eclipse views around the editor area, these are also helpful in managing menus and toolbars We can save perspectives and these can be switched to in future. As an eclipse plugin developer we can either create a new perspective from scratch or enhance existing perspective. Enhancing existing perspective essentially means to accommodate your view in an existing perspective for example: we can add our resource manager view to existing Resource perspective, so that it opens up when ever user selects resource perspective.
Eclipse comes with many inbuilt perspectives (Some of them are listed below):
Resource - This perspective shows various workspace resources irrespective of file extension.
Java/Java Browsing - This is useful for Java development
Debug - This is useful for debugging Java Applications.
Plug-in Development - This is useful while developing Eclipse Plugin Applications
The following figure shows how Java Browsing perspective looks like. Notice how different views Projects view, Packages view etc. are organized in screen below. So the whole purpose of creating perspective can be to organize your screens according to ease of use.
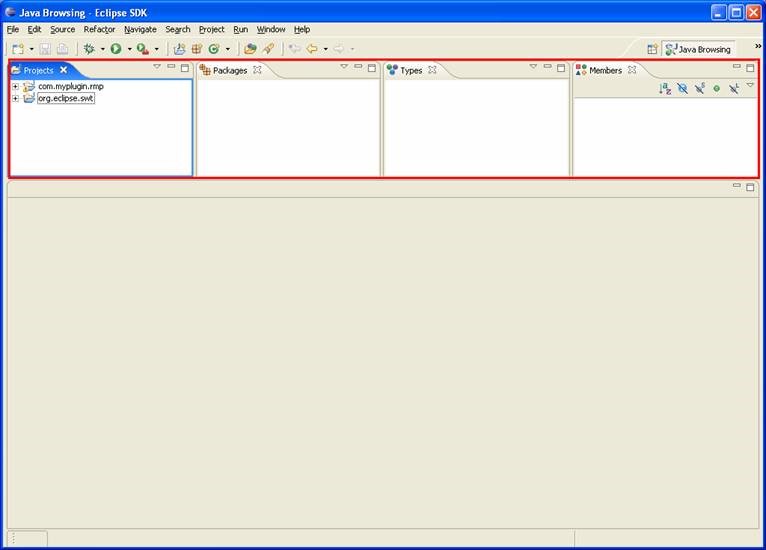
Figure 4-1
Creating a Perspective
We can create a new perspective by extending the org.eclipse.ui.perspectives extension point.
Perspective extension point
In order to create perspective, open the Resource Manager’s Eclipse plugin manifest editor, Now select the Extensions tab. In Extensions tab click the Add button. Now select org.eclipse.ui.perspectives from the list in the New Extension wizard. Click the Finish button.

Figure 4-2
Again go to the Extensions page in the plug-in manifest editor, open mouse right click context menu on the org.eclipse.ui.perspectives extension followed by selecting New > perspective. This will add a new perspective called “com.myplugin.rmp.perspective1”. Modify properties on right side as shown in the figure below.
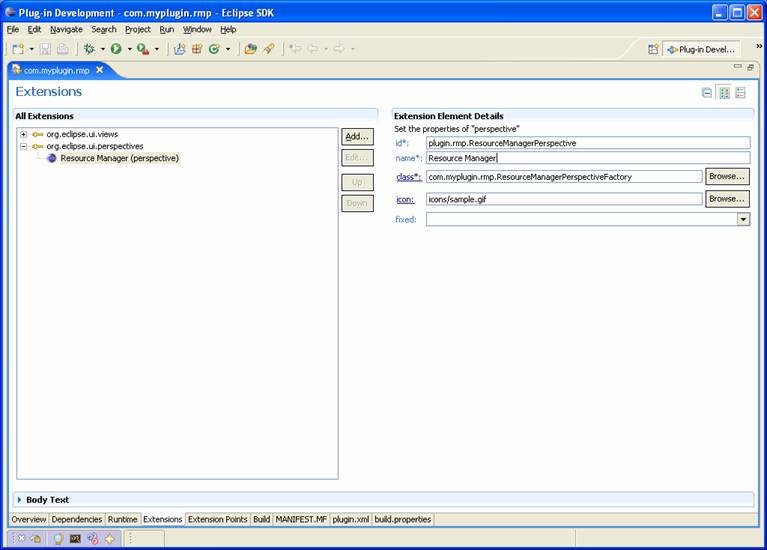
Figure 4-3
Perspective factories
Now we will create perspective factory which will be used to define the layout of our newly created perspective Click on the "class" link on the right side of the class property and use Java Attribute Editor to create a new class.
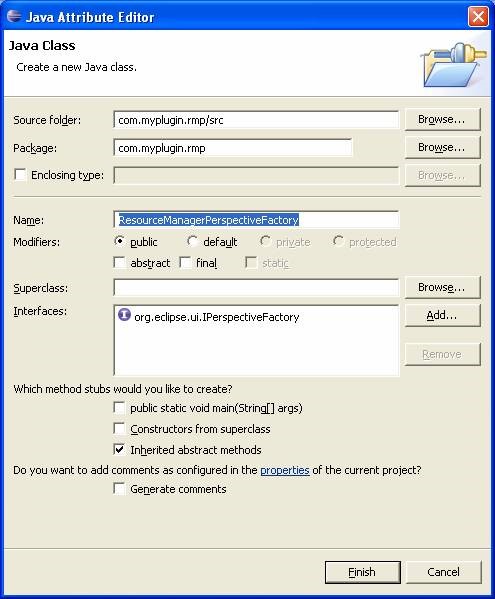
Figure 4-4
Open the ResourceManagerPerspectiveFactory class and modify it as follows so that the Resource Manager view will appear below the editor area and the standard Outline view will be shown to its left.
package com.myplugin.rmp;
import org.eclipse.ui.IPerspectiveFactory;
import org.eclipse.ui.IPageLayout;
import org.eclipse.ui.IFolderLayout;

public class ResourceManagerPerspectiveFactory implements IPerspectiveFactory {

    private static final String VIEW_ID =
        "com.myplugin.rmp.views.ResourceManagerView";

    private static final String BOTTOM = "bottom";

    public void createInitialLayout(IPageLayout myLayout) {

       public void createInitialLayout(IPageLayout myLayout) {

       myLayout.addView(IPageLayout.ID_OUTLINE,IPageLayout.LEFT,0.30f,
                              myLayout.getEditorArea());

       IFolderLayout bot = myLayout.createFolder(BOTTOM,IPageLayout.BOTTOM,0.76f,
                              myLayout.getEditorArea());
       bot.addView(VIEW_ID);
    }
}
Let’s test the new Perspective
Open Manifest editor if not already open. Select Overview tab > Launch an eclipse application. It will launch separate eclipse application.
Open our new perspective from Window > Open Perspective > Other (as shown below)
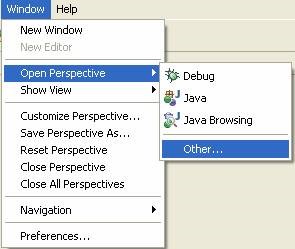
Figure 4-5
This will open up Select Perspective dialog (as shown below)
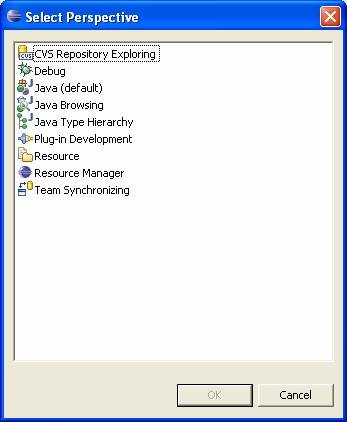
Figure 4-6
Select Resource Manager perspective and click ok button. This will switch the perspective to our newly created perspective as shown below
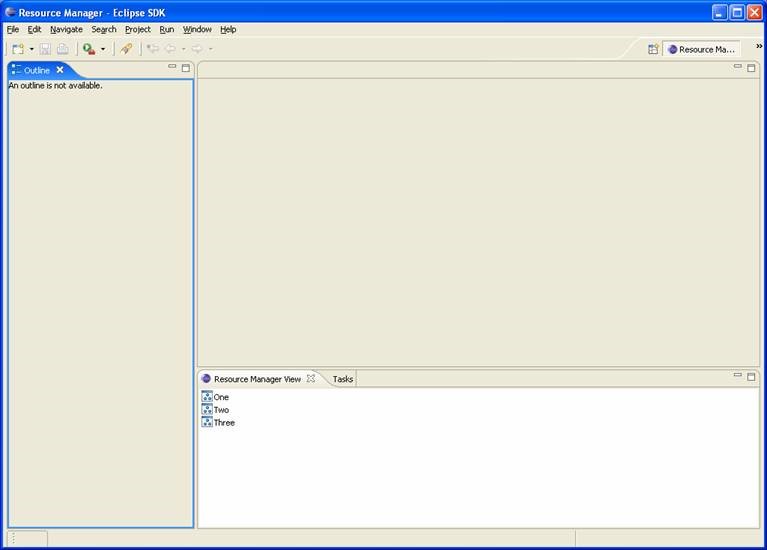
Figure 4-7
Enhancing an already existing Perspective
As discussed earlier, in addition to creating new perspective we can also use already existing perspectives and add our views to it. For example we may want to open Resource Manager view whenever Java Perspective or Resource Perspective is opened up. In this section we will discuss how to enhance an existing perspective such that it accommodates our view in its existing view arrangement.
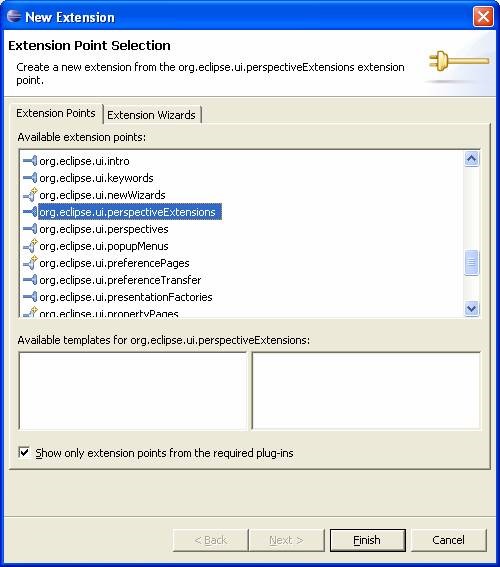
First, open the Resource Manager’s plug-in manifest editor, Next, click on the Extensions tab followed by clicking the "Add" button. Now select org.eclipse.ui.perspectiveExtensions (as shown below) from the list extension points. Next, Click the Finish button.
Figure 4-8
Next, again go to the Extensions page of manifest editor, Open right click context menu on the org.eclipse.ui.perspectiveExtensions. Select New > perspectiveExtension. This will add a perspective extension named “com.myplugin.rmp.perspectiveExtension1”. Modify Properties as shown in the figure below.
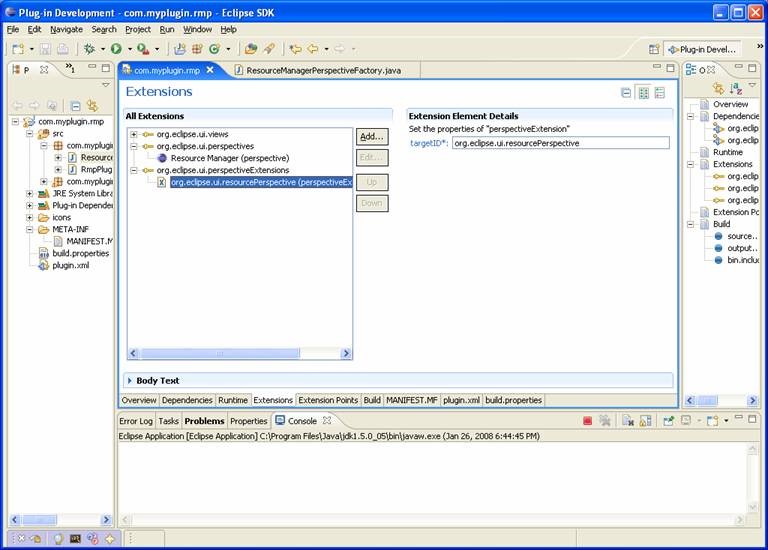
Figure 4-9
On the Extensions page, click on the org.eclipse.ui.resourcePerspective extension and select New > view. Modify Extension element details as shown in figure below.
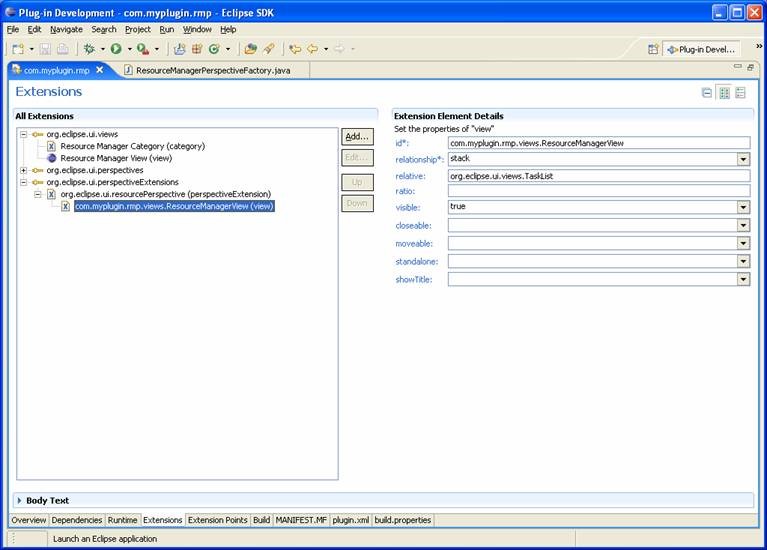
Figure 4-10
Let’s test the Resource Perspective
Open Manifest editor if not already open. Select Overview tab > Launch an eclipse application. It will launch separate eclipse application.
Open Resource Perspective and you will see that Resource Manager view is shown.
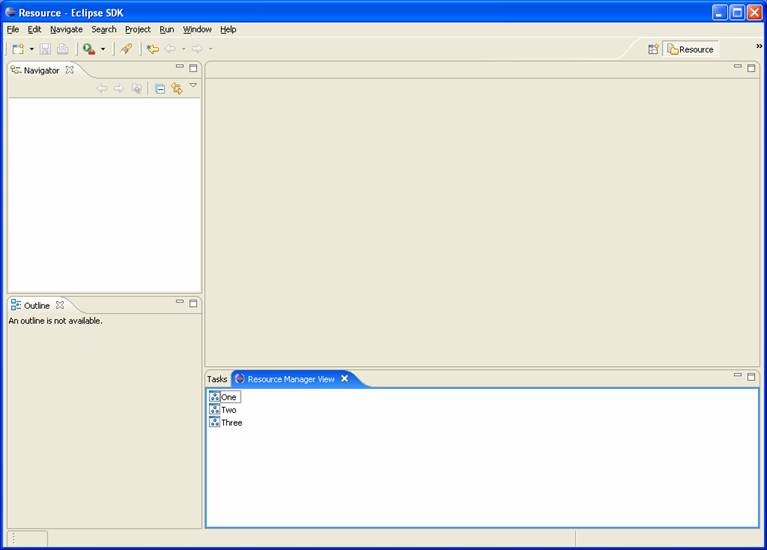
Figure 4-11