
2.1 Setting up Environment
We need to have the following tools to set up environment for creating a web service using JAX WS
- Eclipse
- Tomcat 6 or higher versions
- Jdk 5 or higher versions
Configuration
Setting up environment variables:
- JAVA_HOME: Set environment variable to the Java directory installed in the system (i.e. C:\Program Files\Java\jdk1.6.0_45)
- CATALINA_HOME: Set the path name for the to the Tomcat installed directory
(i.e. D:\Tomcat\apache-tomcat-7.0.47)
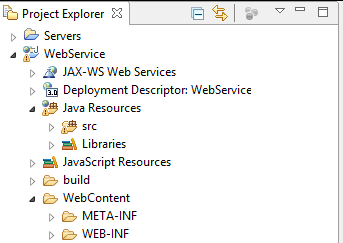
Create a Dynamic Web Application Project using Eclipse IDE. The structure of the created project is shown in fig 2-1 below:
2.2 Service Definition:
Service definition can be done with two different approaches. The two approaches are
1. Top-Down or Contract First Approach:
Top down approach is creating web services by starting WSDL first and generate Java classes from wsdl file
Example in real time implementation:
Web Service using Spring framework
Advantages:
1.Decoupling the logic implemented and we can change the logic if needed in future
2. Bottom-up or Code First
In the bottom up approach, the necessary Java classes are created first and we create service implementation
Example in real time implementation
Spring Web service framework uses code first approach
Service Definition is implemented using WSDL. We need to define a service URL, Service name and input and output details.
Advantages:
1. If the existing business logic to be exposed as a web service, the code first approach is preferred
- No need of skills related to XML, XSD and WSDL
- The learning curve is lesser than the Contract first
3. Meet in the middle:
This approach is also a familiar approach. Start with code first approach by creating Java classes and thereby generating wsdl files. Customize the generated wsdl file and add further functionalities in wsdl itself.
This approach has both the advantages from Code first and Contract first approaches
- Start the web service implementation without implementing XSD and WSDL creation. Simple Java skill set alone sufficient to start the implementation. Once the wsdl file is generated from this approach, further changes will be almost similar to the existing wsdl only
- Since further implementation will be added in wsdl itself, frequent change in the business logic can be changed quickly
2.3 Service Implementation :
We start implementing Contract First web service with adding customerInfo example
We will send id and name of the customer in the request and get the update status in the response.
Service Definition for CustomerInfo can be described in wsdl as below:
<?xml version="1.0" encoding="UTF-8" standalone="no"?>
<wsdl:definitions xmlns:soap="http://schemas.xmlsoap.org/wsdl/soap/" xmlns:tns="http://www.example.org/customerInfo/" xmlns:wsdl="http://schemas.xmlsoap.org/wsdl/" xmlns:xsd="http://www.w3.org/2001/XMLSchema" name="customerInfo" targetNamespace="http://www.example.org/customerInfo/">
  <wsdl:types>
   <xsd:schema targetNamespace="http://www.example.org/customerInfo/">
      <xsd:element name="addCustomerRequest">
        <xsd:complexType>
          <xsd:sequence>
            <xsd:element name="id" type="xsd:string"/>
             <xsd:element name="name" type="xsd:string"/>
          </xsd:sequence>
        </xsd:complexType>
      </xsd:element>
      <xsd:element name="addCustomerResponse">
        <xsd:complexType>
          <xsd:sequence>
            <xsd:element name="out" type="xsd:string"/>
          </xsd:sequence>
        </xsd:complexType>
      </xsd:element>
    </xsd:schema>
  </wsdl:types>
  <wsdl:message name="addCustomerRequest">
    <wsdl:part element="tns:addCustomerRequest" name="parameters"/>
  </wsdl:message>
  <wsdl:message name="addCustomerResponse">
    <wsdl:part element="tns:addCustomerResponse" name="parameters"/>
  </wsdl:message>
  <wsdl:portType name="customerInfo">
    <wsdl:operation name="AddCustomer">
      <wsdl:input message="tns:addCustomerRequest"/>
      <wsdl:output message="tns:addCustomerResponse"/>
    </wsdl:operation>
  </wsdl:portType>
  <wsdl:binding name="customerInfoSOAP" type="tns:customerInfo">
    <soap:binding style="document" transport="http://schemas.xmlsoap.org/soap/http"/>
    <wsdl:operation name="AddCustomer">
      <soap:operation soapAction="http://www.example.org/customerInfo/AddCustomer"/>
      <wsdl:input>
        <soap:body use="literal"/>
      </wsdl:input>
      <wsdl:output>
        <soap:body use="literal"/>
      </wsdl:output>
    </wsdl:operation>
  </wsdl:binding>
  <wsdl:service name="customerInfo">
    <wsdl:port binding="tns:customerInfoSOAP" name="customerInfoSOAP">
      <soap:address location="http://localhost:8080/WebService/services/customerInfoSOAP"/>
    </wsdl:port>
  </wsdl:service>
</wsdl:definitions>
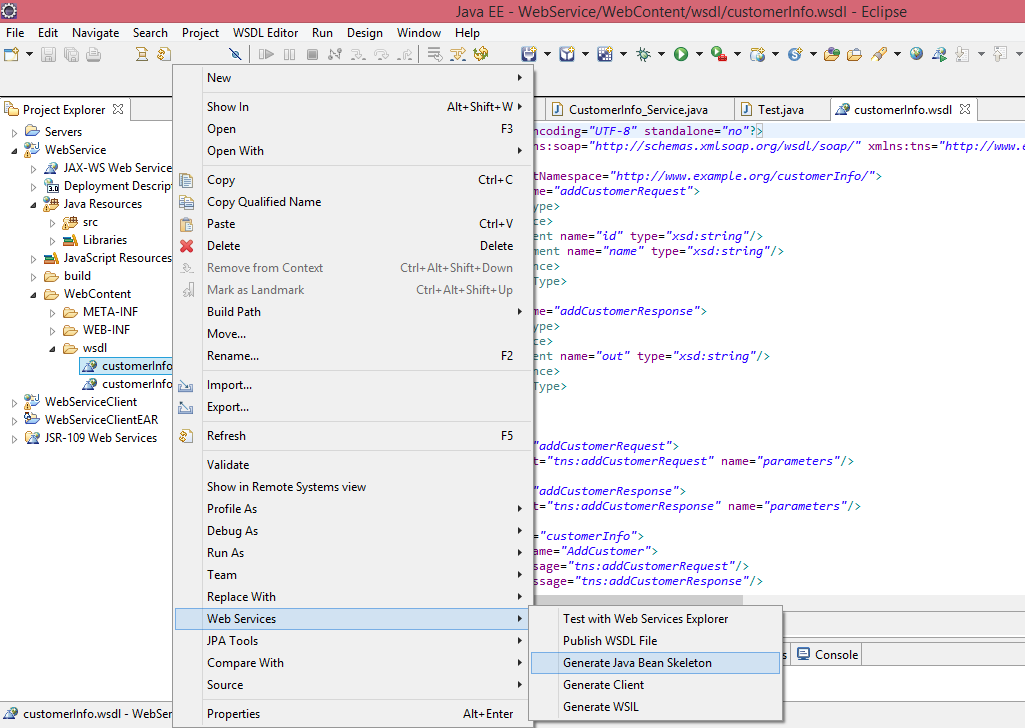
Create a wsdl file having the above content and we have used HTTP as transport protocol. To create the Web Service server side classes (Skeleton), right click on the wsdl file as shown in fig 2-2 :
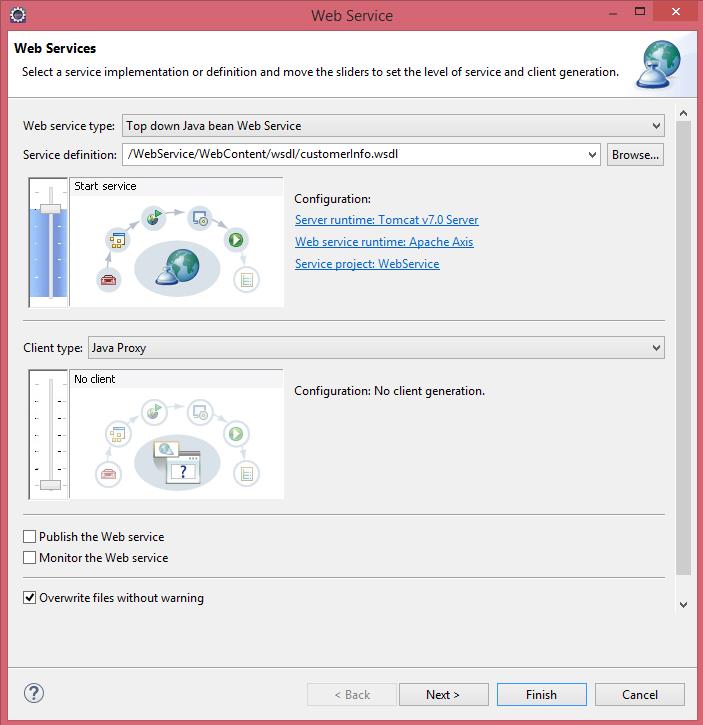
Leave the Web Service type and service definition as default in the next window as
After click on Finish button on the window, the default java artifacts classes are generated. The generated classes are shown in fig 2-4
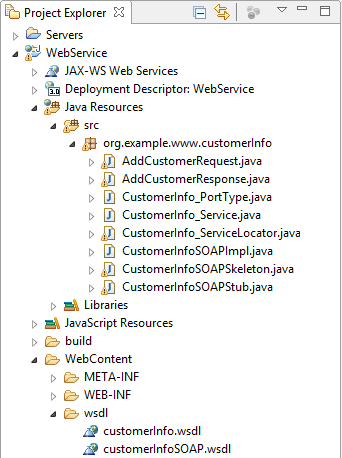
Overview of the generated classes:
1.CustomerInfoSOAPImpl.java
package org.example.www.customerInfo;
public class CustomerInfoSOAPImpl implements org.example.www.customerInfo.CustomerInfo_PortType{
     public org.example.www.customerInfo.AddCustomerResponse addCustomer(org.example.www.customerInfo.AddCustomerRequest parameters) throws java.ri.RemoteException {
                        return null;
    }
}
We modify this default class with the following content to return the response with data
package org.example.www.customerInfo;
public class CustomerInfoSOAPImpl implements org.example.www.customerInfo.CustomerInfo_PortType{
     public org.example.www.customerInfo.AddCustomerResponse addCustomer(org.example.www.customerInfo.AddCustomerRequest custInfoRequest) throws java.rmi.RemoteException {
            AddCustomerResponse resp = new AddCustomerResponse();
            if(custInfoRequest.getId()
                   .equalsIgnoreCase("1234"))
                    resp.setOut("hi hi");
               else
                resp.setOut("bye bye");
            return resp;
      }
 }
2.4 Deployment
In our eample we use Tomcat server as web server. We place the generated war file for the service into CATALINA_HOME/web-aps directory. Since tomcat has the autodeploy option, the war file will be auto deployed once the server is started
After the web service is deployed into the server access the service using the below url:
http://localhost:8080/WebService/services/customerInfoSOAP?wsdl
we can see the entire wsdl file description in the browser
2.5 Service Testing
Soap UI
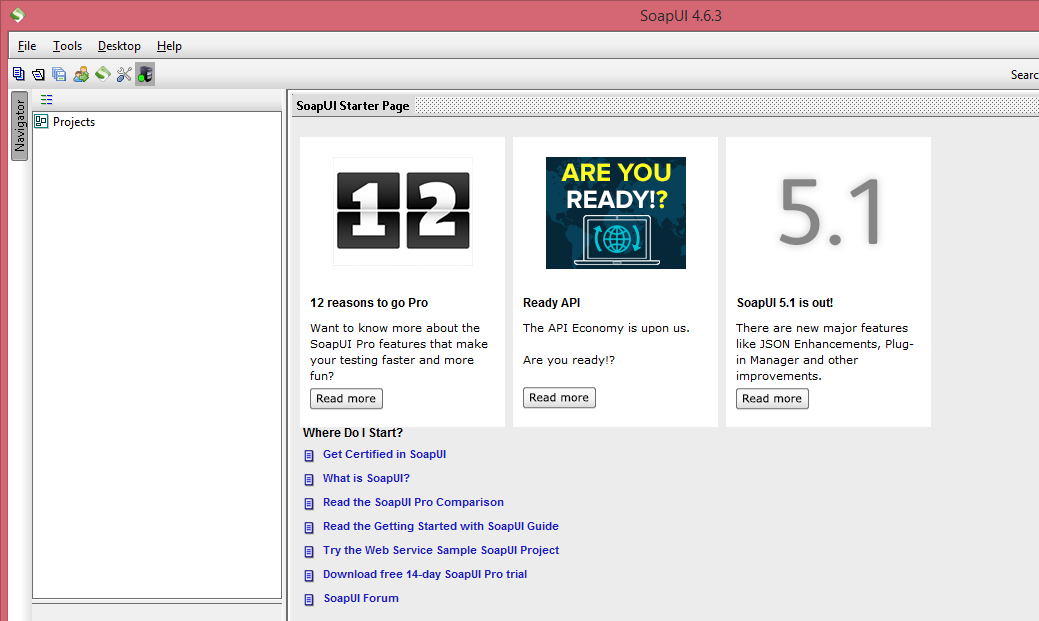
This tool helps to test the JAX WS Web services. If we know the wsdl file and endpoint url
The steps to test webservices using Soap UI tool:
Ensure the web service is deployed and running on the server
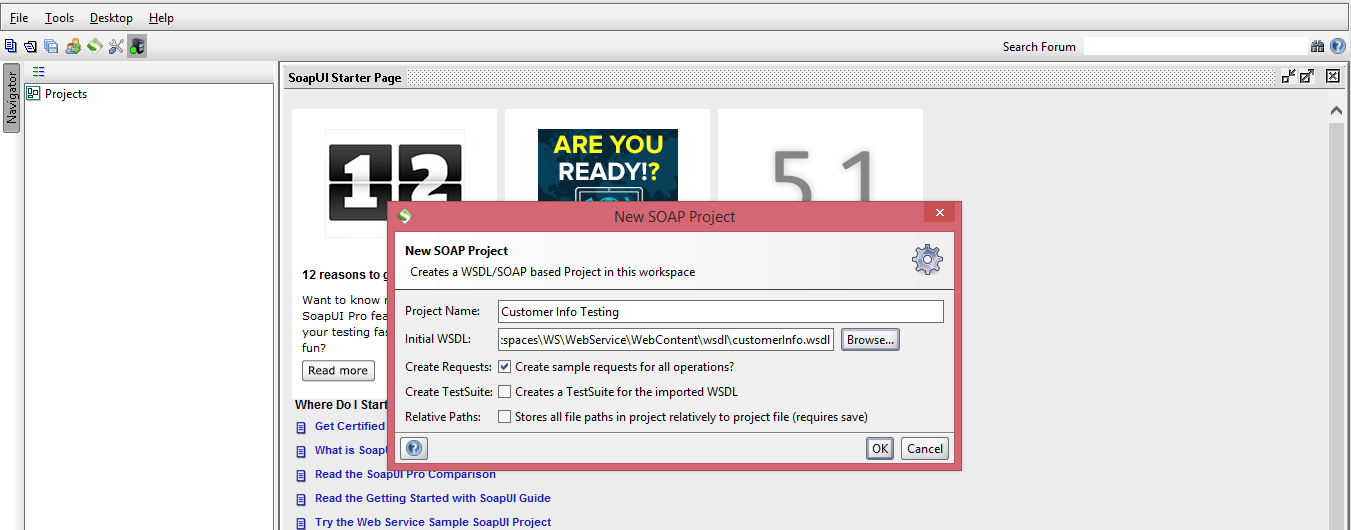
Create new Project from the File menu and selecting the wsdl file from the server location as shown in fig 2-6
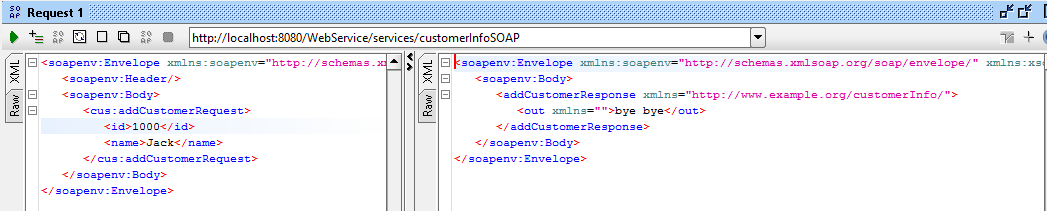
After creating the project, send the request through SOAPRequest
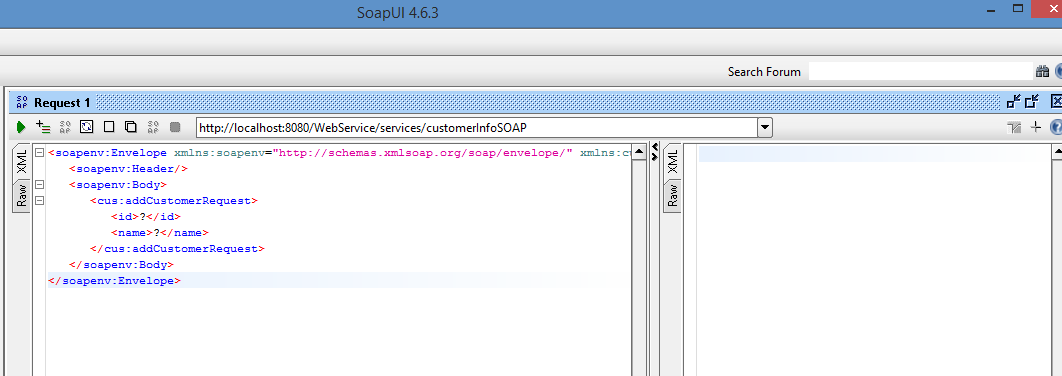
In the SOAP Request send id and name values as shown in fig 2-7
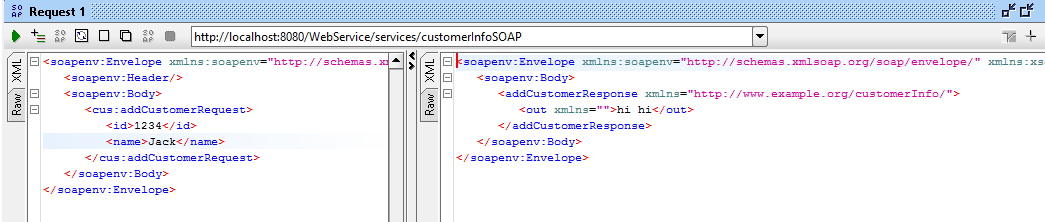
SOAP Response 1:
We got the response from the server for the correct input values as shown in Fig 2.8
Soap Request 2 and Soap Response 2: for wrong input values is shown in fig 2-9
2.6 Code first web service implementation
Code first Web services implementation is started from Java method and will be converted into web services using annotations. Frameworks like CXF or Axis 2 can be used to generate wsdl files from the Java implementation.
Web service implementation using CXF is explained in the following example:
CXF Framework:
CXF is an Apache implementation and it is called as Apache CXF. This is an open source web service framework and can be used for implementing web services for JAX WS and JAX RS requirements. CXF supports different protocols like SOAP, XML based HTTP, Restful HTTP and can be used for protocols like HTTP, JMS or JBI
More information about CXF and its downloads are available from http://cxf.apache.org/.
Example
Steps to implement code first web service:
- Create a maven project
- Define the dependency needed for CXF
- Define the Java implementation and CXF configuration
- Deploy the web service
- Web service testing
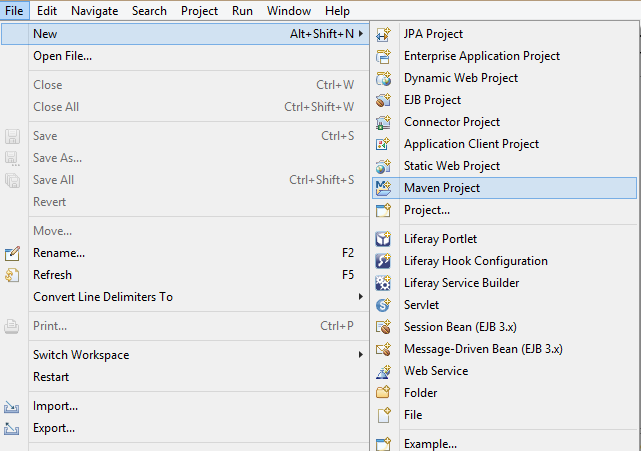
i. Create a Maven Project:
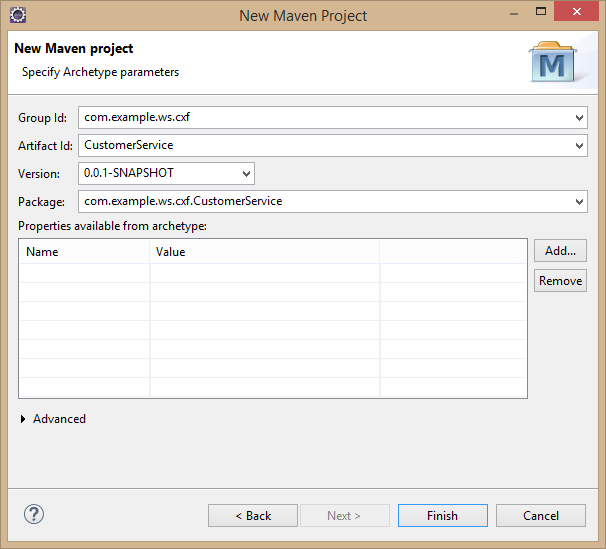
In eclipse IDE, select New Maven project as shown in fig 2.5.1
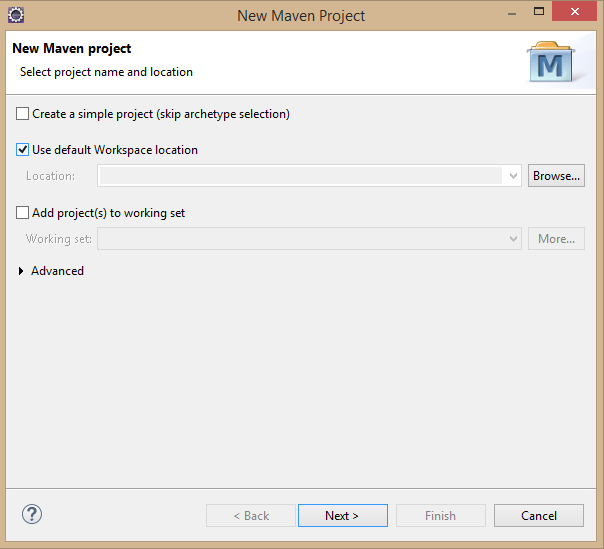
After click on Maven project, provide the details about the maven project in the pop up window
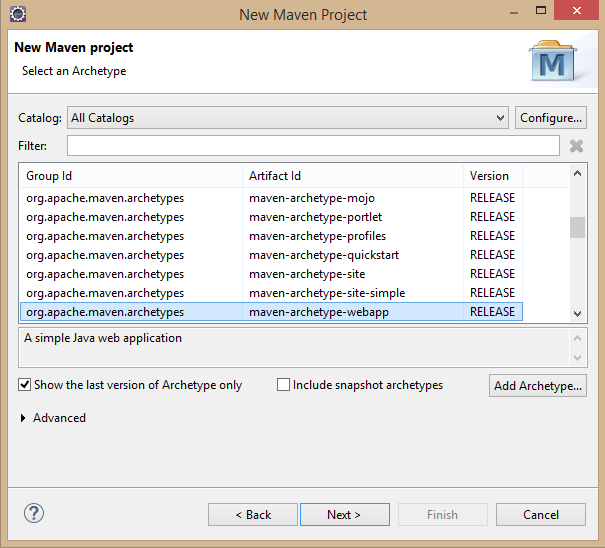
Click next on the window opened, select maven-archetype-web app and click Next
Provide Group Id, Artifact Id, version and Package information and click Finish
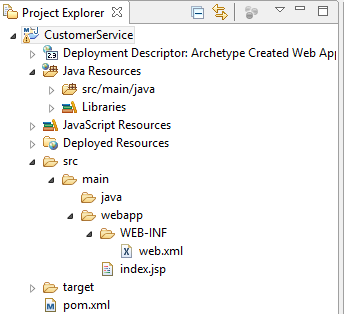
The maven project is created and the project structure is shown in fig 2.5.5
ii. Define the dependency needed for CXF
The default POM file generated in the project is shown in 2.5.6
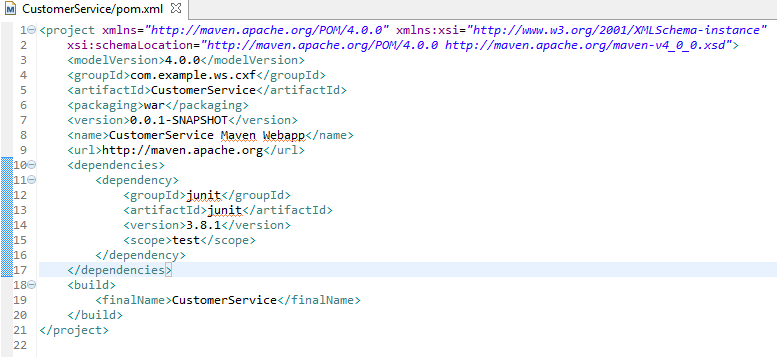
Add the following jars as a dependency in the POM file
a. Spring-core
b. Spring-web
c. Spring-context
d. cxf-rt-frontend-jaxws
e. Cxf-Rt-transports-http
III. Define the Java implementation and CXF configuration
Define the following Java implementation
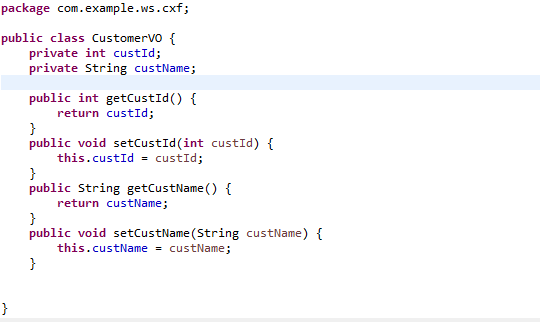
- Define POJO class for the model
Example
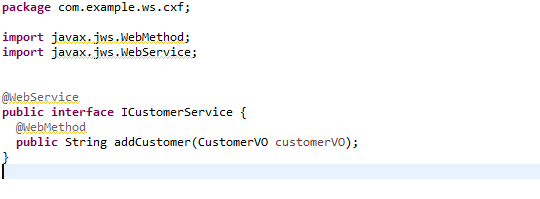
b. Declare methods in an Interface
Example: ICustomerService interface
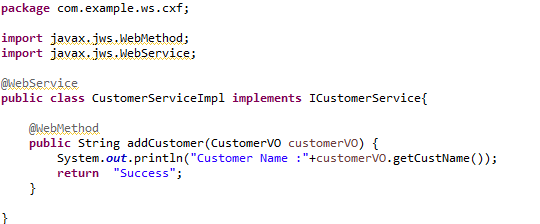
c. Provide class implementation for the interface
Example: CustomerserviceImpl
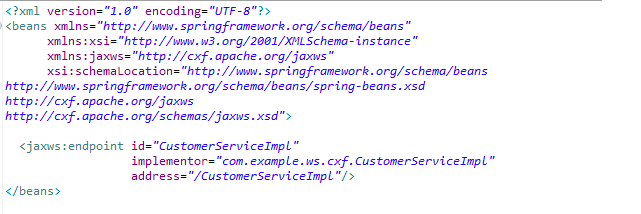
d. Define cxf bean declaration in xml file and declare this xml file in web.xml as shown in the fig 2.5.10
This config is used to define the endpoint implementation of the web service
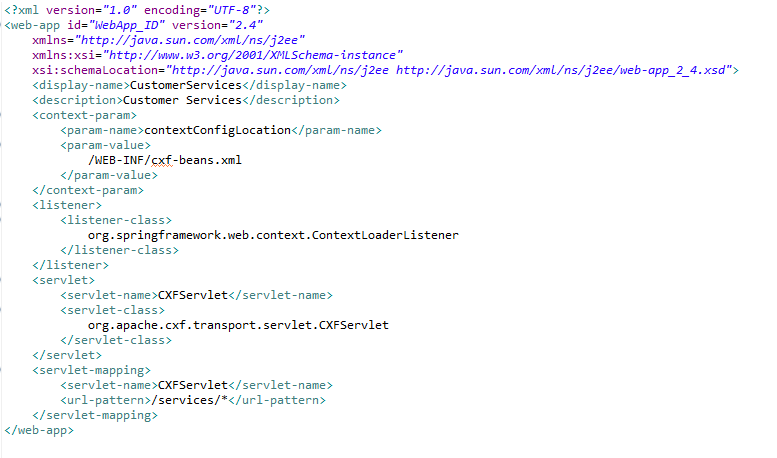
e. The listing of web.xml is shown in the fig 2.5.11
The correct configuration of web.xml also is very important. Here we configure the cxf-beans.xml, cxf servlet mapping and listener class. The cxf servlet is mapped to url pattern as services/*
IV. Deploy the web service
After completing java and other configurations build war file and deploy in any application server. We used Tomcat in the example.
Once the application is deployed successfully, open the browser with the following address: http://localhost:8080/CustomerService/services/
The page will display the details about the service and the link to get WSDL file

We can get the generated WSDL file by CXF by opening the link {http://cxf.ws.example/com/}CustomerServiceImplService and shown in Fig 2.5.13
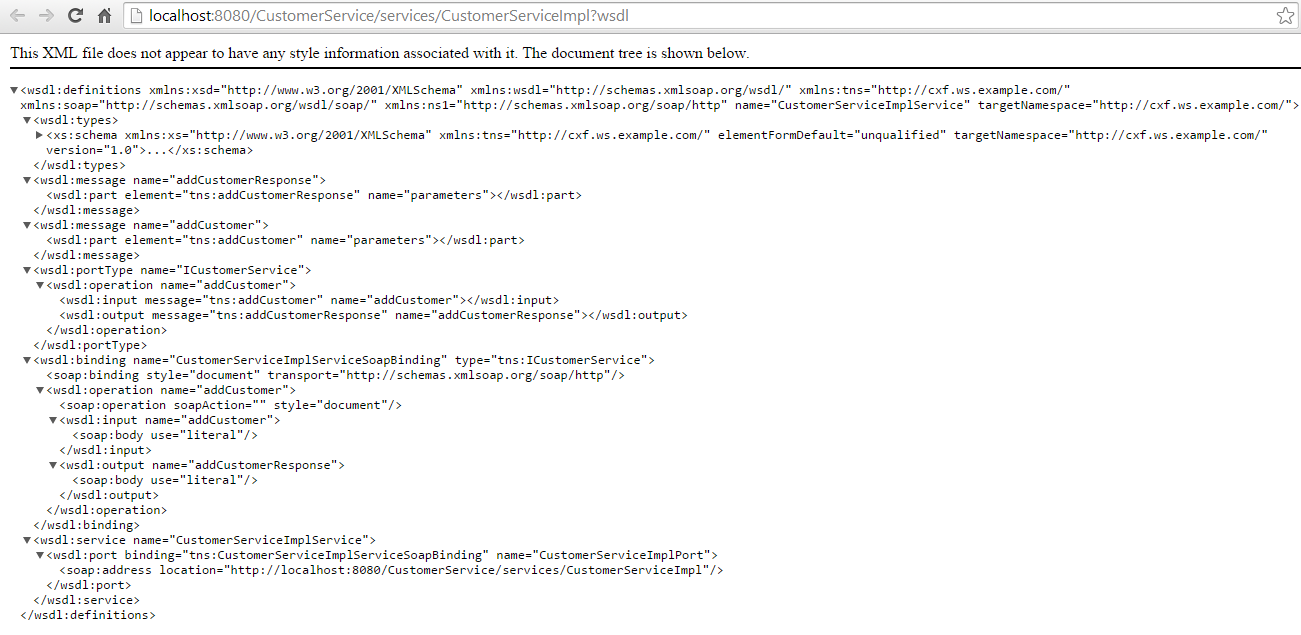
The complete listing about the generated wsdl as below:
<wsdl:definitions xmlns:xsd="http://www.w3.org/2001/XMLSchema" xmlns:wsdl="http://schemas.xmlsoap.org/wsdl/" xmlns:tns="http://cxf.ws.example.com/"xmlns:soap="http://schemas.xmlsoap.org/wsdl/soap/" xmlns:ns1="http://schemas.xmlsoap.org/soap/http" name="CustomerServiceImplService" targetNamespace="http://cxf.ws.example.com/">
<wsdl:types>
<xs:schema xmlns:xs="http://www.w3.org/2001/XMLSchema" xmlns:tns="http://cxf.ws.example.com/" elementFormDefault="unqualified" targetNamespace="http://cxf.ws.example.com/"version="1.0">
<xs:element name="addCustomer" type="tns:addCustomer"/>
<xs:element name="addCustomerResponse" type="tns:addCustomerResponse"/>
<xs:complexType name="addCustomer">
<xs:sequence>
<xs:element minOccurs="0" name="arg0" type="tns:customerVO"/>
</xs:sequence>a
</xs:complexType>
<xs:complexType name="customerVO">
<xs:sequence>
<xs:element name="custId" type="xs:int"/>
<xs:element minOccurs="0" name="custName" type="xs:string"/>
</xs:sequence>
</xs:complexType>
<xs:complexType name="addCustomerResponse">
<xs:sequence>
<xs:element minOccurs="0" name="return" type="xs:string"/>
</xs:sequence>
</xs:complexType>
</xs:schema>
</wsdl:types>
<wsdl:message name="addCustomerResponse">
<wsdl:part element="tns:addCustomerResponse" name="parameters"></wsdl:part>
</wsdl:message>
<wsdl:message name="addCustomer">
<wsdl:part element="tns:addCustomer" name="parameters"></wsdl:part>
</wsdl:message>
<wsdl:portType name="ICustomerService">
<wsdl:operation name="addCustomer">
<wsdl:input message="tns:addCustomer" name="addCustomer"></wsdl:input>
<wsdl:output message="tns:addCustomerResponse" name="addCustomerResponse"></wsdl:output>
</wsdl:operation>
</wsdl:portType>
<wsdl:binding name="CustomerServiceImplServiceSoapBinding" type="tns:ICustomerService">
<soap:binding style="document" transport="http://schemas.xmlsoap.org/soap/http"/>
<wsdl:operation name="addCustomer">
<soap:operation soapAction="" style="document"/>
<wsdl:input name="addCustomer">
<soap:body use="literal"/>
</wsdl:input>
<wsdl:output name="addCustomerResponse">
<soap:body use="literal"/>
</wsdl:output>
</wsdl:operation>
</wsdl:binding>
<wsdl:service name="CustomerServiceImplService">
<wsdl:port binding="tns:CustomerServiceImplServiceSoapBinding" name="CustomerServiceImplPort">
<soap:address location="http://localhost:8080/CustomerService/services/CustomerServiceImpl"/>
</wsdl:port>
</wsdl:service>
</wsdl:definitions>
V. Web service testing
We can test the code first web service with the generated wsdl file using Soap UI tool
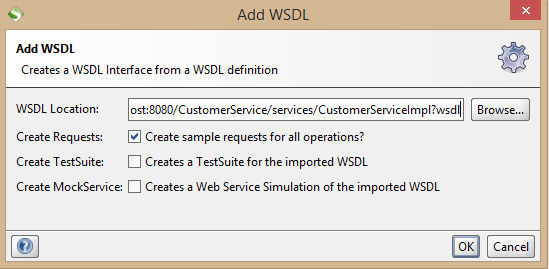
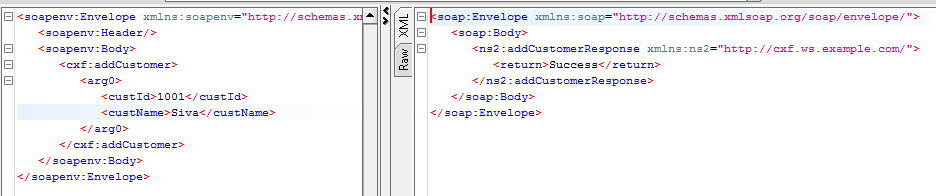
Create a Soap project by adding the wsdl file and the project structure and the soap request message is shown below:
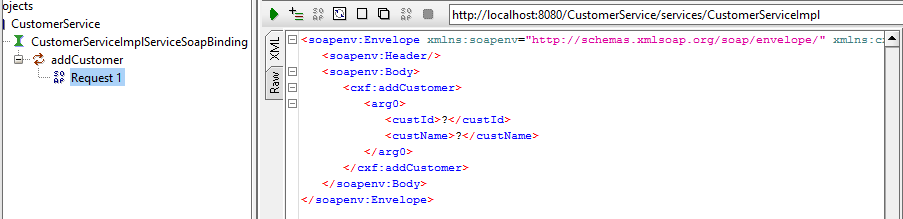
Provide the input data in the SOAP request and run the service by click on the Green arrow
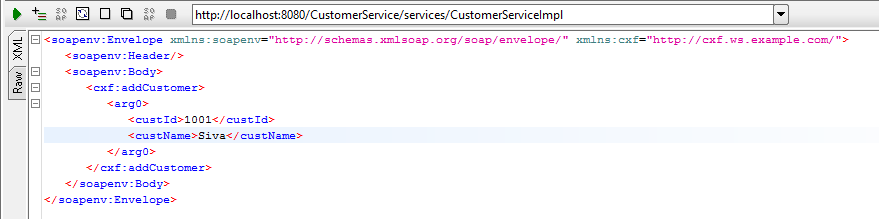
The Request and response details for the correct input data in the SOAP Message as below
The request with the invalid input data and fault response details in the SOAP Message is shown in fig

2.6 WebService Interoperability
JAX WS supports Web Service Interoperability (WS-I) basic profile version 1.1 and JAX WS runtime supports documents\literal and rpc\ literal encodings for services, static ports, dynamic proxies and Dynamic Invocation Interface
2.7 Handling Exceptions
The java exceptions thrown by the Web Services are mapped as Soap Fault, which carries error and status information within Soap message
There are two types of Soap faults as below:
- Modeled
The exception thrown by the business logic
- Unmodeled
Mapped to the Run time Exception
Soap:Fault contains the following sub elements:
- env:Code
gives information related to fault code and contains sub elements value and sub code.This is required element
- env:Value:
This element also required element and the following set of code values are determined by Soap specification
- versionMismatch
- MustUnderstand
- Sender
- Receiver
- DataEncodingUnknown
- env:subcode
Gives more information about fault
- env:Reason
- env:Node
Information regarding the actor
- env:Role:
A ctor’s Role at the time of Fault and this element is optional
- env:Detail:
This is also an optional element which carries application specific information